21
21
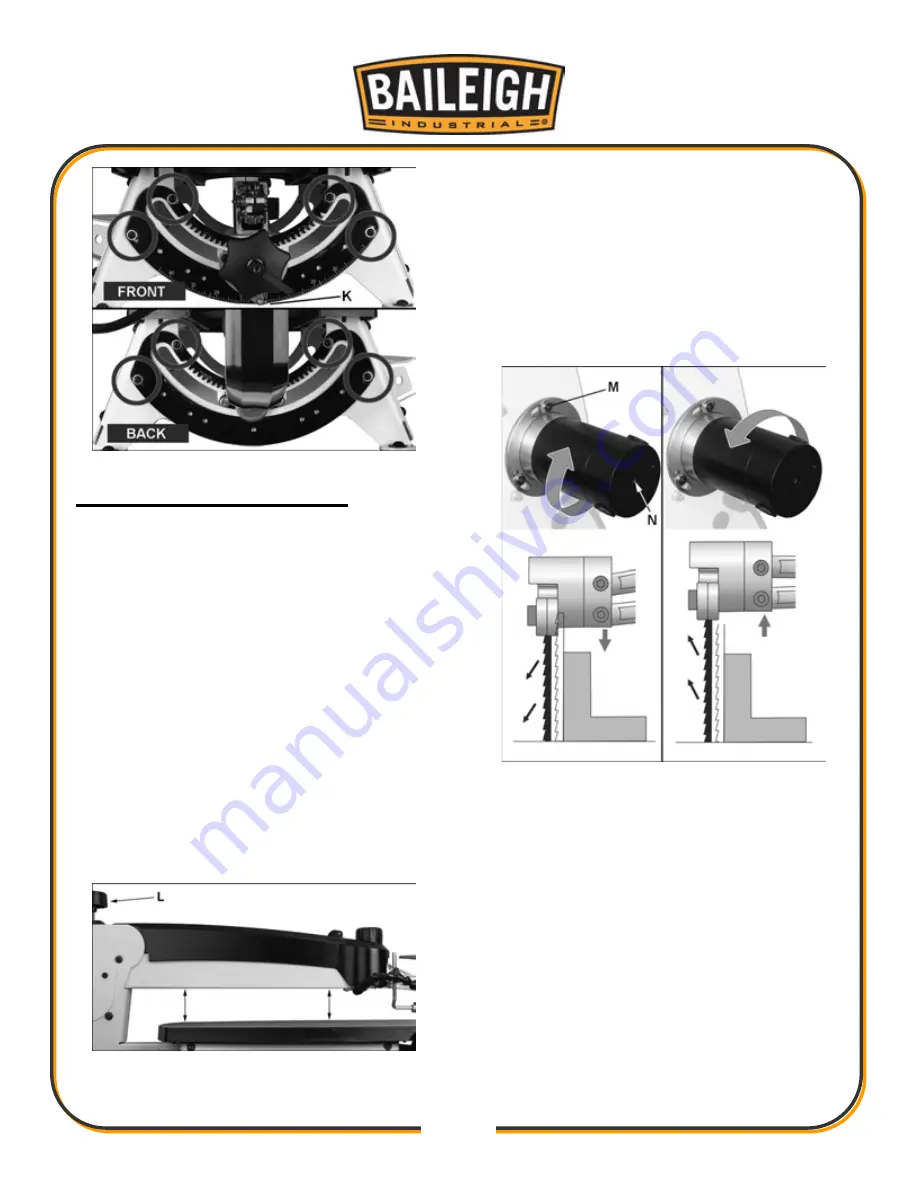
Figure 19: Squaring Blade to Table
Adjusting Blade Oscillation
Refer to Figure 20.
Blade movement can be adjusted to accommodate
different wood stock and types of operations. For
example, for faster, more aggressive cutting the blade
can be adjusted for slight backward movement on the
upstroke, and slight forward movement into the wood
on the downstroke. For slower, fine detail work and
more control, completely vertical blade movement is
often preferred.
This adjustment is based upon user’s preference; as
the scroller gains experience, he/she will get a feel for
the oscillation that is most efficient for the work at
hand.
1. Turn off saw and remove blade.
2. First verify that upper arm is parallel to table
surface (Figure 20). Push arm down, and measure
at front and back of arm; if measurements are
different, rotate arm adjustment knob (L) until
upper arm is parallel.
Figure 20: Arm/Table Parallelism
3. Install blade. Adjustments to blade oscillation can
be subtle; place a square or block of wood on table
and alongside blade as reference.
4. Loosen screws on motor flange (M, Figure 21) with
4mm hex wrench.
Only loosen screws enough to
allow motor rotation.
5. Turn motor shaft (N, Figure 21) with flat-blade
screwdriver
to
observe
blade
motion.
Alternatively, you may turn on saw to slowest
speed to observe blade motion.
Figure 21: Blade Oscillation
6. Slowly rotate entire motor by hand to adjust
oscillation. Clockwise rotation will make blade
movement more aggressive on downstroke.
Counterclockwise will make blade more
aggressive on upstroke. See Figure 21.
TIP: If more rotation is needed,
turn off saw
and
install motor mount screws in second set of holes
behind motor flange.
7. When desired oscillation is achieved, securely
tighten motor mount screws (M).


