26
26
SAW OPERATION
1. Verify the work area including the table is clear of obstructions.
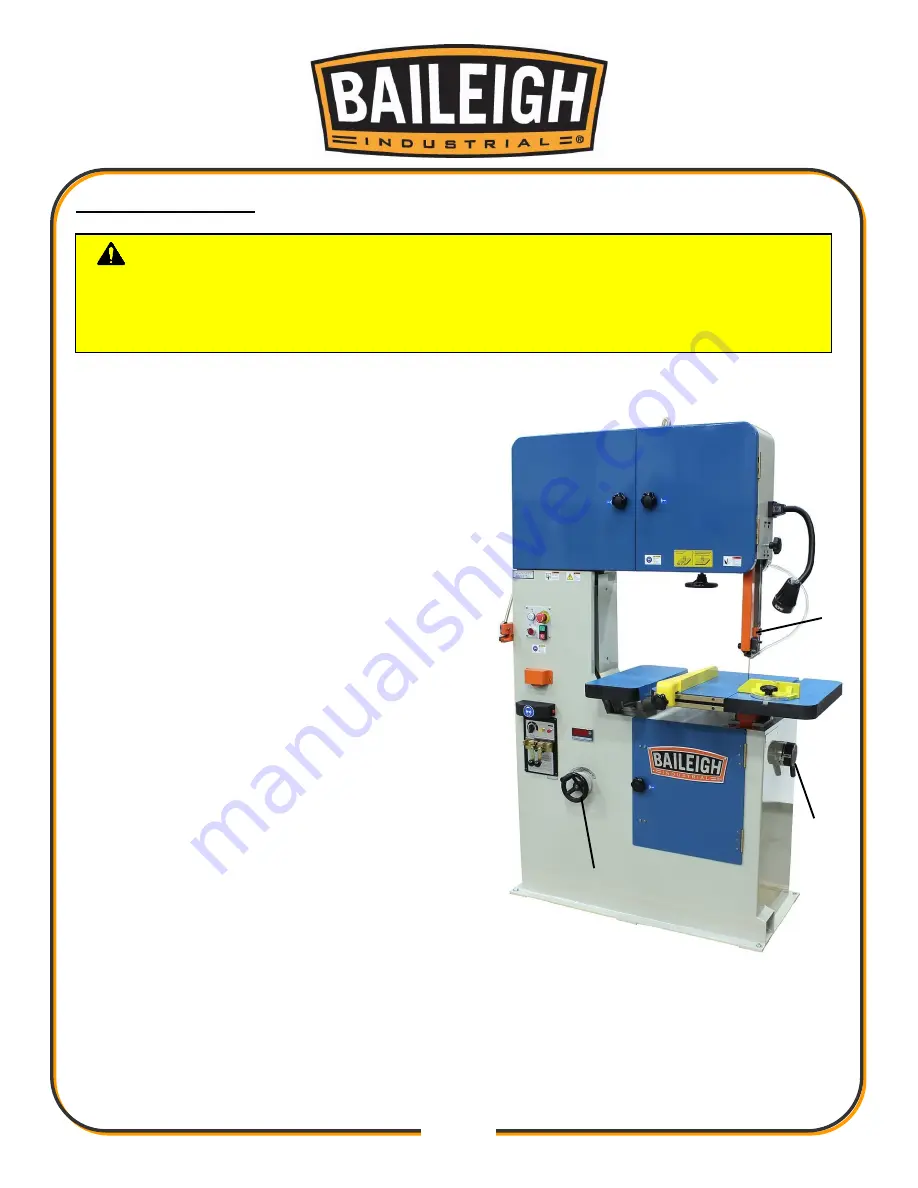
2. Set the guide post (
A
) to approximately .25”
(6.35mm) above the piece part and tighten the
guide post knob.
3. Set the table and/or fence, miter guide as
needed to complete the cut. Have a push block
within reach without crossing the blade path or
vision of the cut area. Simulating the cut
without power may be helpful.
4. Have proper support for the material to be cut.
This should include both the finished piece and
the excess material.
5. Place the transmission in either Lo or Hi range
(
B
).
6. Twist the emergency stop button to reset and
supply power to the machine, the white power
light should be lit.
7. Press the green start button to energize the
motor stating the blade. The saw blade should
now be moving. If any abnormal sounds or
vibrations are noticed, press the red stop
button immediately.
8. Adjust the variable speed (
C
) until the desired
speed is indicated on the speed display.
9. Carefully place the material on the table.
10. When positioned, feed the material into the blade using a steady smooth motion.
11. When the cut is complete, press the red stop button on the control panel and wait until the
blade stops before removing any material near the blade.
12. Press the emergency stop button if the saw will not be used immediately.
CAUTION:
Always wear proper eye protection operating the saw. The
bandsaw blade is sharp and will cut fingers and hands. Keep hands and fingers clear
of the blade. Use a block of wood as a pusher for the material being cut. It is
recommended to always wear leather gloves when working near the blade.
C
B
A
Summary of Contents for BSV-24VS
Page 15: ...12 12 Footprint Dimensions...
Page 16: ...13 13 GETTING TO KNOW YOUR MACHINE F K B J A D G E C O H I M L N P...
Page 27: ...24 24...
Page 46: ...43 43 NOTES...
Page 47: ...44 44 NOTES...


