33
33
SAW ADJUSTMENTS
Adjusting the Blade Guides
1. DISCONNECT POWER FROM THE BAND SAW.
2. Check to make sure the guide post is secure and the blade has been properly tensioned.
3. Using a 5mm
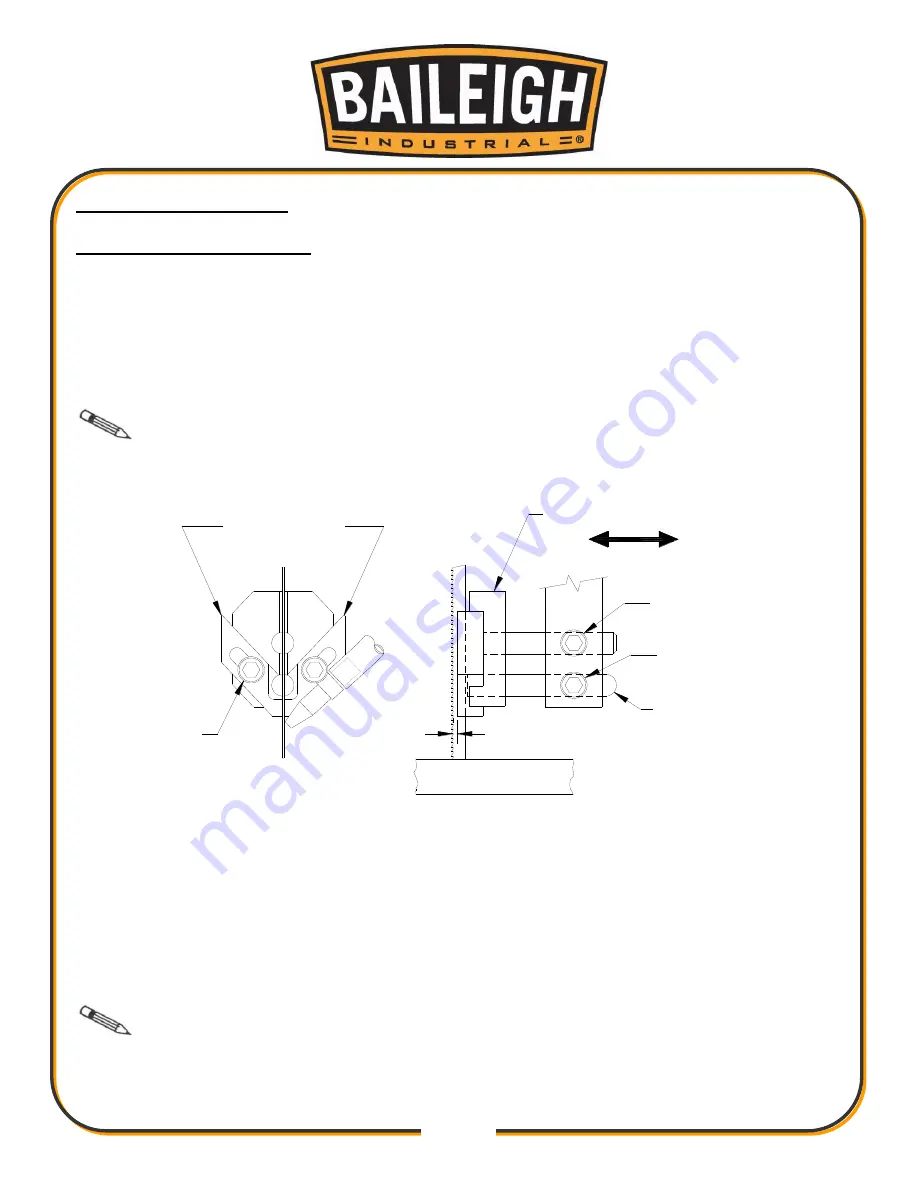
hex wrench you need to loosen the socket cap screws “A” and “B” in (fig. 30).
4. Slide the blade
guide bracket so the blade guides are approximately 0.06” (1.58mm) behind
the tooth gullets as s
hown in (fig. 27). Tighten socket cap screw “A” only.
Note: The blade guides need to be adjusted far enough back so they are behind
the tooth gullets when the blade is pushed back against the blade support.
5. With
socket capscrew “
B
” still loose, slide the blade support rod up to, but not touching the
back end of the blade. Re-
tighten socket capscrew “
B
”.
6. Next the blade needs to be centered between the blade guides. To do this, first loosen the
socket
capscrews “
C
” using a 5mm hex wrench. Now slide a piece of copy machine paper or
a dollar bill between each side of the blade guide and the blade. Either of them should be
0.004” (0.1mm) thick. Gently pinch the paper between the blade guides and the blade. Now
tighten each socket capscrew “
C
”. (Check the position of the air nozzle). The guides should
now be positioned correctly without touching the blade.
Note: Over time the blade inserts will wear. When this happens, flip over and
reverse the guides. If the blade wears a groove into the blade support, loosen and rotate it to a
new spot.
Table
0.06"
[1.58mm]
"A"
"B"
Blade guide bracket
Blade support
Blade guides
"C"
figure 27
Summary of Contents for BSV-24VS
Page 15: ...12 12 Footprint Dimensions...
Page 16: ...13 13 GETTING TO KNOW YOUR MACHINE F K B J A D G E C O H I M L N P...
Page 27: ...24 24...
Page 46: ...43 43 NOTES...
Page 47: ...44 44 NOTES...


