background image


14 

14 

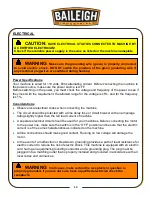
  Improper connection of the equipment-grounding conductor can result in risk of electric 

shock. The conductor with insulation having an outer surface that is green with or without 
yellow stripes is the equipment-grounding conductor. If repair or replacement of the electric 
cord or plug is necessary, do not connect the equipment-grounding conductor to a live 
terminal. 

  Check with a qualified electrician or service personnel if the grounding instructions are not 

completely understood, or if in doubt as to whether the machine is properly grounded. 

  Repair or replace damaged or worn cord immediately. 


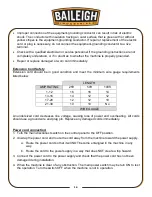
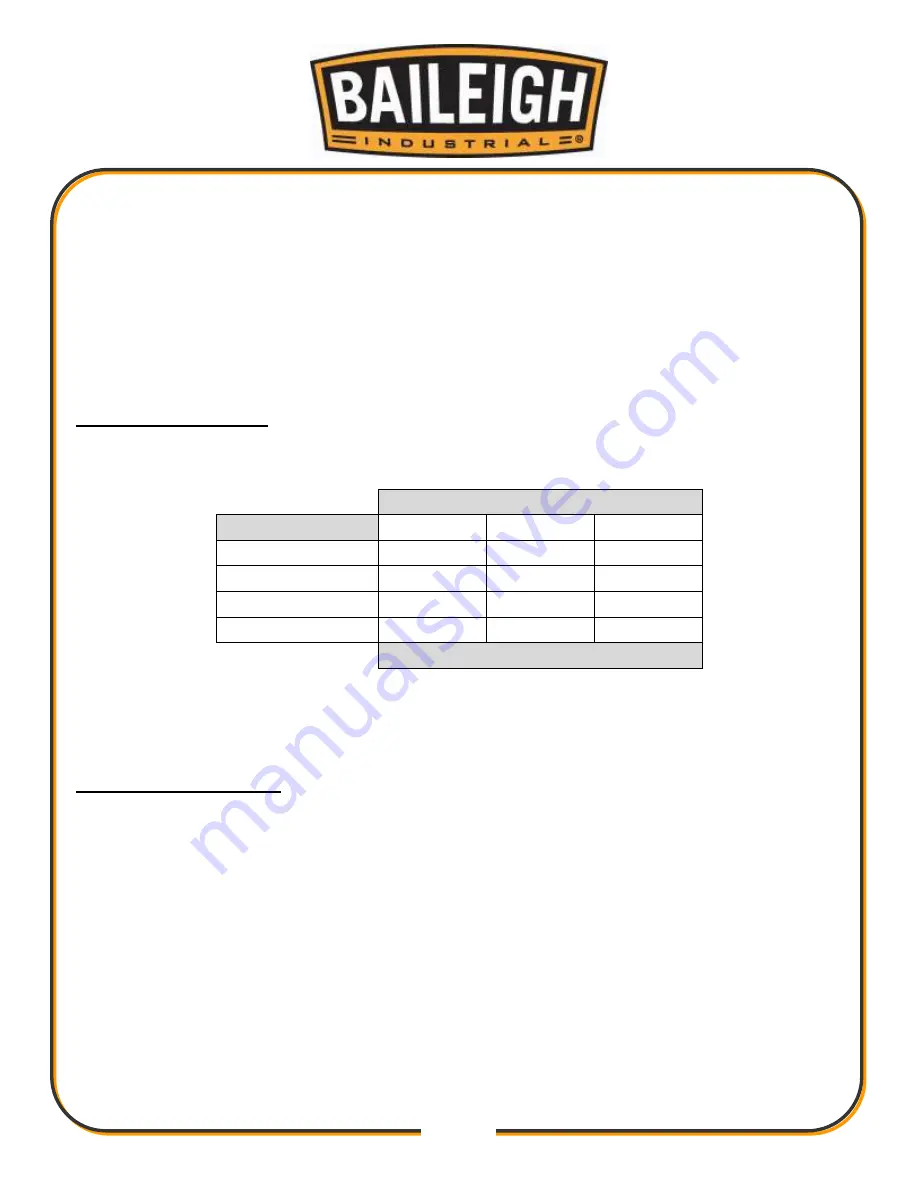
Extension Cord Safety 

Extension  cord  should  be  in  good  condition  and  meet  the  minimum  wire  gauge  requirements 
listed below: 


LENGTH 

AMP RATING 

25ft 

50ft 

100ft 

1-12 

16 

16 

14 

13-16 

14 

12 

12 

17-20 

12 

12 

10 

21-30 

10 

10 

No 


WIRE GAUGE 

 
An  undersized  cord  decreases  line  voltage,  causing  loss  of  power  and  overheating.  All  cords 
should use a ground wire and plug pin. Replace any damaged cords immediately. 


Power cord connection: 

1.  Turn the main disconnect switch on the control panel to the OFF position. 

2.  Unwrap the power cord and route the cord away from the machine toward the power supply. 

a.  Route the power cord so that it will NOT become entangled in the machine in any 

way. 

b.  Route the cord to the power supply in a way that does NOT create a trip hazard. 

3.  Connect the power cord to the power supply and check that the power cord has not been 

damaged during installation. 

4.  When the machine is clear of any obstruction. The main power switch may be turn ON to test 

the operation. Turn the switch OFF when the machine is not in operation. 


Summary of Contents for DBG-62

Page 1: ...RIAL INC IS PROHIBITED Baileigh Industrial Inc does not assume and hereby disclaims any liability for any damage or loss caused by an omission or error in this Operator s Manual resulting from acciden...

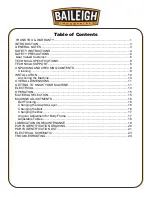
Page 2: ...N 10 Anchoring the Machine 10 OVERALL DIMENSIONS 11 GETTING TO KNOW YOUR MACHINE 11 ELECTRICAL 13 OPERATION 15 MATERIAL SELECTION 15 MACHINE ADJUSTMENTS 16 Belt Tracking 16 Changing the Graphite Layer...

Page 3: ...e to Seller of any suspected defect in the Goods prior to the expiration of the warranty period The original end user must also obtain a RGA from Seller prior to returning any Goods to Seller for warr...

Page 4: ...or further remedies provided under this Agreement or at law or equity Attorney s Fees In the event legal action is necessary to recover monies due from Buyer or to enforce any provision of this Agree...

Page 5: ...Description of the functional parts of the machine Capacity charts Setup and start up instructions Machine operation Scheduled maintenance Parts lists GENERAL NOTES After receiving your equipment remo...

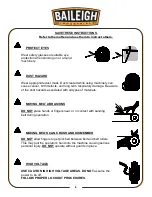
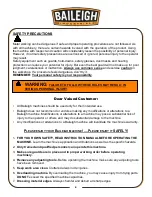
Page 6: ...zardous situation which if not avoided will result in death or serious injury WARNING Indicates a hazardous situation which if not avoided could result in death or serious injury CAUTION Indicates a h...

Page 7: ...Be aware of the dust hazards associated with all types of materials MOVING BELT ABRASIONS DO NOT place hands or fingers near or in contact with sanding belt during operation MOVING BELTS CAN CRUSH AN...

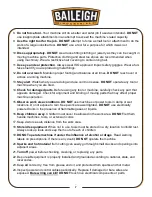
Page 8: ...making any modifications or alterations to a Baileigh machine Modifications or alterations to a machine may pose a substantial risk of injury to the operator or others and may do substantial damage to...

Page 9: ...inding of moving parts that may affect proper machine operation 15 Observe work area conditions DO NOT use machines or power tools in damp or wet locations Do not expose to rain Keep work area well li...

Page 10: ...k for purchased machines Tech Support handles questions on machine setup schematics warranty issues and individual parts needs other than die sets and blades For specific application needs or future m...

Page 11: ...ge painted surfaces Follow manufacturer s label instructions when using any type of cleaning product After cleaning wipe unpainted metal surfaces with a light coating of quality oil or grease for prot...

Page 12: ...to the mounting surface FLOOR This machine distributes a large amount of weight over a small area Make certain that the floor is capable of supporting the weight of the machine work stock and the ope...

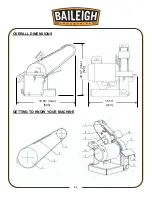
Page 13: ...11 11 OVERALL DIMENSIONS GETTING TO KNOW YOUR MACHINE 19 68 max 500 16 14 410 20 47 max 520...

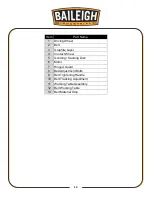
Page 14: ...l 2 Belt 3 Graphite Layer 4 Contact Wheel 5 Grinding Sanding Disc 6 Motor 7 Hinged Guard 8 Bed Adjustment Bolts 9 Belt Tightening Handle 10 Belt Tracking Adjustment 11 Working Table Assembly 12 Belt W...

Page 15: ...indicated on the machine All line connections should make good contact Running on low voltage will damage the motor In the event of a malfunction or breakdown grounding provides a path of least resist...

Page 16: ...sted below LENGTH AMP RATING 25ft 50ft 100ft 1 12 16 16 14 13 16 14 12 12 17 20 12 12 10 21 30 10 10 No WIRE GAUGE An undersized cord decreases line voltage causing loss of power and overheating All c...

Page 17: ...keep these instructions in mind Material must be clean and dry without oil Material should have a smooth surface so it processes easily Dimensional properties of material must be consistent and not e...

Page 18: ...belt to reveal the graphite layer 3 4 Remove the old graphite layer and replace with a new one 5 Replace the belt and rotate the handle 9 counterclockwise ccw to tighten 6 Replace the working table as...

Page 19: ...ent for Body Frame 1 Shut off the machine making sure the driving wheel has completely stopped 2 Remove the working table assembly 11 3 Peel off the sanding grinding disc 4 There are four socket head...

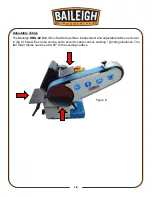
Page 20: ...h DBG 62 Belt Disc Sander has three independent and adjustable tables as shown in fig 8 below Each one can be set to accommodate various sanding grinding situations The two lower tables can be set at...

Page 21: ...te threaded components and sliding devices Apply rust inhibitive lubricant to all non painted surfaces Note Proper maintenance can increase the life expectancy of your machine WARNING Make sure the el...

Page 22: ...20 20 PARTS IDENTIFICATION DRAWING...

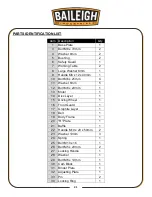
Page 23: ...x 25mm 4 11 Washer 6mm 5 12 Bolt M6 x 20mm 1 13 Motor 1 14 Disc Layer 1 15 Driving Wheel 1 16 Front Guard 1 17 Graphite Layer 1 18 Belt 1 19 Body Frame 1 20 R Plate 1 21 Baffle 1 22 Handle M10 x 20 x...

Page 24: ...22 22 Item Description Qty 35 Bracket 1 36 Bearing 2 37 Washer 10mm 2 38 Shaft 1 39 Spring 1 40 Rear Wheel 1 41 Spring 1 42 Switch 1 43 Bolt M5 x 60mm 2 44 Bolt M8 x 20 2 45 Support 1...

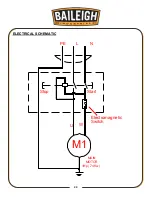
Page 25: ...23 23 ELECTRICAL SCHEMATIC M1 L N PE MAIN MOTOR U W 1Hp 74Kw Stop Start Electromagnetic Switch...

Page 26: ...ing or damage Replace worn or damaged bearings CONTACT WHEEL WEAR 1 Grinding in one area on belt 2 Excessive grinding deposits on belt and debris in machine Use entire work surface of belt whenever po...

Page 27: ...25 25...

Page 28: ...TOWOC WI 54220 PHONE 920 684 4990 FAX 920 684 3944 www baileigh com BAILEIGH INDUSTRIAL LTD UNIT D SWIFT POINT SWIFT VALLEY INDUSTRIAL ESTATE RUGBY WEST MIDLANDS CV21 1QH UNITED KINGDOM PHONE 44 0 24...

Reviews: