21
21
DIGITAL READOUT
A.
On/Off/Zero: Press button to turn on display.
Hold button in for a few seconds to turn off display.
When the display is on you can press button to
zero out.
B.
Hold: Press hold button to lock in a reading
before the table is moved. Press the hold button
again to show current reading.
C.
Tolerance: Press tolerance button once to
display beginning tolerance. Press and hold button
to toggle through display. When you reach the
position you want to change release tolerance
button and press again to make changes. Once
desired setting is made toggle to "set", displayed in
the upper right hand corner, and press tolerance
button to accept changes. Press tolerance button
again to display ending tolerance and set up as done previously. Press a third time to exit
tolerance set-up.
D.
ABS: Press this button to toggle between absolute value and incremental value. When in
the incremental mode "inc" will be displayed in the upper left hand corner. incremental: When
working in the incremental mode you can zero out at any time. When you get close to your
finished thickness zero out the display and measure workpiece thickness. Use the display to
remove exact amounts from the workpiece. Absolute: When working in the absolute mode your
zero will be 0.125" to compensate for table stops. This means you will need to raise the table
completely and zero out the scale (0.125") every time after the display has been turned off or
zeroed in the absolute setting, see "Set" section below.
E.
Set: Press this button to display the "zero" setting for absolute. Raise table completely.
Press and hold in set button. Make changes to zero setting by holding the button in to toggle
through display. Release set button and press again to make changes. Set the zero to 0.125".
Once the setting is made toggle to "set", displayed in the upper right hand corner, and press the
set button to accept changes. Note: This will give you an approximate reading depending on
table rollers, blade setting, etc..
F.
mm/in: Press this button to toggle between metric and inches.
G.
Battery Cover: Slide the cover off to replace the battery.
Summary of Contents for IP-2008-HD
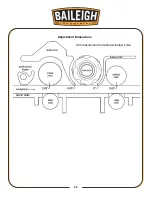
Page 28: ...25 25 All measurements are shown below knife Adjustment Dimensions...
Page 42: ...39 39 6 Loosen Nut on motor bracket 7 Remove belt 8 Remove cutterhead pulley...
Page 46: ...43 43...
Page 50: ...47 47 PARTS DIAGRAM...
Page 51: ...48 48...
Page 52: ...49 49...
Page 53: ...50 50...
Page 54: ...51 51...


