6
5
11
OPERATION INSTRUCTIONS
Operation steps
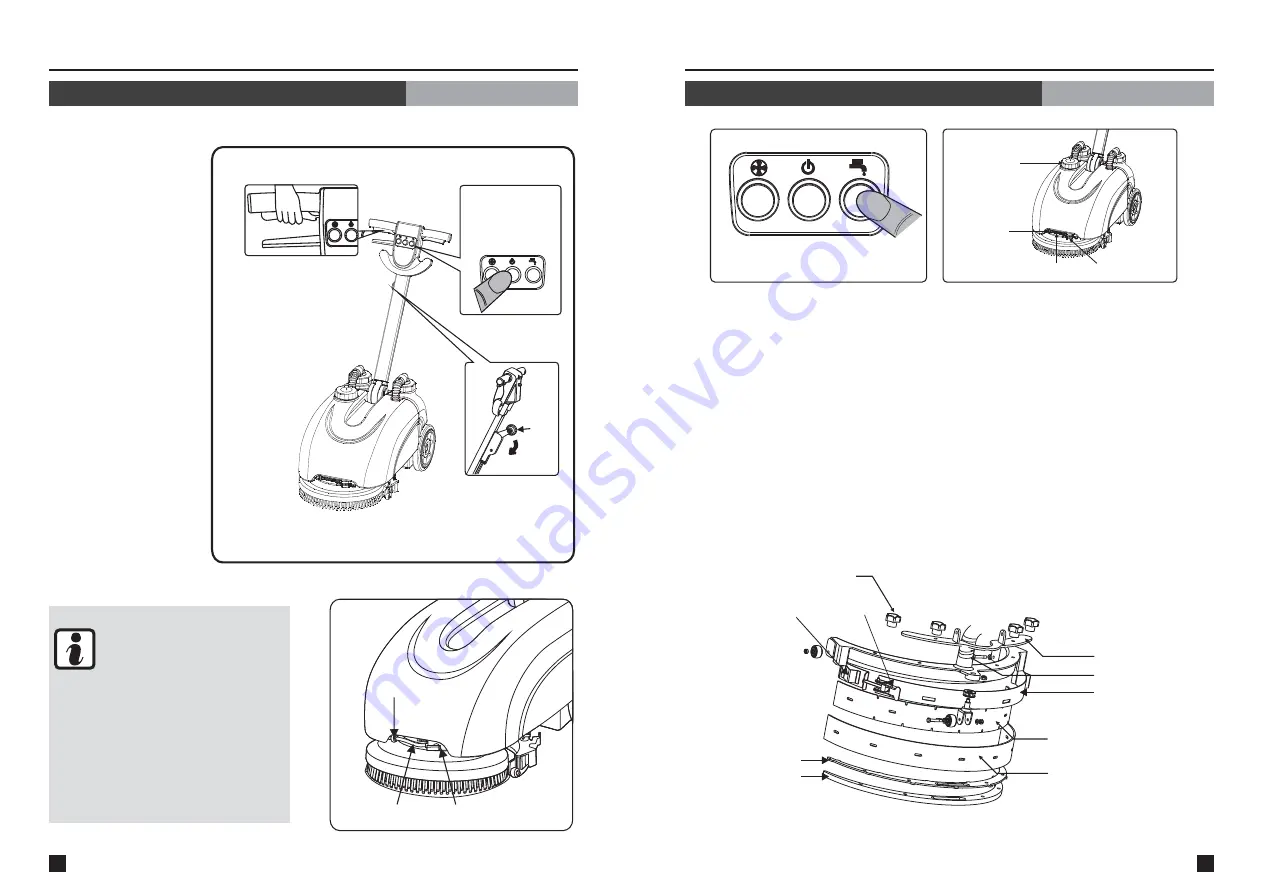
After the preparation work, operator can use the machine to begin the cleaning work.
c. Hold on the brush
motor switch
a. Press the function
buttons
b. Put the squeegee
lever down
squeegee
lever
1 Check whether the sprinkling
button and the vacuum button
are turn off. Then switch on the
ON/OFF switch on the control
panel(fig.5-a), the machine will
in manual state.
.
2.Press the sprinkling button
on the control panel(fig.5-a),
the solenoid valve begins to
work, the machine starts
sprinkling water.
3.Put down the squeegee lever
to ensure that the squeegee
is totally touched with the floor
to work.
4.Hold on the brush motor
switches on both sides
(fig.5-c), the brush can
clean the floor.
5.After cleaning the work,
lift up the squeegee lever
and release the brush
motor switches. Then,
press the sprinkling button,
vacuum button, ON/OFF
switch to stop all cleaning
work.
Note
During the cleaning work, change the
water flow according to the condition
of the floor. The ball valve above the
brush cover can be used to adjust the
water flow. After the cleaning work,
pull the water pipe from quick connector
can discharge water in the solution tank
(fig.6).
Quick connector
Water pipe Ball valve
fig.6
MAINTENANCE GUIDE
Daily maintenance
Turn off the ON/OFF switch
fig.11
Solution
tank lid
Quick
connector
Water pipe Ball valve
fig.12
3.Maintain the squeegee
Remove, clean and air-dry the squeegee regularly to prolong the service life. The whole
squeegee assembly can be removed, to be cleaned and air-dry.
The procedure to remove the squeegee:
Star nuts
Triangle
clasp
Squeegee
clasp
Squeegee holder
Suction hose
Front squeegee
Rear squeegee
Upper inner pad
Lower inner pad
Retaining metal
strip assembly
①
②
③
④
Release the squeegee clasp to loosen the retaining metal strip assembly. Then pull the
two triangle clasps downwards to take out the retaining metal strip assembly.
After taking out the retaining metal strip assembly, the rear squeegee can be
removed.
Loosen the upper and lower inner pads and then the front and rear squeegee
can be removed. Check to confirm the wearing condition of the squeegee and
turn to an untouched side for use. Each squeegee has 4 sides for switching use.
Turn the two star nuts anticlockwise to remove the squeegee assembly.
Sprinkling
switch
ON/OFF
switch
V
acuum
switch
Guangdong
Baiyun
Cleaning
Group
Co.,Ltd.


