BAK Thermoplastic Welding Technology AG
4
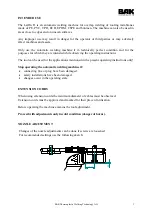
GUIDE ROLLER ADJUSTMENT
Bring the automatic welding machine into the welding position.
Push the transport roller to the right in welding position, take care that the spring sheet
engages.
Push the guide roller downward and fix it with the hexagon nut on the threaded bar.
Outside edge of the overlap, outside edge of pressure roll and outside edge of guide roller
must form a line. Please refer to the sketch below:
START UP OF THE WELDING MACHINE
If it is not possible to start the motor, a reset is needed.
o
Reset: Turn off main switch – wait for 3 seconds – Turn on main switch
Before connecting the tool to the mains supply please check that:
-
Main switch is on pos. 0 OFF.
-
Drive switch is on pos. 0.
-
Heating switch is on pos. 0.
-
Potentiometer of the air flow is on pos. 0 (100%).
-
The hot air blower is on pos. stand by (lifted up).
-
Put the plug into the socket.
-
Put the main switch on pos. 01.
The tool now heats up to the last selected set temperature.
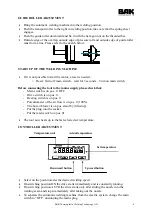
CONTROLLER ADJUSTMENT
Select on the potentiometer the desired welding speed.
On switching position ON the drive starts immediately and is constantly running.
On switching position AUTO the drive starts only after sliding the nozzle into the
welding seam and stops immediately after taking out the nozzle.
To separate the automatic welding machine from the electric system, change the main
switch to “OFF” und unplug the mains plug.
Actual temperature
Upward button
Downward button
Temperature
unit
Set temperature
Summary of Contents for LarOn H
Page 1: ...BAK Thermoplastic Welding Technology AG 1 OPERATING MANUAL...
Page 7: ...BAK Thermoplastic Welding Technology AG 7...
Page 8: ...BAK Thermoplastic Welding Technology AG 8...
Page 9: ...BAK Thermoplastic Welding Technology AG 9...
Page 12: ...BAK Thermoplastic Welding Technology AG 12 ERON LARON H BL 230V 400V...

