background image

en

19

Interrupting the programme

Set main switch 

1

 to OFF.

Indicator lights extinguish. The
programme is retained in the
dishwasher memory.

If the hot water was switched ON or the
appliance has already heated up and then
the appliance door opened, leave the door
ajar for several minutes and then close.
Otherwise, the appliance door may fly
open due to expansion.

In order to continue with the stored
programme, set the main switch to ON
again.

Terminating the programme
(Reset)

Only when the main switch is on:
Rotate programme selector to the
Reset position. The digital display
indicates 

 after approx. 3 sec.

The programme sequence lasts
approx. 1 min.
When the programme has run,
switch off the main switch 

1

.

To restart, rotate the programme selector

3

 to the required programme. Switch on

the main switch 

1

. The programme

sequence starts automatically.

Changing the programme

It is possible to change the programme
within 2 minutes after you have switched
the dishwasher on.
Should it be necessary to change the
programme after this period, the
programme cycle that has already been
begun (e.g. washing) will be completed
first of all.
The new remaining time displayed is the
sum of the remaining time from the
preceding programme cycle and the
remaining time attributable to the new
programme that has been selected.

Intensive drying

By activating the “Intensive drying”
function, the final rinse will produce
a higher temperature in all programmes
resulting in an improved drying result
(please note that higher temperatures
might have an effect on delicate items).

Close the door.
Hold down button   and
switch on main switch 

1

.

Release both buttons.
The digital display 

8

 indicates 

(on) or 

 (off) and button   flashes.

To change the setting, press
button  .
Switch off the main switch 

1

; the

chosen setting has now been stored.

Summary of Contents for 3VI552XD

Page 1: ...EN Instructions for use Dishwasher ...

Page 2: ... ...

Page 3: ...dding rinse aid 9 Not suitable for the dishwasher 10 Arranging crockery glasses etc in the dishwasher 11 Detergents 14 auto 3in1 15 Programme overview 17 Washing dishes 18 Additional functions 20 Maintenance and care 21 Fault finding 23 Customer Service 26 Information 26 Installation 27 Waste disposal 28 ...

Page 4: ...that the unit is attached properly and also at the rear Built under and built in appliances should always be installed under a continuous work surface which is attached to the adjacent cupboards in order to ensure that the appliance is entirely stable After the appliance has been installed the mains plug should still be easily accessible Not on all models The plastic housing on the water input con...

Page 5: ... the drawings in the back of the envelope 40 Switch on the child proof lock 41 Open the door with child proof lock switched on 42 Switch off the child proof lock When the door is open the child proof lock offers no protection If a fault occurs Repairs or other work on the dishwasher should only be carried out by a qualified specialist The dishwasher must be disconnected from the electricity supply...

Page 6: ... indicator 8 Digital display some models Appliance interior 20 Upper basket with additional cup rack 21 Additional cutlery basket for the top basket 22 Top spray arm 23 Bottom spray arm 24 Dispenser for salt 25 Filters 26 Cutlery basket 27 Bottom basket 28 Lock for detergent dispenser 29 Dispenser for rinse aid 30 Detergent dispenser 31 Rating plate some models You will need to purchase the follow...

Page 7: ... agent can help you with this Identify setting from the following water hardness table Water hardness table Close the door Rotate the programme selector 3 from the 12 o clock position by one notch to the left Switch on main switch 1 and hold down for at least 3 sec The digital display 8 indicates the current set hardness value and the salt refill indicator 6 flashes hardness value has been set to ...

Page 8: ... salt residues and screw the compartment lid back on without tilting the lid The LOW SALT indicator 6 on the front panel will light up initially but will extinguish again after a short period when the salt solution has become sufficiently concentrated If the set hardness value is do not add salt because no salt is used during operation the salt refill indicator is switched off Do not pour detergen...

Page 9: ...aid which has run over with a cloth Adjusting the amount of rinse aid The amount of rinse aid added to the water can be varied by adjusting the stepless control The rinse aid control has been set to 4 in the factory Do not alter the setting of the rinse aid control unless streaks turn knob towards or water marks turn knob towards are left on the dishes 29 Rinse aid controller Rinse aid refill indi...

Page 10: ...nd fade during the wash cycle Even some types of glass e g crystal glass objects may turn cloudy after many wash cycles Recommendation In future buy utensils which are identified as dishwasher proof Damage to glassware and other dishes Possible causes type of glass or manufacturing process chemical composition of detergent water temperature and duration of dishwasher programme Suggested remedy Use...

Page 11: ...the dishwasher as they could easily fall out of the baskets Removing the dishes To prevent water dripping from the top basket onto the dishes in the lower basket we recommend that you empty the lower basket first and then the top basket Cups and glasses Upper basket 20 not included with all models Pots and pans Lower basket 27 Cutlery Cutlery should be placed in the dishwasher always unsorted and ...

Page 12: ...accessories e g cups lids etc can be held securely in the small accessories holder Adjusting position of basket not on all models 86cm 81cm Ø max 30 25cm Ø max 20 25cm Ø max 34 29cm Ø max 20 25cm If required the height of the top basket can be adjusted in order to create more space for large utensils either in the top or bottom basket Select one of the two following procedures according to the des...

Page 13: ...re insert the basket ensure that it is at the same height on both sides Otherwise the appliance door cannot be closed and the upper spray arm will not connect to the water circuit Baking sheet spray head some models You can clean large baking sheets or grilles with the baking sheet spray head To do this remove the top basket and insert the spray head as illustrated in the diagram To ensure that th...

Page 14: ...gent or using a detergent that contains chlorine Check the label on the detergent packaging to determine whether a particular product is suitable for use with silverware If you have any further questions we recommend that you contact the customer advice departments of the various detergent manufacturers Detergent compartment with measuring marks The side of the detergent compartment is marked with...

Page 15: ...ssary There are currently several types of combined detergent products available 3in1 They contain detergent rinse aid and salt function 2in1 They contain detergent and rinse aid or salt function Always check the type of detergent or combined product which you are using Always follow the operating instructions or the information on the packaging The rinse programme is automatically adjusted in ord...

Page 16: ...e button A flashes By pressing button A you can switch the rinse aid indicator off or on Switch off the main switch 1 The setting is saved Remember to switch on the rinse aid refill indicator again if you use a detergent without an integrated rinse aid Switching the salt refill indicator water softening system off and on Close the door Rotate the programme selector 3 from the 12 o clock position b...

Page 17: ...e aid 70 Drying Drying Drying Main rinse Main rinse Rinse aid 55 Wash 45 Rinse aid 65 Wash 50 Rinse off if the dishes have been stacked for several days in the dishwasher prior to washing Pre rinse Mixed Delicate Mixed Gentle 40 Pre rinse Wash 40 Main rinse Rinse aid 55 Drying a little loosely attached Third rinse Pre rinse 50 Wash 70 First rinse Second rinse medium The programme sequence is optim...

Page 18: ...he temperature adjusted If the turbidity is greater the water is drained and is replaced with fresh water In this way the water consumption is reduced by approx 4 litres for utensils which are less dirty Switching on the appliance Close the door Turn on the tap fully Rotate programme selector 3 to the required programme Switch on the main switch 1 The expected programme duration is indicated on th...

Page 19: ...he programme sequence starts automatically Changing the programme It is possible to change the programme within 2 minutes after you have switched the dishwasher on Should it be necessary to change the programme after this period the programme cycle that has already been begun e g washing will be completed first of all The new remaining time displayed is the sum of the remaining time from the prece...

Page 20: ...ing the drying phase and the washing time The washing and drying performance will be reduced with the Time reduction time saving programme option h Time delay You can delay the start of the programme in 1 hour steps up to 19 hours Switch on the appliance Press the timer programming button until the digital display 8 jumps to Keep pressing the timer programming button until the required time is dis...

Page 21: ...age Regularly wipe the front of the appliance and panel with a damp cloth water and a little washing up liquid will suffice Do not use sponges with a rough surface or abrasive detergents as these could scratch the surfaces Attention Never use other chlorinated household detergents Health hazard Special dishwasher salt Check the LOW SALT indicator 6 Top up with salt if required Rinse aid As soon as...

Page 22: ...e spray arms 22 and 23 and the arm mountings Inspect the nozzles in the spray arms for blocked holes due to remnants of food If necessary pull the lower arm 23 upwards and lift it off Unscrew the upper spray arm 22 Clean both spray arms under running water 0 1 2 3 Refit the spray arms Ensure that the lower arm has locked into place and the upper one is screwed tight ...

Page 23: ... Re insert the filters and screw down Torx T20 2 1 Fault finding Resolving minor problems yourself Experience has shown that you can resolve most problems that arise during normal daily usage yourself without having to call out a service engineer Not only does this save costs but it also means that the appliance is available for use again that much sooner The following list of common occurrences a...

Page 24: ...nside dispenser Compartment was damp when it was filled up with detergent Compartment must be dry before detergent is added Indicator lamps do not extinguish after washing has finished Main switch is still set to ON Refill display does not light up Rinse aid refill indicator switched off see auto 3in1 chapter Salt refill indicator switched off see auto 3in1 chapter Water remains inside appliance a...

Page 25: ...rance Not enough detergent was added to input compartment Amount of rinse aid was set too low Although water is quite hard no salt has been put in appliance Water softener was set too low Lid on salt container is not screwed tight If you used a phosphate free detergent try a detergent containing phosphates and compare results Dishes cutlery etc have not been dried Selected programme did not includ...

Page 26: ...ill find details of the conditions for the comparison tests on the additional Notes on comparison tests sheet The consumption values for the relevant programmes are given in the introduction General Built under and integrated appliances which are subsequently installed as free standing appliances must be secured to prevent them from falling over e g by screwing them to the wall or by installing th...

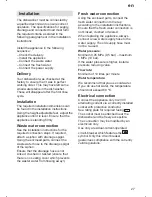
Page 27: ...e spigot of the siphon Ensure that the drainage hose is not kinked crushed or twisted ensure that there is no sealing cover which prevents the waster water from flowing away Fresh water connection Using the enclosed parts connect the fresh water connection to the tap according to the installation instructions Ensure that the fresh water connection is not kinked crushed or twisted When replacing th...

Page 28: ...h off the appliance Turn off the tap Protection from freezing temperatures If the appliance is installed in a location where there is a risk of freezing temperatures e g in a holiday home all water must be completely drained out of the interior see Transporting the dishwasher Turn OFF the tap disconnect the supply hose and allow to drain Waste disposal Disposal Old appliances are not worthless rub...

Page 29: ...lypropylene PP Disposal of redundant appliances Make redundant appliances unusable to prevent subsequent accidents Dispose of the appliance in an environmentally friendly manner Warning Children could become locked in the appliance risk of suffocation or find themselves in other dangerous situations Therefore Pull out the mains plug sever and dispose of the power cord Destroy the door lock so that...

Page 30: ...en 30 en Subjekt to modification ...

Page 31: ...en 31 ...

Page 32: ...ppliance in accordance with our instructions This also includes correct installation of the Aqua Stop extension original accessory Our warranty does not cover defective supply lines or fittings up to the Aqua Stop connection on the tap 4 In principle it is not necessary to monitor an appliance fitted with Aqua Stop during operation or to secure it afterwards by turning off the tap You should only ...

Reviews: