background image

Template  56377  10-05-12

59340-91_59342-01_59310_59371_97_C   10-17-19

11

Manufactured under one or more of these patents.  U.S. Patents: 5332944, 5361215, 5550753, 5559720, 5,883,459, 6253227, 6282370, 6590188, 6976052, 6965815, 7030343, 7,417,834 b2, 

Canadian Patent: 2342614, Australian patent: 2373248 other patents both foreign and domestic applied for and pending.                                            © Copyright 2009 Balboa Water Group.

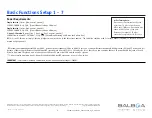
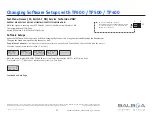
Test Menu Access (S1, Switch 1 ON) Service Technician ONLY.

DANGER! HIGH VOLTAGE WILL BE ACCESSIBLE! SERVICE TECHNICIAN ONLY!

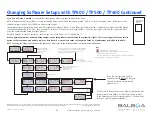
While the system is running, move DIP Switch 1 (on S1 on the Main circuit board) to ON.  
The system will enter Test Mode.  
Moving DIP Switch 1 to OFF will exit Test Mode.

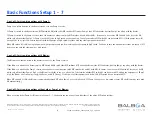
Software Setups 

Under the TEST Menu, the Setup screen will allow changing the Setup from 1 to any number established by the Manufacturer. 
Changing the Setup may require wiring changes as well. 

You will have 1 minute 

to complete the setup change after you manually exit Priming Mode. (Once familiar with the process, 

the Setup change should take less than 15 seconds.)

ON

1

6

S1

As soon as Switch #1 is placed 

in the ON position, the temperature will show

“T” after it instead of F or C, indicating the 

System is in Test Mode

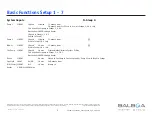
When the panel displays RUN PMPS PURG AIR, press any Temperature button ONCE to exit Priming Mode.   
You should see “---T” where the T indicates the system is in Test Mode.

Continued on Next Page.

READY

RANGE

READY

RANGE

or

Changing Software Setups with TP600 / TP500 / TP400

Summary of Contents for 59310

Page 1: ... ID M100_235 V52 0 Software Version 52 0 File Name BP200_52 0_BP200UX hex Configuration Signature AE7D76E4 Eng Project Number 5270 Control Panels See later pages for more information spaTouch 2 Any version version 2 0 or later required for bba 2 fully integrated functionality Icon spaTouch Any version version 3 36 or later required for bba 2 fully integrated functionality Menued spaTouch Any versi...

Page 2: ... with an optional user insstalled expander board the expander board mounting hardware is pre installed 59340 01 59342 01 5270 09 05 19 BWG Update software for full TP500 compatibility 59310 5270 09 05 19 BWG Added PN for version with remote heater support Remote heater is sold separately 10 10 19 BWG Add line 3 info to 2 3x16A conversion instructions box 59371 10 17 19 BWG Added new 825 Incoloy sy...

Page 3: ...ne of the three lines unused The third line could be used for a slave heater if desired or left for a use not related to the spa at all BP systems automatically detect 50Hz vs 60Hz However power frequency 50Hz vs 60Hz is just one of many differences between North American UL and CE power and it is because of these other differences that different BP systems must be used for UL vs CE territories Al...

Page 4: ...ump at high speed prevents you from turning the other pump to high speed You have to turn the first pump to either low speed or OFF before you can turn the other pump to high speed 2 out of 3 Service wiring options with Blower The Blower can either be wired to the Heater service or to the Pump 1 service If the Blower is wired to the Heater service DIP Switch A8 ON with other DIP swtiches OFF makes...

Page 5: ... P1 Low in non circ Setupa 2 4 6 only This is the heater pump in Setups 2 4 6 Must deliver 20 GPM through heater 1 Speed in Setups 1 3 5 Unused in Setup 7 Pump 2 230VAC 1 Speed 12A max 15 minute timer H Used in Setups 1 2 only Blower 230VAC 1 Speed 4A max 15 minute timer H Used in Setups 3 4 only Circ Pump 230VAC 1 Speed 2A max Programmable Filtration Cycles Polling This is the heater pump in Setu...

Page 6: ... AREA 3 CONNECT TO J5 F5 10A 250V 1 FILTERS POLLING 1 SPEED 1 SPEED NONE X P2151 PN 59233 C 2 NONE 2 SPEED 1 SPEED NONE X P2151 PN 59233 C 3 FILTERS POLLING 1 SPEED NONE 1 SPEED X B PN 59231 C 4 NONE 2 SPEED NONE 1 SPEED X B PN 59231 C 5 FILTERS POLLING 1 SPEED NONE NONE NONE C 6 NONE 2 SPEED NONE NONE NONE C 7 FILTERS POLLING NONE NONE NONE NONE C SETUP CIRC PUMP PUMP 1 PUMP 2 BLOWER USER INSTALL...

Page 7: ...LING 1 SPEED 1 SPEED NONE X P2151 PN 59233 C 2 NONE 2 SPEED 1 SPEED NONE X P2151 PN 59233 C 3 FILTERS POLLING 1 SPEED NONE 1 SPEED X B PN 59231 C 4 NONE 2 SPEED NONE 1 SPEED X B PN 59231 C 5 FILTERS POLLING 1 SPEED NONE NONE NONE C 6 NONE 2 SPEED NONE NONE NONE C 7 FILTERS POLLING NONE NONE NONE NONE C SETUP CIRC PUMP PUMP 1 PUMP 2 BLOWER USER INSTALLED EXPANDER TEMP SCALE INSTEAD OF SETUP 5 THIS ...

Page 8: ...A2 A5 ON OFF 230V 1þ 1x16A As shown on additional wiring diagram sections 1 2 J4 J8 J18 J51 J1 J27 J10 3 J20 J10 J12 J88 J52 230V 2 3þ 2 3x16A A2 A3 ON OFF A5 A8 A2 A3 ON OFF A5 A8 FOR PUMP2 OR BLOWER ON HTR SERVICE BRN 1 J3 WIRE FROM EXPANDER BOARD MUST BE WIRED TO AREA 2 FOR PUMP2 OR BLOWER ON PUMP1 SERVICE BRN 2 J3 WIRE FROM EXPANDER BOARD MUST BE WIRED TO J55 BRN LINE 3 LINE 3 CAP INSULATE END...

Page 9: ...To Change Software Setups While in Test Mode press the indicated icons to move from screen to screen ON 1 10 S1 Changing Software Setups with spaTouch Icon Driven Panels Once on the Setup Selection screen press the Up or Down icon to select the desired Setup Number then press the Check Mark icon to confirm and to have the spa restart After the system restarts you may see a message that The setting...

Page 10: ...tem is running move DIP Switch 1 on S1 on the Main circuit board to ON The system will enter Test Mode Moving DIP Switch 1 to OFF will exit Test Mode Software Setups Under the TEST Menu the Setup screen will allow changing the Setup from 1 to any number established by the Manufacturer Changing the Setup may require wiring changes as well Changing Software Setups with TP800 TP900 spaTouch Menued Pa...

Page 11: ...Moving DIP Switch 1 to OFF will exit Test Mode Software Setups Under the TEST Menu the Setup screen will allow changing the Setup from 1 to any number established by the Manufacturer Changing the Setup may require wiring changes as well You will have 1 minute to complete the setup change after you manually exit Priming Mode Once familiar with the process the Setup change should take less than 15 s...

Page 12: ...lace a circuit board or system and needs to change the Setup on a replacement part while in the field NOTE Changing the Setup may require wiring changes as well refer to the wiring diagram or wiring diagram addendum THIS SYSTEM IS CONFIGURED AS SETUP Indicates Flashing or Changing Segment Key A temperature button used for Action Light or dedicated Choose button depending on control panel configura...

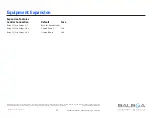
Page 13: ...0188 6976052 6965815 7030343 7 417 834 b2 Canadian Patent 2342614 Australian patent 2373248 other patents both foreign and domestic applied for and pending Copyright 2009 Balboa Water Group Expansion Features Control Connection Default Fuse Relay 1 J5 in Setups 5 7 None As Manufactured Relay 1 J5 in Setups 1 2 1 Speed Pump 2 15A Relay 1 J5 in Setups 3 4 1 Speed Blower 10A Equipment Expansion ...

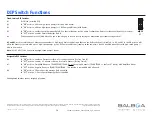
Page 14: ...determined by software configuration A2 and A3 work in combination to determine the number of high speed devices and blowers that can run before the heat is disabled i e A2 and A3 in the ON position will allow the heater to operate with up to 3 high speed pumps or two HS Pumps and Blower running at the same time Heat is disabled when the fourth high speed pump or blower is turned on Note A2 A3 all...

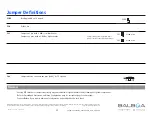
Page 15: ...E models J30 Do Not Use J31 Jumper on 1 pin with 2 0kW or smaller heater Jumper on 2 pins with a 3 0kW or higher heater J44 Jumper must be on center two pins 240V for CE Systems Warning Setting DIP switches or jumpers incorrectly may cause abnormal system behavior and or damage to system components Refer to Switchbank illustration on Wiring Configuration page for correct settings for this system C...

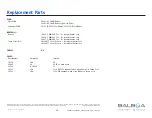
Page 16: ...59341 01 3 0kW Models 59343 01 2 0kW Models Remote Model Expander PCBA 59233 X P2151 for Pump2 59231 X B for Blower HEATER s Heater 58419 3 0kW 800 Inc for integral heater only 58450 3 0kW 825 Inc for integral heater only 58427 2 0kW 800 Inc for integral heater only Temp Sensor Kit 30344KIT 12 inch sensor for integral heater only 30382KIT 24 inch sensor for integral heater only CABLES N A FUSES Pa...

Page 17: ...only General Pump Timer 15 Minutes Blower Timer 15 Minutes Mister Timer 15 Minutes Light Timer 240 Minutes Circ when enabled Programmable Polling Circ Pump can be set with the following functions 24 hr 24 hr w 3 shutoff Acts like P1 Low filters polls etc Requires a single speed P1 Cleanup Cycle 30 Minutes Between 30 and 240 minutes 30 Minutes or OFF Cleanup as Preference setting Yes Yes No N A Ozo...

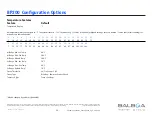
Page 18: ...uired for default settings choose a desired C value that after rounding cor responds to a Fahrenheit value C 4 5 6 7 8 9 10 11 12 13 14 15 16 17 18 19 20 21 22 F 39 41 43 45 46 48 50 52 54 55 57 59 61 63 64 66 68 70 72 C 23 24 25 26 27 28 29 30 31 32 33 34 35 36 37 38 39 40 F 73 75 77 79 81 82 84 86 88 90 91 93 95 97 99 100 102 104 Hi Range Min Set Temp 80 F Between 50 and 80 F 1 F Hi Range Max Se...

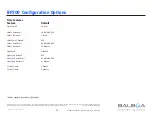
Page 19: ...ime Format 24 Hour 12 Hour 24 Hour N A Filter 1 Start Hour 20 00 8 00 PM 00 00 to 23 00 1 Hour Filter 1 Duration 2 Hours Between 15 Min and 23 45 15 Minutes or continuous Filter Cycle 2 Default OFF OFF ON N A Filter 2 Start Hour 08 00 8 00 AM 00 00 to 23 00 1 Hour Filter 2 Duration 15 Minutes Between 15 Min and 23 45 15 Minutes or Continuous or Disabled Light Cycle Disabled Disabled Enabled N A Li...

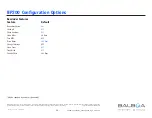
Page 20: ...ement Reminders Shown Yes Yes No N A Check pH OFF See Reminder Period Note 1 Days Check Sanitizer OFF See Reminder Period Note 1 Days Clean Filter 30 Days See Reminder Period Note 1 Days Test GFCI OFF See Reminder Period Note 1 Days Drain Water 100 Days See Reminder Period Note 1 Days Change Cartridge OFF See Reminder Period Note 1 Days Clean Cover OFF See Reminder Period Note 1 Days Treat Wood OF...

Page 21: ... B 1 Pump at High Speed maximum Blower turns OFF when 1 Pump is at High Speed 3 Phase Special Amperage Rule Pumps or Blower in Group 3 eg Pump 2 are the only ones which turn the Heater Off Pumps not in Group 3 ie Pump 1 do not turn the Heater OFF Drain Mode Disabled Disabled Enabled N A Demo Mode Disabled Disabled Enabled N A GFCI Trip Not Applicable for CE Models Automatic GFCI Test Disabled Disa...

Page 22: ...vert Invert Circ Icon 5 Invert Invert Invert Invert Circ Icon Undefined Undefined 6 Circ Icon Undefined Circ Icon Undefined Undefined Undefined Undefined 7 Undefined Undefined Undefined Undefined Undefined Undefined Undefined 8 Undefined Undefined Undefined Undefined Undefined Undefined Undefined 9 Undefined Undefined Undefined Undefined Undefined Undefined Undefined 10 Undefined Undefined Undefin...

Page 23: ...c Icon Undefined A6 Circ Icon Undefined Circ Icon Undefined Undefined Undefined A7 Undefined Undefined Undefined Undefined Undefined Undefined A8 Undefined Undefined Undefined Undefined Undefined Undefined A9 Undefined Undefined Undefined Undefined Undefined Undefined A10 Undefined Undefined Undefined Undefined Undefined Undefined A11 N A N A N A N A N A N A A12 N A N A N A N A N A N A A13 Undefin...

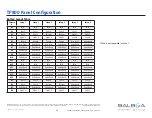
Page 24: ...6976052 6965815 7030343 7 417 834 b2 Canadian Patent 2342614 Australian patent 2373248 other patents both foreign and domestic applied for and pending Copyright 2009 Balboa Water Group TP800 Panel Configuration Spa Screen Shortcuts Screen A2 A3 A4 A5 A6 A7 A8 A9 A10 A16 A15 A14 A13 B1 B1 B3 B3 B4 B4 B2 B2 A13 A14 A15 A16 Note Buttons 11 and 12 are not used in this configuration Button 1 is fixed ...

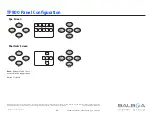
Page 25: ...d domestic applied for and pending Copyright 2009 Balboa Water Group TP600 Panel Configuration READY RANGE FLTR1 1 2 3 4 5 6 1 2 3 4 1 2 3 4 1 4 2 5 3 6 TP600 55676 XX No Overlay Button Layout Table Button Setups 1 2 Setups 3 4 Setups 5 6 1 Jets 1 Jets 1 Jets 1 2 Jets 2 Blower Undefined 3 Invert Invert Invert 4 Up Up Up 5 Light 1 Light 1 Light 1 6 Down Down Down LED 1 Jets 1 Jets 1 Jets 1 LED 2 Je...

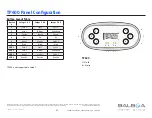
Page 26: ...0260 XX Includes overlay PN 12511 Button Layout Table for TP400T Button Setups 1 2 Setups 3 4 Setups 5 6 Setup 7 1 Temperature Temperature Temperature Up 2 Jets 1 Jets 1 Jets 1 Down 3 Light 1 Light 1 Light 1 Light 1 4 Jets 2 Blower Undefined Undefined LED 1 Heater ON Heater ON Heater ON Heater ON LED 2 Jets 1 ON Jets 1 ON Jets 1 ON Undefined LED 3 Light ON Light ON Light ON Light ON LED 4 Jets 2 B...

Reviews: