Plumbing Considerations
The control system can be installed wherever it may be convenient, however, it is supplied
with a pressure switch. Therefore, it is only possible to install the heater on the pressure
side of the of the plumbing system. (If you find it necessary to install the heater on the
suction side of the plumbing system, please contact Hydro-Quip for further information).
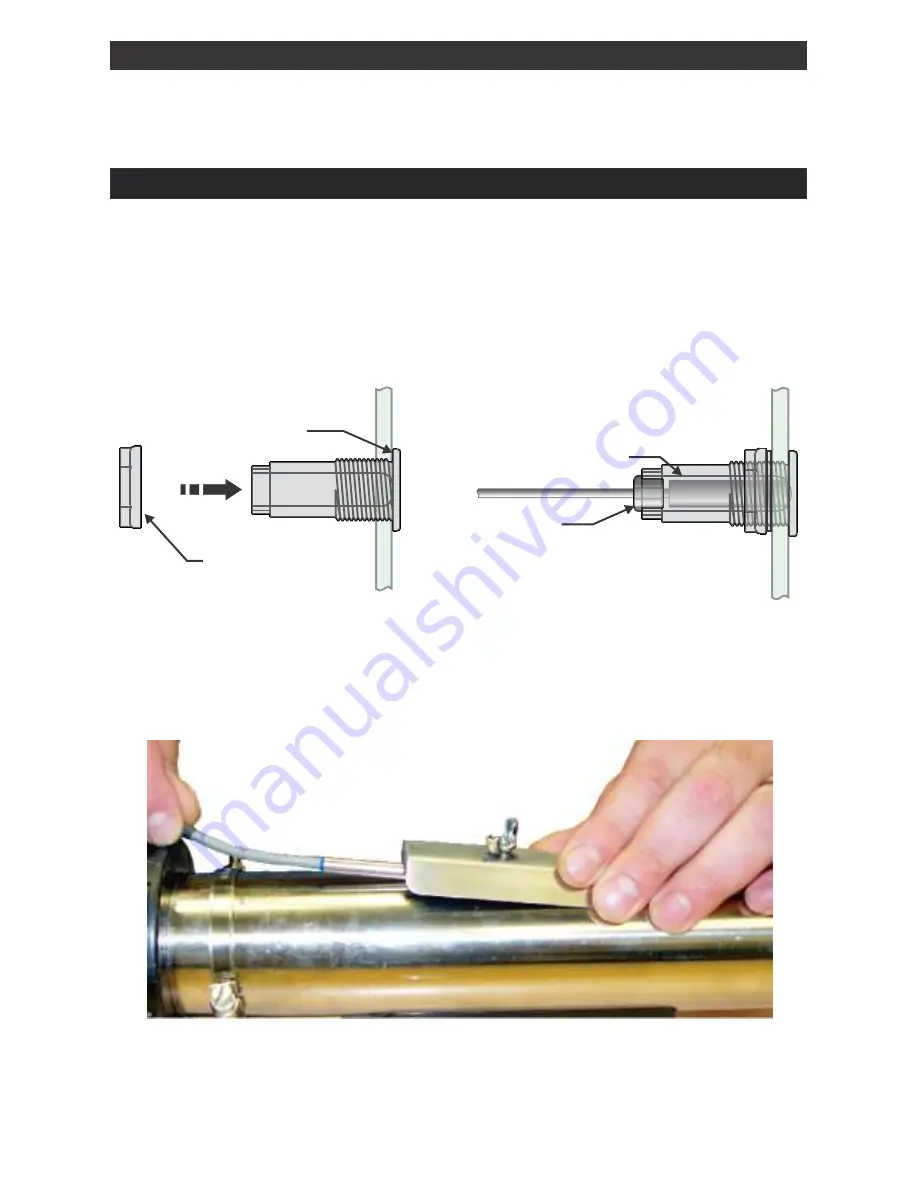
Option #1 Drywell:
The “U” Series fixed heater configuration comes with a 8’
temperature sensor to replace the existing temperature sensor for “Drywell” housings.
If the existing placement of your temperature sensor does not allow for an accurate
temperature reading, a drywell may have to be installed in the spa wall. Once a location
has been chosen, cut a 1 1/8” hole (cut from inside the spa). Clean excess debris from
around the hole. Use a water resistant silicone applied to the sealing surfaces and insert
the drywell into the hole. Tighten the drywell nut ( DO NOT over tighten). Insert
temperature sensor into drywell and insert grommet as shown below. Allow silicone to
cure for 24-hours.
Spaside Control Operation
Temperature Sensor Installation
9
Option #2 Heater Housing:
The “VS” / “US” Series heaters comes with 1/4” sensors
located under the plate. To install the sensor, loosen the wing nut and slide the sensor
under the plate until it becomes no longer visible. Once the sensor is install under the
plate, tighten the wing nut to ensure the sensor is secure. If you wish, you can order the
10’ x 3/8” temperature sensor to replace the existing temperature sensor for “Drywell”
applications.
Option #3 Using your existing sensors:
If you are replacing an existing Balboa Lite
Leader system, you may use your existing sensors. This will be optional in applications
with the temperature sensor installed in a “Wetwell” application or unable to gain access
to the temperature sensor.
SEALING SURFACE
SEALING SURFACE
GROMMET
TEMPERATURE
SENSOR
SpaDepot.com


