GENERAL SAFETY
Thoroughly read and understand this manual
before installing, operating or servicing this
equipment.
INSTALLATION
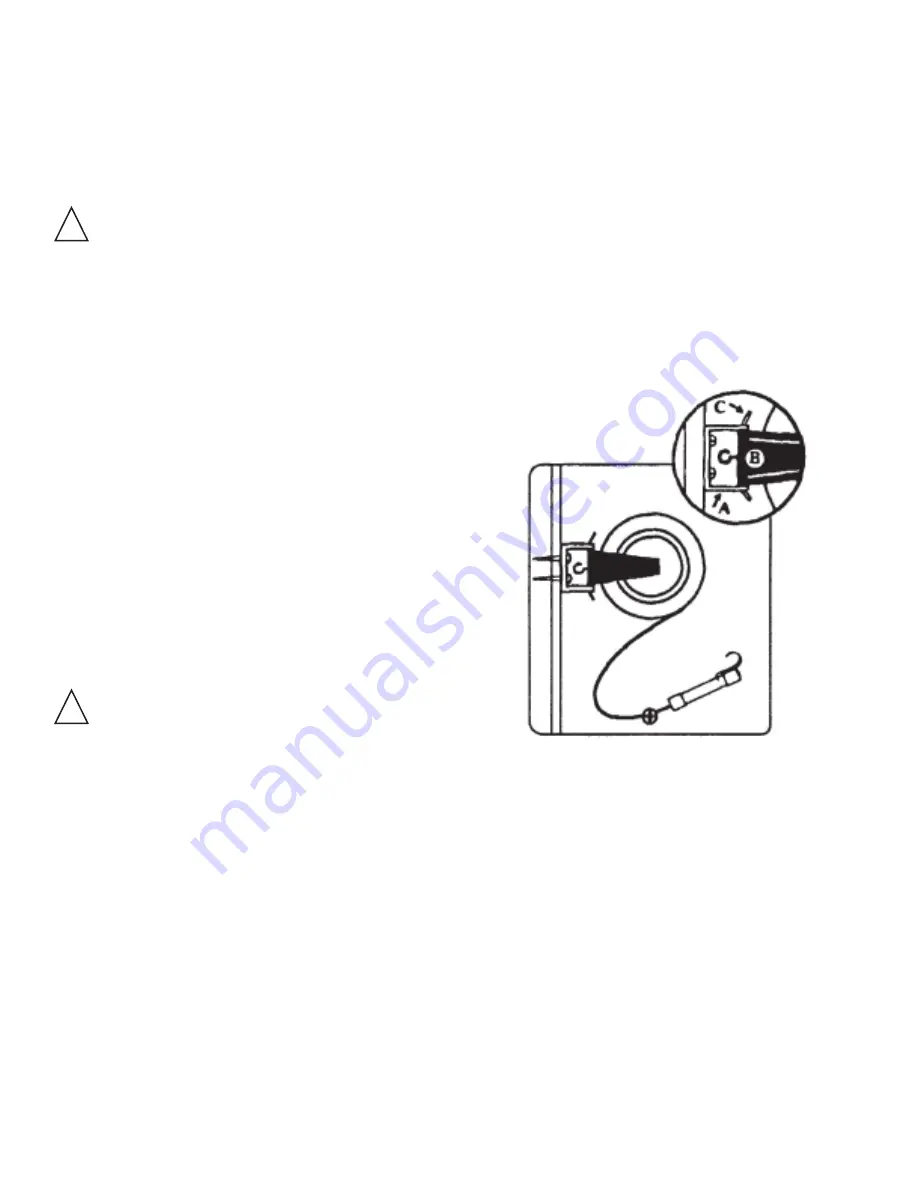
Wall or Ceiling Mounting 180
0
Rotation:
1. Select location within 2 feet of an electrical
outlet.
2. Take “U” shaped Bracket A and attach to
solid part of the wall or ceiling with the
screws provided.
3. Place Hanger Bracket B inside “U” shaped
Bracket A lining up small holes in the
Brackets.
4. Insert Locking Pin C through lined-up holes.
Be sure to bend the end of the locking pin.
CAUTION:
1. Do not use the 2510-010 worklight in
hazardous areas under UL speci
fic
ations
355.
2. Inspect cord regularly for damage and
replace if necessary for user safety.
3. Do not submerge.
4. Read mounting instructions carefully before
installing.
5. When hanging reel on ceiling:
By Hook - Close hook with pliers to prevent
reel from falling down.
By Bracket Pin - With reel in place, bend
end of “L” shaped pin to prevent pin from
falling out.
6. See caution statement regarding the
polarized plug.
!
CAUTION:
The 2510-010 portable lamp has a polarized
plug (one blade is wider than the other) as a
feature to reduce the risk of electric shock.
This plug will
fit
in a polarized outlet only one
way. If the plug does not
fit
fully in the outlet,
reverse the plug. If it still does not
fit,
contact
a
qualified
electrician. Never use an extension
cord unless plug can be fully inserted. Do not
alter the plug.
!
INSTALLATION
Ceiling Mounting 360
0
Rotation:
1. Select location within 2 feet of an electrical
outlet.
2. Screw the Hanger Hook securely into the
ceiling.
3. Hang Reel on Hook.
4. Close Hook with pliers to prevent reel from
coming off. Refer to point A below.
5. Adjust Cord Stop so light hangs at desired
length when cord is retracted.


