
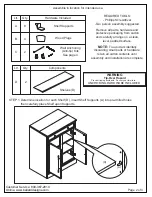

Installation:
Cleaning & Care:
DO NOT use alcohol based products or spray polisher as
they can damage the finish. Dust with soft cloth.
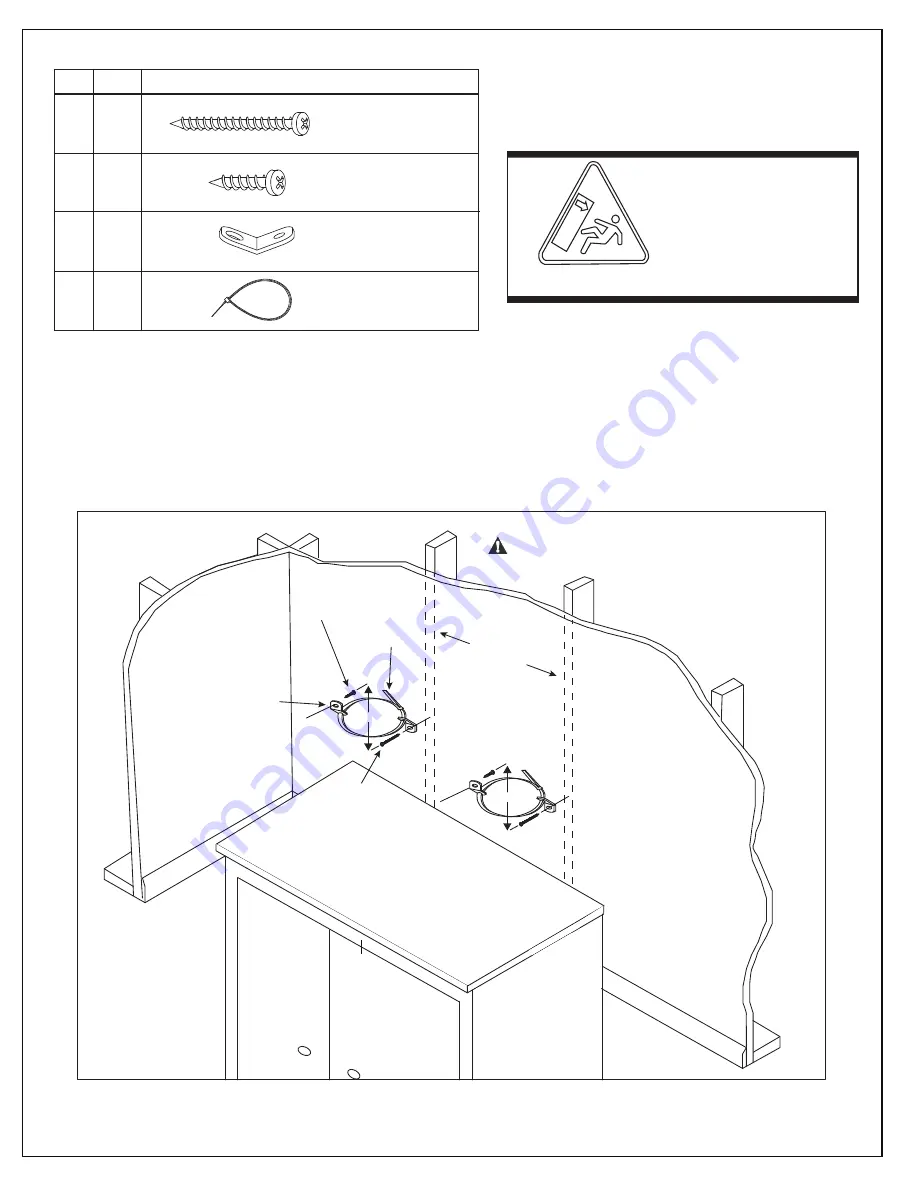
Ltr.
A
2
Small Screw
Retention Belt
Qty.
Hardware Included
B
2
Large Screw
C
4
Bracket
D
2
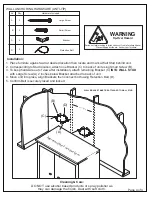
WALL ANCHORING HARDWARE (ANTI-TIP)
1. Place furniture against wall at desired location then locate and mark a Wall Stud behind unit.
2. Corresponding to Stud location, attach one Bracket (C) to back of unit using Small Screw (B).
3. To keep hardware out of view after installation, attach remaining Bracket (C)
INTO WALL STUD
with Large Screw (A) 2 inches below Bracket attached to back of unit.
4. Move unit into place, align Brackets then connect both using Retention Belt (D).
5. Confirm Belt is securely laced and locked.
Serious or fatal crushing injuries can occur from a furniture tip-over
Tip-Over Hazard
Prevent tipping accidents. Anchor your furniture.
WARNING
WALL S
TUD
WALL BRACKET MUST BE ATTACHED TO WALL STUD
(A)
(B)
(C)
(D)
Re
pre
s
en
t
a
tive F
u
r
nitu
r
e I
tem
Page 4 of 4


