38
39
BICYCLE
ASSEMBLY
BICYCLE
ASSEMBLY
DERAILLEUR
Although the front and rear derailleurs are initially adjusted at the factory,
you will need to inspect and readjust both before riding the bicycle.
REAR DERAILLEUR
Begin by shifting the rear shifter to largest number indicated and place
the chain on the smallest sprocket. Adjust the High limit screw so the
guide pulley and the smallest sprocket are lined up vertically. Reconnect
the cable, pull out any slack, and retighten the anchor bolt securely. Shift
through the gears, making sure each gear achieved is done quietly and
without hesitation. If necessary, use the barrel adjuster to ine tune each
gear by turning it the direction you want the chain to go. For example,
turning clockwise will loosen the cable tension and move the chain away
from the wheel, while turning counter-clockwise will tighten cable tension
and direct the chain towards the wheel. Shift the rear shifter to the gear
one and place the chain on the largest cog. Adjust the Low limit screw
in quarter turn increments until the guide pulley and the largest cog are
aligned vertically. Again, shift through each gear several times, checking
that each gear is achieved smoothly. It may take several attempts before
the rear derailleur and cable is adjusted properly.
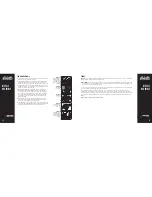
(Fig. A, Fig. B)
Ensure all bolts are secured tightly and the chain does not fall off
in either direction.
Freewheel
Outer side of top gear
Pulley
adjustment
screw
Adjustment
screws
SIS cable
adjuster
Tension
Pulley
Guide
Pulley
High gear
adjustment
screw
Low gear
adjustment
screw
Barrel
adjuster
FIG. A
FIG. B
DISC GETS HOT!
Severe injury could result from contact with the hot
disc! Mind your legs, as well as your hands.
These brakes require breaking in! Ride and use the brakes gently for 13
miles before using the brakes in downhill conditions, for sudden stops,
or any other serious braking. Please be aware that your brake system will
change in performance throughout the wear-in process. The disc brake
should be cleaned before the irst ride using rubbing alcohol. NEVER use
oil or similar products to clean your disc brake system.
WARNING:
Disc brakes are sharp, keep ingers away from brake
caliper and rotor. If ingers contact brake while wheel is turning injury
can occur.
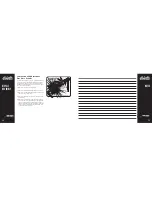
After adjusting brake, squeeze the brake lever as hard as you can several
times and re-inspect the brake pads, centering, and brake lever travel.
If the brake pads are no longer square to the rim, repeat brake pad
adjustments. Be sure that brake pads return to a centered position by
spinning the wheel and listening for the brake pad rubbing the rotor on
either side. Readjust as needed. Check that the brake cable tension allows
the brake lever about 1/3 of the travel before the brake pads contact the
rotor. If the cable has stretched or slipped, readjust brake cable tension
by loosening cable anchor bolt and pulling more cable through the anchor
or use brake adjustment barrels for ine tuning brake cable tension.
Adjust brake
caliper so disc
is centered
between
brake pads
FIG. O
FIG. P
FIG. Q


