background image


EN


12 

IMPORTANT 

Before using the space heater, carefully read all of the instructions and follow them scrupulously. 
The manufacturer cannot  be held responsible for damage to  persons and/or property caused  by improper use of 
the equipment. 
This instruction manual is an integral part of the equipment and must therefore be stored carefully and passed on 
with the unit in the event of a change of ownership.


GENERAL RECOMMENDATIONS 

The  space  heaters  run  on  diesel  fuel.  Direct  combustion 

versions  send  hot  air  and  combustion  products  into  the  room, 
while  indirect  combustion  versions  are  fitted  with  a  flue  to 
discharge the fumes through the chimney. 

Always  follow  local  ordinances  and  codes  when  using  this 

heater: 

  Follow the instructions in this booklet very carefully; 

  Use  only  in  places  free  of  flammable  vapours  or  high  dust 

content; 

  Keep inflammable material at a safe distance from the heater 

(minimum 3 metres); 

  Make sure fire fighting equipment is readily available; 

  Ensure that the machine resting surface or ground is not made 

of flammable material; 

  Make sure sufficient fresh outside air is provided according to 

the  heater  requirements.  Direct  combustion  heaters  should 
only  be  used  in  well  vented  areas  in  order  to  avoid  carbon 
monoxide poisoning; 

  the  indirect  combustion  heater  is  installed  near  a  chimney  to 

ЭКФО  КаКв  ЭСО  ПЮЦОЬ  (ЬОО  ЭСО  ЩКЫКРЫКЩС  “FUMES  FLUE 

POSITIONING  DIAGRAM”)  КЧН  МoЧЧОМЭОН  Эo  КЧ  ОХОМЭЫТМКХ 

switchboard; 

  nothing  is  obstructing  the  aspiration  and  expulsion  of  air; 

movement of air may be obstructed in various ways including 
placing covers or other objects on the heater or positioning the 
heater too near a wall or other large object;  

  In case of very low temperatures add kerosene to the heating 

oil; 

  Make  sure  heater  is  always  under  surveillance  and  keep 

children and animals away from it; 

  Before  starting  the  heater  always  check  free  rotation  of 

ventilator; 

  Unplug heater when not in use. 


SAFETY DEVICES 

The  heater  is  fit  with  an  electronic  device  that  controls  the 

flame  and  the  maximum  safe  temperature  by  means  of  a 
photocell and an overheat thermostat. 

The  electronic  device  controls  start/stop  times  and  trips  the 

safety  in  case  of  malfunctions.  It  has  reset  button  (13)  that  can 
assume  different  colours  (Function  Light)  depending  on  the 
function mode: 


oПП:  СОКЭОЫ  ТЬ  ТЧ  ТНХО  ЦoНО  oЫ  ТЧ  “ЬЭКЧН

-

Лв”  ЦoНО,  аКТЭТЧР  ПoЫ 

heating request; 

  steady green: heater functioning normally; 

  steady red: heater in safety stop; 

  flashing  orange:  heating  interrupted  due  to  excessive 

variations  in  voltage  supply  (T<175V  or  T>265V);  heating  will 
resume automatically when voltage returns in range from 190 
V and 250 V. 


Warning 

To  restart  heating  after  a  safety  stop,  push  reset 
button (13) for 2 seconds. 


Warning 

NEVER  do  more  than  two  restarts  in  a  row: 
uncombusted  diesel  fuel  may  accumulate  in  the 

combustion  chamber  and  suddenly  flare  up  at  the 
next restart. 


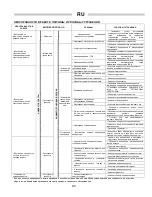
If  the safety  stop  persists,  you  have  to  find  and  eliminate  the 

cause of the stop before you restart the heater. Push button (13) 
for  at  least  5  seconds  to  launch  a  self-diagnosis  programme, 
after  which  the  button  will  assume  different  colours  (Self-
diagnosis light) depending on the type of safety that tripped: 

  flashing orange: false flame detected during restart cycle. 

  flashing red: no flame during restart cycle. 

  flashing red/green: no flame during work cycle. 

  steady orange: internal error of electronic device. 


Warning 

See 

“TROUBLESHOOTING” Эo ТН

entify the cause of 

the malfunction. 


OPERATION 

Before switching on the heater and, therefore, before plugging 

it  into  the  electrical  power  supply,  check  that  the  power  supply 
specifications are the same as those stated on the identification 
plate. 


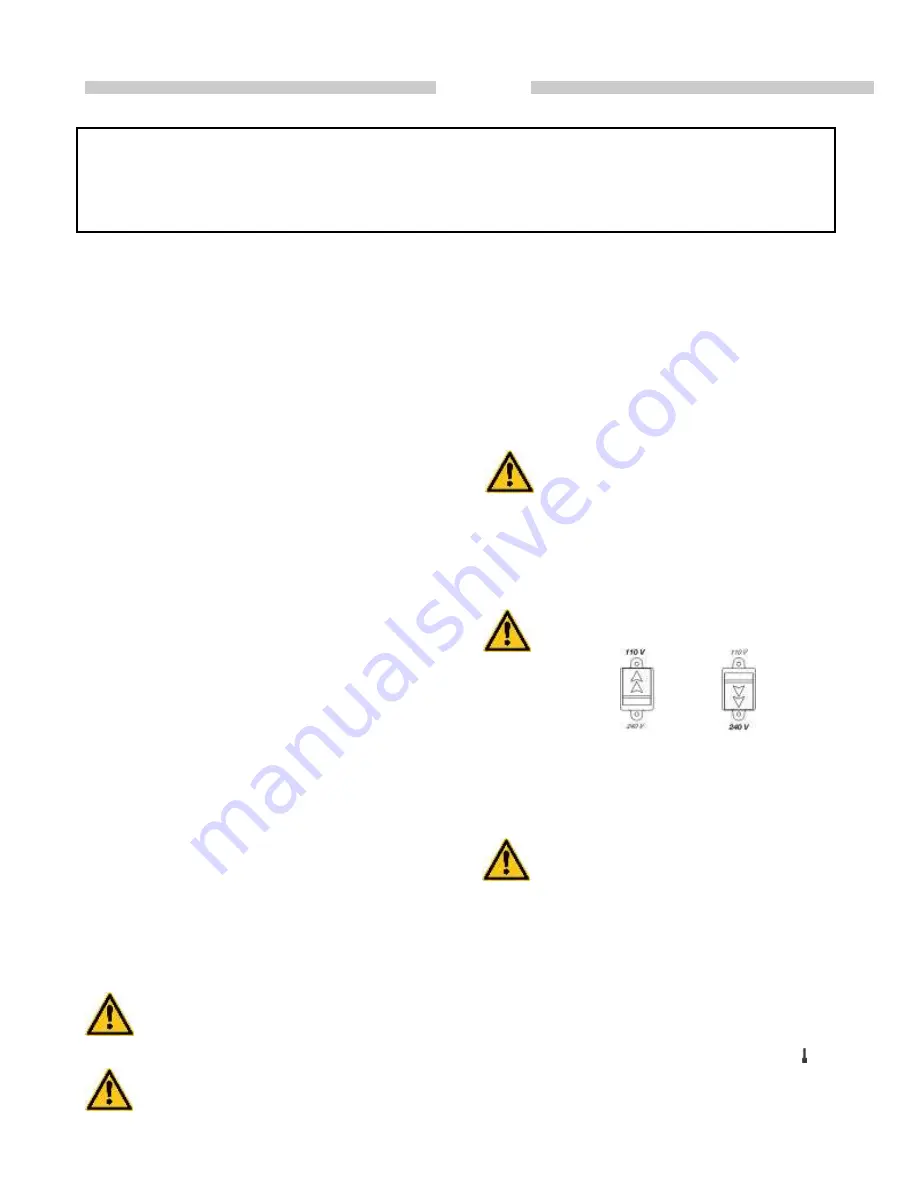
Warning 

For  ЦoНОХs  “DV”  МСОМФ  ЭСКЭ  ЭСО  Кrroаs  oЧ  ЭСО 

voltage  supply  selector  key  cover  are  pointing  to 
the voltage value required. 


If necessary: 

• rОЦoЯО ЭСО МoЯОr;


• prОss НОПХОМЭor (

18) to the position required; 

• rОpХКМО ЭСО proЭОМЭТЯО МoЯОr.


Warning 

  The power line must be earthed and fitted with a 

residual current circuit breaker. 

  The  heater  plug  must  be  inserted  into  a  socket 

equipped with a mains switch. 


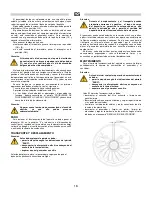
The  heater  must  be  placed  on  a  flat,  stable,  and  levelled 

surface in order to prevent it from overturning and/or diesel leaks 
from the tank filler cap. 

You can run the generator in manual by setting switch (14) to 

ON. 

The  generator  can  only  work  automatically  when  a  control 

device, such as for example a thermostat or a timer, is connected 
to the heater. 

Connection  to  the  heater  is  made  by  removing  the  socket 

cover (15) and inserting the thermostat plug. 

To start the machine you must: 

• ТП МoЧЧОМЭОН Эo ЭСО ЭСОЫЦoЬЭКЭ, ЭЮЫЧ ЭСО ЬаТЭМС Эo (ON + 

); 

• ТП ЧoЭ МoЧЧОМЭОН Эo ЭСО ЭСОЫЦoЬЭКЭ, ЭЮЫЧ ЭСО

 switch to (ON); 


Summary of Contents for GE 36

Page 1: ...Ballu Biemmedue EC 22 http www vseinstrumenti ru klimat teplovye_pushki dizelnye ballu biemmedue ec_22 http www vseinstrumenti ru klimat teplovye_pushki dizelnye ballu biemmedue ec_22 tab Responses...

Page 2: ...1 51 GE 36 GE 46 EC 22 EC 32 Code 128...

Page 3: ...PIEDE MANIGLIA SUPPORT POIGNEE STUTZE HANDGRIFF SUPPORT HANDLE SOPORTE MANIJA 11 RUOTA ROUE RAD WHEEL RUEDA 12 SERBATOIO COMBUSTIBILE R SERVOIR COMBUSTIBLE BRENNSTOFFTANK FUEL TANK DEPOSITO DE COMBUST...

Page 4: ...el modo di funzionamento o o o della richiesta di riscaldamento o o o o o o o o o o o o o o o o o variazioni eccessive della tensione di alimentazione T 175V o T 265V il funzionamento riprende automat...

Page 5: ...TRASPORTO E MOVIMENTAZIONE Attenzione Pr spos r pp r o s Arrestare la macchina secondo le indicazioni del p r r o ARRESTO Dis s r r o r s r o spina dalla presa elettrica Attendere che il generatore si...

Page 6: ...o o o So o o Ro o lampeggiante o rosso verde lampeggiante A o o o o o o interrotto So o o C o o o So Co o o o o So o o A o o o Co o o accensione agli elettrodi e al trasformatore Co o o o o o o o o o...

Page 7: ...variations excessives de tension d alimentation T 175V ou T 265V le fonctionnement reprendra automatiquement lorsque la valeur de tension ser o o 190 V 250 V Attention Apr s o s r s ss r o r po sso r...

Page 8: ...o o 0 o o o o La flamme o o o o 90 secondes pour refroidir la chambre de combustion TRANSPORT ET DEPLACEMENT Attention A p r pp r Arr r r r s s o s p r r p ARRET D r r o r q fiche de la prise de coura...

Page 9: ...nte P du transformateur N o o la chambre de combustion C o o R o o Ro clignotante ou rouge verte clignotante Bo o o interrompu R o r Ro o o R o Co o R o L o o V o transformateur V o o o o REGLAGE DES...

Page 10: ...Reset Taste 13 ausgestattet deren Farbe B o B o ausgeschaltet bei Pausen oder Standby Mo G Erwartung der Heizungsanforderung D No G o D S G orangefarbene Blinkanzeige bei Betriebsunterbrechung infolge...

Page 11: ...nn STILLSETZUNG S G S 14 Po o 0 o Ko o o B Einstellung des Thermostats auf eine niedrigere Temperatur Der Brenner schaltet ab und der Ventilator arbeitet ca 90 s weiter bis die B TRANSPORT UND HANDHAB...

Page 12: ...R H Brennkammer entfernen Fo o Fo o Ro Blinkanzeige o o Blinkanzeige Mo o o o durchgeschmolzen Mo o Mo o o L Mo o o o durchgeschmolzen Ko o K V E o und Tran o o Po o E o A S EINSTELLUNG DER ELEKTRODE...

Page 13: ...n case of malfunctions It has reset button 13 that can assume different colours Function Light depending on the function mode o o o o o heating request steady green heater functioning normally steady...

Page 14: ...urely attached Warning Diesel may leak during handling and transport the fuel tank cap is not sealed This allows air to enter and allows the tank to be emptied while the heater is running The heater c...

Page 15: ...o D o o R o o B o o R o Defective electric ignitor C o o o H T o o and transformer C o SETTING THE ELECTRODES C o o R H T o D flame control box R o o o D o o C o o o I o o C o o o pump plastic couplin...

Page 16: ...se extraiga el o o DISPOSITIVOS DE SEGURIDAD E o o o o o con o o o o o o o E o o o o o o o o funcionami o o o o o 13 que se ilumina de diferentes colores Luz Funcionamiento o o o o o o o espera del pe...

Page 17: ...el aparato se debe poner el o 14 o 0 o o o o o o o o o L o o o o o o 90 o o TRANSPORTE Y DESPLAZAMIENTO A Antes de desplazar el aparato se debe p r r q s s o s p rr o PARO s o r r r o o r esperar a q...

Page 18: ...nte Bo o o o o o interrumpido S o o Co o o o o S o o Co or del motor quemado S o o E o o o Co o o o o encendido a los electrodos y al transformador Co o o o o o REGULACI N ELECTRODOS Co o o o o o S o...

Page 19: ...RU 18 3 25 13 U 175 V U 265 V 190 V 250 V 13 3 13 5...

Page 20: ...RU 19 14 ON 15 13 13 1 2 13 3 14 0 90 50...

Page 21: ...RU 20 13 175 190 265 250 LI...

Page 22: ...RU 21 RU 0001 11 B51 109599 74 2 II 109599 74 2 II 8 495 991 45 42 8 499 372 01 67 C IT AB51 B 02155 12 02 2013 12 02 2015 BIEMMEDUE S p A Via Industria 12 12062 Cherasco CN I...

Page 23: ...RU 22 Ballu Biemmedue Ballu Biemmedue 1 2 1 2 3 4 5 6 7 8 9 12 _________________ ____________________ 201...

Page 24: ...____ ______________________________________________________________________________ ______________________________________________________________________________ _____________________________________...

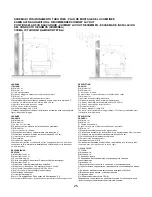
Page 25: ...ECTRIC PILOT TESTIGO TENSI N LI1 TERMOSTATO DI SICUREZZA THERMOSTAT DE SURCHAUFFE SICHERHEITSTHERMOSTAT OVERHEAT THERMOSTAT TERMOSTATO DE SEGURIDAD EV1 ELETTROVALVOLA ELECTROVANNE MAGNETVENTIL SOLENOI...

Page 26: ...DEUTSCH A Mindestabstand 1 m B Mindestabstand 1 m C So D G o D R E Mindestabstand 1 m 1 G 2 Waagerechter Durchgang mit Steigungswinkel von mind 5 3 Schornstein Innenabmessungen mind 20 x 20 cm 4 Expl...

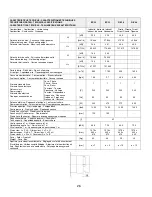
Page 27: ...1 85 2 7 3 04 3 88 Alimentazione elettrica A o Netzanscluss Power supply A Fase Phase Phase Phase Fase 1 1 1 1 Tensione Tension Spannung Voltage Tension V 230 230 230 230 Frequenza F Frequenz Frequenc...

Page 28: ...27...

Page 29: ...28...

Reviews: