8
3.3
On each panel, check for proper
alignment and level. Leveling can be
accomplished by placing wooden shims
under the vertical panels (cross-
reference IM-268-11, Section6).
3.4
Remove the shipping strap attached to
the bottom of the door opening. When
attaching the door, hold a level on the
face of the door section, and when
plumb, Speed-Lok to adjacent corner
section.
IT IS VERY IMPORTANT THAT
THE DOOR SECTION IS ALWAYS LEVEL
AND PLUMB.
4.
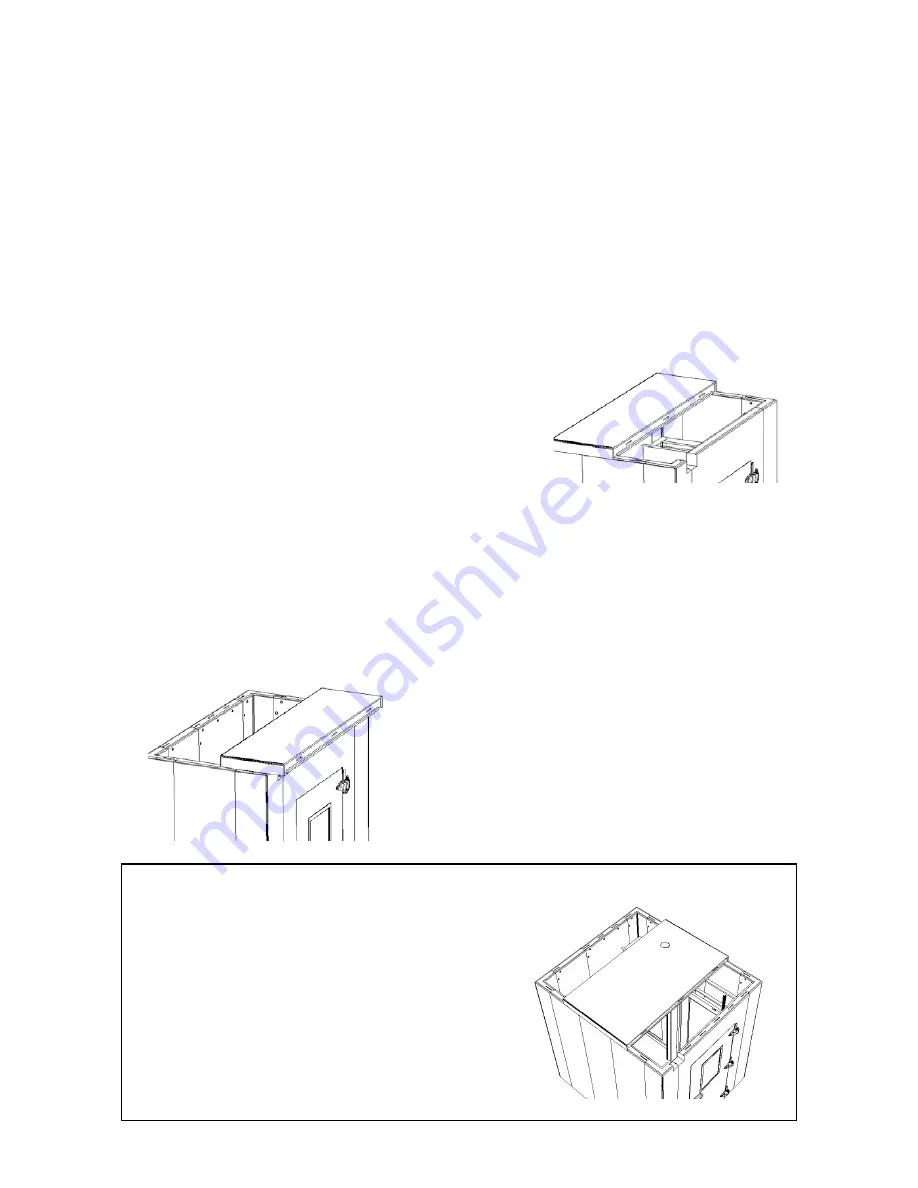
Installation of the Ceiling Panels
4.1.
Bring the rear ceiling panel on top of
the front half of the blast chiller.
4.2.
Caulk on both sides of the tongues of all the
appropriate rear wall panels.
4.3.
Pick up the ceiling panel, bring it back, and
drop it in place. Engage a couple of locks on
the back wall.
Do not fully lock.
4.4.
Caulk the groove or tongue of the rear
ceiling panel and the rest of the wall tongue
area.
4.5.
Bring up the front ceiling panel and lock it to
the back ceiling panel, fully engaging the
Speed-Loks to the lock position on the seam
between the two
ceiling panels
.
4.6.
Make sure the ceiling panels are secured
squarely on the vertical panels.
Do not fully
lock.
Align and adjust accordingly.
4.7.
Fully engage the Speed-Loks to the lock
position on the
vertical panels
to the
ceiling panels.
Installing Ceiling Panels on the Northwind 1000
•
Install the middle ceiling panel first. The large
panel will align more panels quicker.
•
Instead of caulking the tongues, place the
caulk in the corners of the grooves in the
ceiling panel, then lay the ceiling panel on a
piece of cardboard trimmed to size.
•
Lift the ceiling and cardboard onto the
verticals, locate the ceiling panel, tilt it up,
and remove the cardboard.


