background image

ADJUSTMENTS & MOVEMENTS

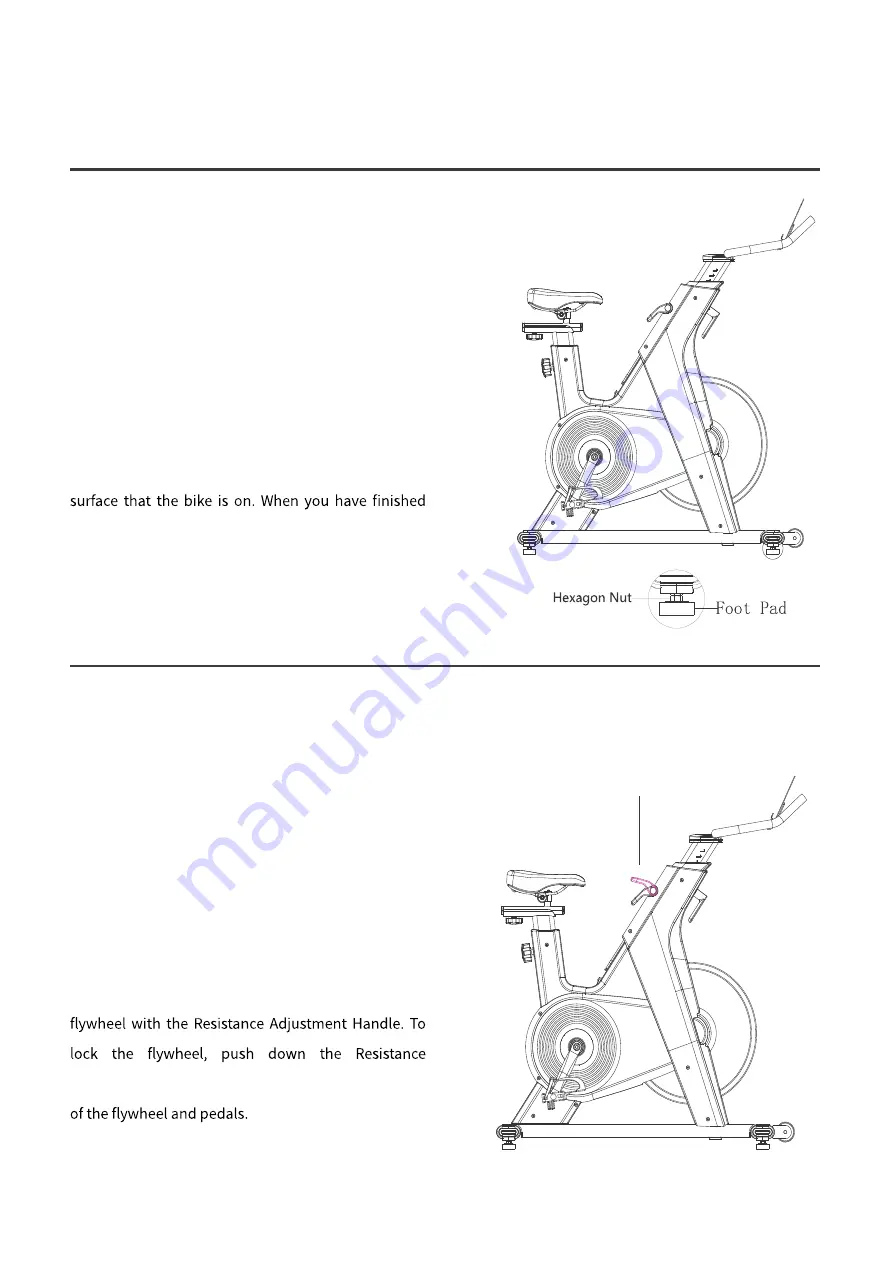
ADJUSTING THE BALANCE

In  order  to  achieve  a  smooth  and  comfortable  ride, 

you must ensure that the bike is stable and secured. If 

you notice that the bike is unbalanced during use, you 

should adjust the Foot Pad located beneath the Front 

and Rear stabilizers. To do so, use Spanner to loosen 

Hexagon  Nut  by  turning  it  clockwise.  With  the  nut 

loosened, rotate the Foot Pad until it sits level with the 

adjusting the Foot Pad, re-tighten the Hexagon Nut by 

turning it counter-clockwise to complete the balance 

adjustment of the bike. If needed, repeat this process 

to adjust the remaining foot pad.

ADJUSTING THE RESISTANCE 
& EMERGENCY STOP

Adjust  the  tension  by  raising  the  Resistance 

Adjustment Handle to decrease the level of resistance. 

Press Resistance Adjustment Handle down to increase 

the  level  of  resistance.  Pushing  down  on  the 

Resistance  Adjustment  Handle  to  the  end  to  enforce 

the brake and stop the bike immediately.

NOTE

: When the bike is not in use, be sure to lock the 

Adjustment Handle to the end to prevent movement 

Loosest

08

Summary of Contents for BC-B599

Page 1: ...all precautions and instructions carefully before using this product Keep this manual for future reference If you require assistance or if you need to order replacement parts please contact Customer C...

Page 2: ...NSTRUCTIONS PARTS AND TOOLS ASSEMBLY INSTRUCTIONS BATTERY INSTALLATION REPLACEMENT BLUETOOTH CONNECTION ADJUSTMENTS MOVEMENTS CONSOLE SPECIFICATIONS EXERCISE INSTRUCTIONS WARRANTY 01 02 03 06 07 08 11...

Page 3: ...t 24 0 6m on each side of the machine clear 6 Before using the equipment ensure that the nuts bolts and parts such as the pedals are securely tightened 7 Maximum user weight limit 275 lbs 125 kg Do no...

Page 4: ...ption PanHexagonSocket Bolt M855 PanHexagonSocket BoltM8 15 FlatWasher08 4 016 Spring Washer08 1 012 3 AlenWrench6 5 Spanner Sl3 S14 S15 Qty 1 1 1 1 1 1 2 Description Main Frame Front stabilizer Rear...

Page 5: ...ace Allow a workout area of a minimum 2 3 m x 1 8 m 90 x 69 Figure arrow on the box is pointing up As shown in Figure 3 Pull the box up as shown in Figure Read and understand the important safety inst...

Page 6: ...table Handlebar Tube NO 4 into Main Frame NO 1 and adjust to desired height Secure it in place by reinserting and tightening the Plum Screw Knob Make sure the Plum Screw Knob engages the holes in the...

Page 7: ...TE The Pedals NO 7 are marked L and R for Left and Right Connect the Left Right Pedal NO 7 onto the Left Right Crank Left Pedal Align the Left Pedal NO 7L with the Left Crank at 90 degrees and gently...

Page 8: ...ecomes dim or illegible press the buckle of Battery Cover on the back of the Console NO 6 then remove the Battery Cover 2 Remove the 2 old AA batteries in the battery case and install 2 new AA batteri...

Page 9: ...in the right corner Click bike icon SHUA logo and click Now you ve connected to BANCON exercise bike Click SH B599 bluetooth and device BC B599P will show up Notice If there is a code on your digital...

Page 10: ...g the Foot Pad re tighten the Hexagon Nut by turning it counter clockwise to complete the balance adjustment of the bike If needed repeat this process to adjust the remaining foot pad ADJUSTING THE RE...

Page 11: ...Plum Screw Knob Slide the Seat to desired position and fully tighten the Plum Screw Knob NOTE When adjusting you will see height mark and a STOP mark on the Adjustable Seat Tube The height mark is fo...

Page 12: ...correct height according to your body Do not lift the tube passed the STOP mark MOVING THE BIKE 5 is properly secured If the handlebar is loose tighten the L shaped adjustment handle to secure it hol...

Page 13: ...IME Count the time from exercise start to the end When the exercise pauses TIME will stop SPEED Displays the current speed being obtained DISTANCE CALORIES guide which can not be used in medical treat...

Page 14: ...NS FUNCTION SCAN TIME SPEED DISTANCE CALORIES RPM LEVEL 6S 0 00 99 59 MINUTE SECOND 0 99 9MPH 0 999 9MILE 0 9999 KILOCALORIE 0 999R MIN 1 8 AABATTERY 2 0 40 10 60 BATTERY WORKING TEMPERATURE STORE TEM...

Page 15: ...with your hands on a wall and put one leg behind Keep your hind legs upright and landing on your heels and leaning toward a wall Hold for 10 to 15 seconds then relax Repeat each leg 3 times see Figure...

Page 16: ...nce of the case the normal use of non human damage The warranty card is limited to the original purchaser and is not transferable Ii The warranty period is one year since the date of purchase Iii The...

Page 17: ...15...

Reviews: