A351, A355
PNEUMATIC TOOL
www.BAND-IT-IDEX.com
Document # P35087 Rev. I
© Copyright
BAND-IT-IDEX, Inc. 2021
All rights reserved
Page 8 of 19
BAND-IT-IDEX, Inc.
A Unit of IDEX Corporation
4799 Dahlia Street
Denver, CO 80216-3070 USA
P: 1-800-525-0758
F: 1-800-624-3925
Operating
Manual
1. Connect tool and air regulator using coil hose.
2. All tools are factory set for nominal clamping conditions.
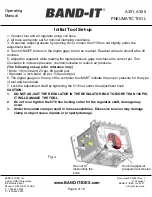
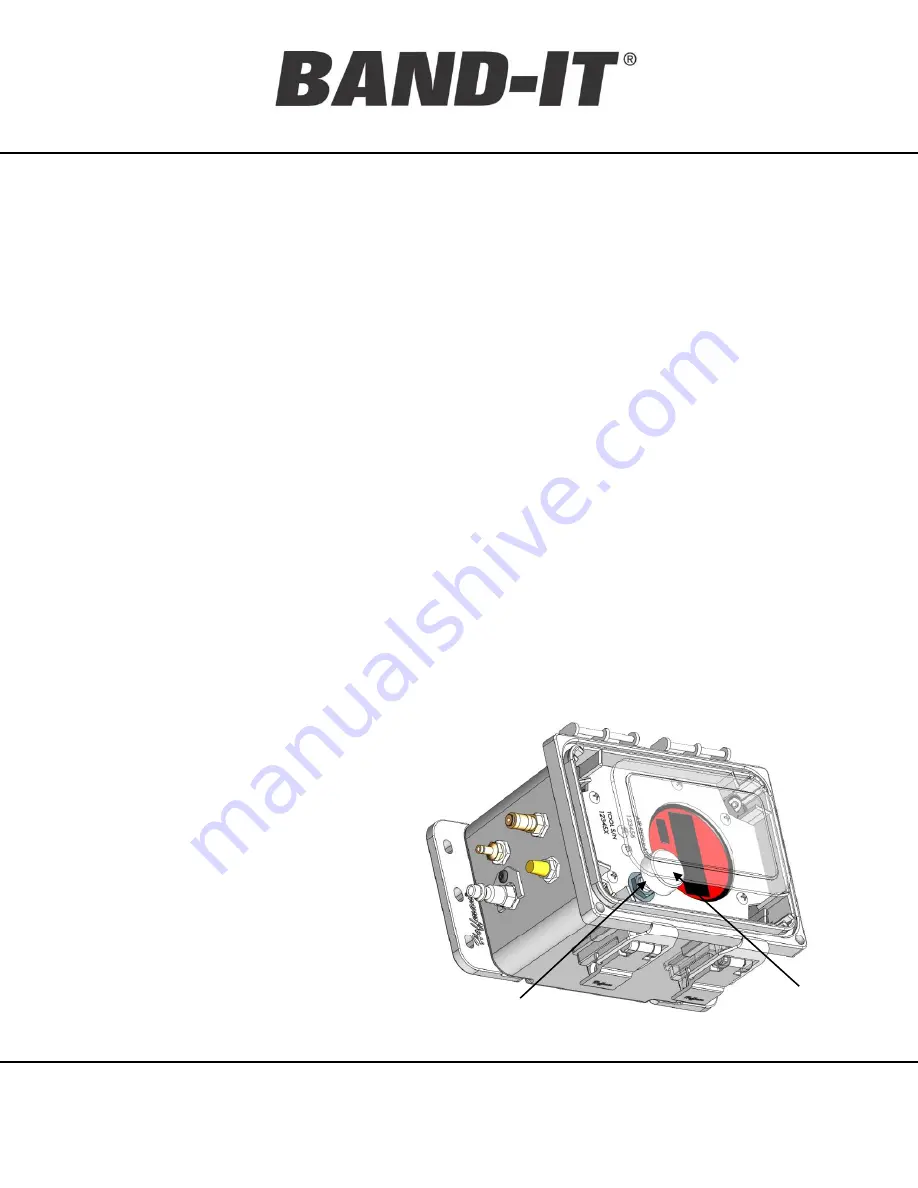
3. If required, adjust pressure by opening cover, loosen the 5/16 hex nut slightly under the
adjustment knob.
4. Touch ON/OFF button on the digital gage to turn on readout. Readout will auto shutoff after 20
minutes
5. Adjust the regulator while reading the digital pressure gage to achieve the correct psi, Turn
Clockwise to increase pressure, counterclockwise to reduce air pressure.
(The following set-up is for reference only)
• Micro 1/8 inch band, 23 psi, 80 pound pull.
• Standard ¼ inch band, 44 psi, 150 pound pull.
6. The digital gauge on the top of the controller box MUST indicate the proper pressure for the type
of tool and band used.
7. Lock the adjustment shaft by tightening the 5/16 nut under the adjustment knob.
CAUTION:
1.
DO NOT ADJUST THE REGULATOR IN THE REGULATOR BOX TO MORE THAN 100 PSI,
IT WILL DAMAGE THE TOOL.
2.
Do not over tighten the 5/16 hex locking collar for the regulator shaft, damage may
occur.
3.
Under tensioned clamps result in loose assemblies. Excessive tension may damage
clamp or object cause injuries or property damage.
Initial Tool Set-up
Hex nut to
lock/unlock the
knob
Knob to adjust air
pressure/Tool tension
Fig. 4

