


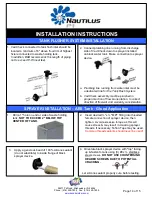
1. Vac/Check connected to tank flush inlet should be
located a minimum of 6" above flood rim of highest
fixture connected to waste holding tank.
In addition, B&B recommends this length
of
piping
not to exceed 6'-8' lineal feet.
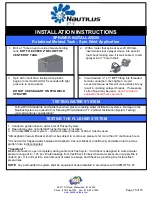
2. Connect plumbing line running from discharge
side of Vac/Check down to sprayer installed
on black water tank. Make connection to sprayer
device.
a. Plumbing line running from water inlet must be
a dedicated line for the Tank Flush System.
b. Vac/Check assembly must be plumbed in
proper direction of flow & orientation. Incorrect
direction of flow will void warranty consideration.
TANK FLUSHER SYSTEM INSTALLATION
SPRAYER INSTALLATION
– ABS Tank - Glued Application
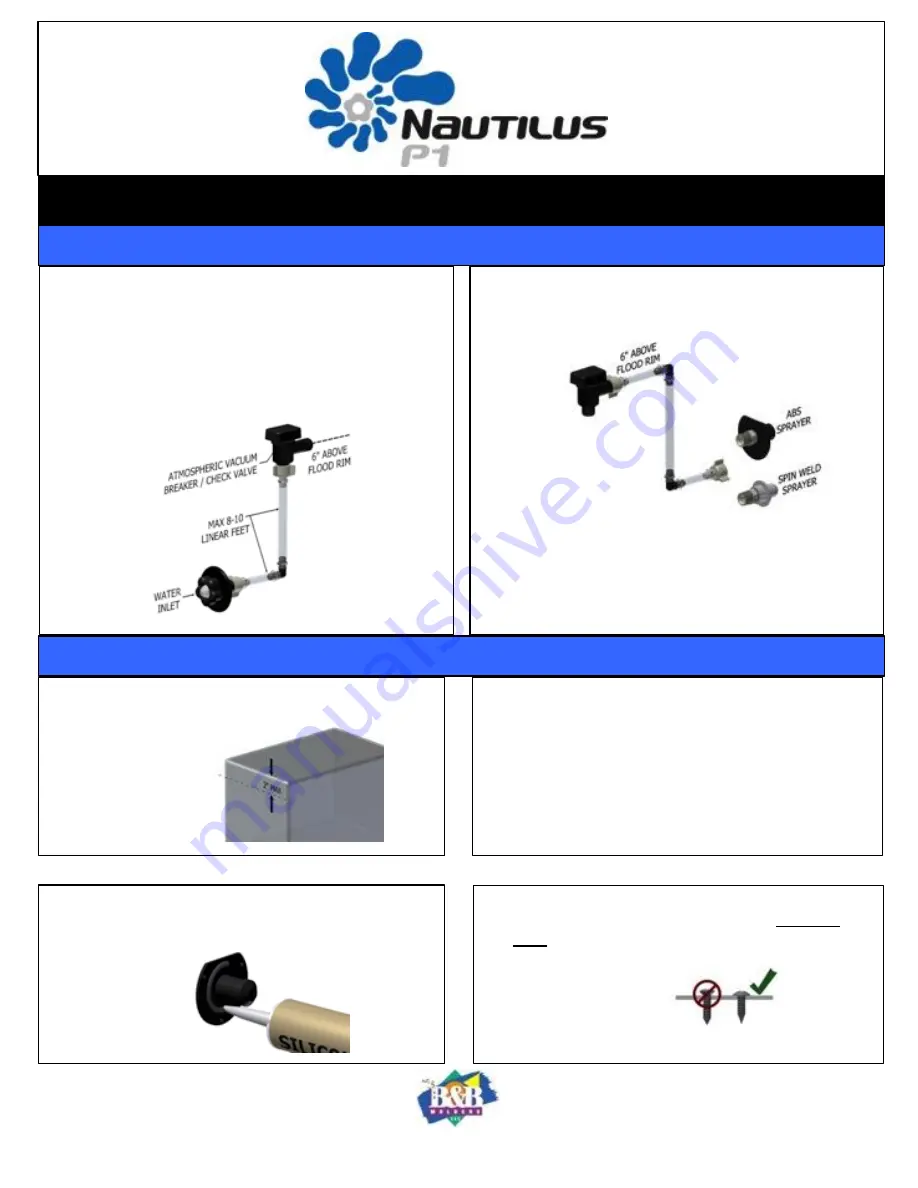
1. Drill a 1" hole on end or side of waste holding
tank,
NOT TO EXCEED 2" BELOW TOP
CENTER OF TANK.
3. Apply a generous bead of 100% silicone sealant
(do not substitute) to inside flange of black
sprayer device.
4. Orientate black sprayer device with "top" facing
up & fasten to tank using (3) #8 x ½ stainless
steel screws.
DO NOT USE COUNTERSINK
HEADED SCREWS DUE TO POTENTIAL
CRACKING.
2. Insert desired ½" x ½" MPT fitting into threaded
female connection of sprayer device, then
tighten. Avoid excessive torque as this will
cause stress & may result in cracking sprayer
threads. If necessary, Teflon Tape may be used.
Common thread sealants should never be used!
Let silicone sealant properly cure before testing.
58471 Fir Road, Mishawaka, IN 46544
Phone: (574) 259-7838 Fax: (574) 259-7939
www.bandbmolders.com
Page 14 of 15
INSTALLATION INSTRUCTIONS
INSTALLATION INSTRUCTIONS
Summary of Contents for Nautilus P1
Page 1: ......


