Revision 2 December 2013
2.0 INSTALLATION
2.1 INSTALL FIRST BRACKET
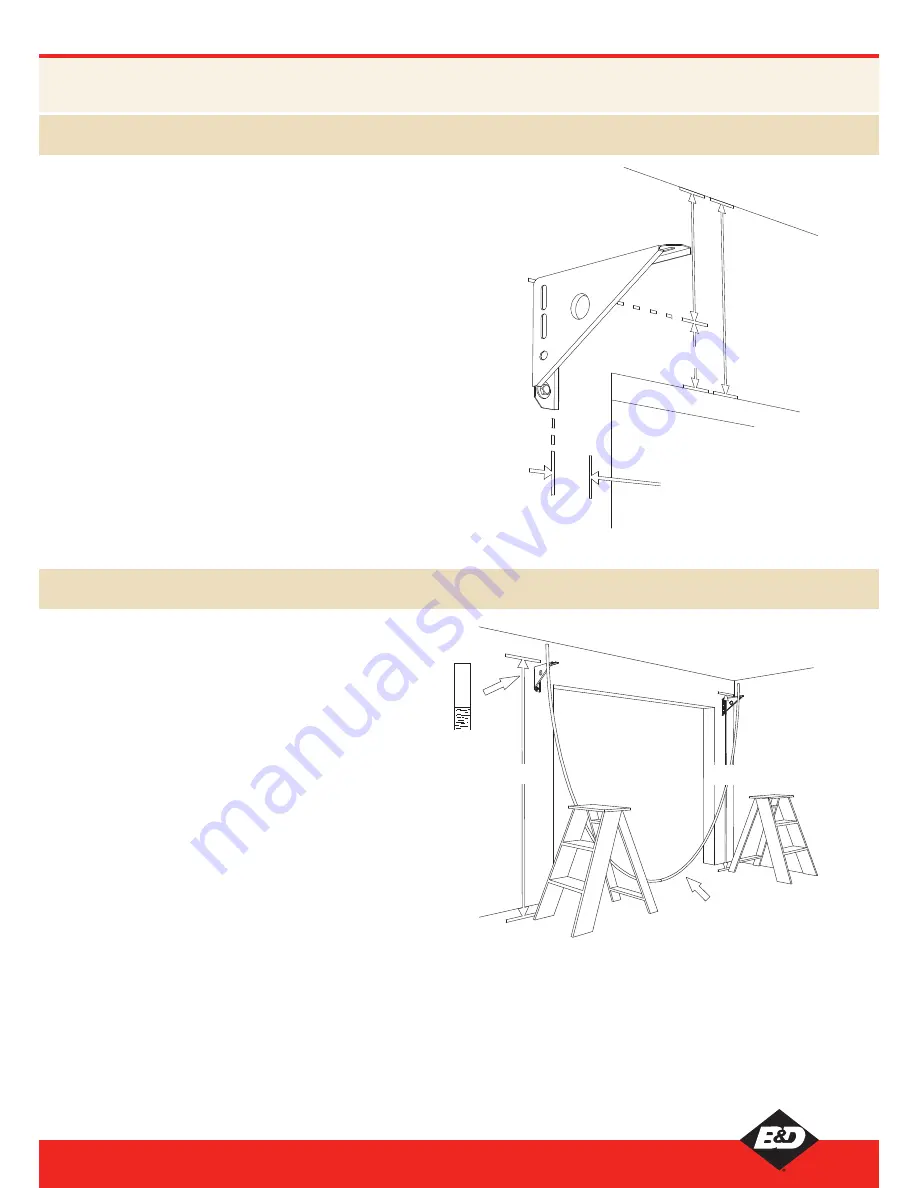
a)
Measure the door
curtain width and mark where edge of the curtain will
be, allowing for over lap on each side of the opening.
b)
Add clearance
of 35 to 75mm from edge of curtain to inside edge
of bracket to determine positioning of the bracket. Also check this
clearance if an opener is being fitted.
c)
Normal Headroom
(350mm for doors up to 2200mm high, 370mm for
doors over 2200mm high). Measure up 120mm from underside of the
head. If the head is not level, measure up from the lowest side first.
Restricted Headroom
(315mm for doors up to 2200mm high, 335mm
for doors over 2200mm high). Measure down 230mm (or 250mm if
door is over 2200mm high) from roof or lowest obstruction to the top of
the bracket. (Bracket should be between 85mm and 100mm up from
the lintel).
NOTE:
Restricted headroom is not recommended for doors fitted with
an opener.
d) Mark two hole positions using top and bottom slots of the bracket.
e) Drill both holes, then attach bracket using 2x100xM10 Anchor screws
or equivalent or three 22mm 14-20 Tek screws to each bracket. Ensure
large diameter washers are used.
120mm
40
-
7
5m
m
Line for Edge of Door Curtain
(Check this measurement if an
opener is to be fitted)
230mm Restricted or
250mm Normal Headroom
315mm Restricted or
350mm Normal
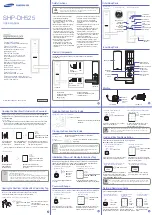
2.2 INSTALL SECOND BRACKET
Centering Axle
(a)
(b)
BOTTOM RAIL AT 3 O’CLOCK
Axle “Floats” in
either direction
EQUAL
WATER LEVEL
EQUAL
HOSE
a) Using a water level mark the position for the second
bracket.
NOTE:
The brackets must be perfectly level
for the door to operate.
b) Re-check levels then drill and fix as with first bracket.
7
Series 1 Windrated Installation Instructions


