32
33
UK
UK
DCD
DCD
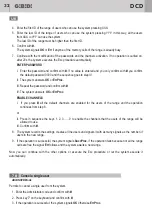
4. Enter the first ID of the range of users who can use the system pressing XXX.
5. Enter the last ID of the range of users who can use the system pressing YYY. In this way, all the users
from XXX to YYY can use the system.
The last ID of the range must be higher than the first ID.
6. Confirm with
#
.
The system signals
OK
or
Err
if anyone of the memory cells of the range is already busy.
7. Continue with the modification of the passwords and the channels activation. If no operation is carried on,
after 20 s the system executes the Esc procedure automatically.
ENTER PASSWORD
I. Enter the password and confirm with
#
. If no value is entered and you only confirm with
#
you confirm
the default password 0000 and the sequence goes to step IV.
II. The system answers
OK
or
ErrProc
.
III. Repeat the password and confirm with
#
.
IV.
.
ENABLE CHANNELS
I. If you press
#
all the default channels are enabled for the users of the range and the operation
continues from step 8.
or
II. Press in sequence the keys 1, 2, 3, ..., 9 to enable the channels that the users of the range will be
allowed to use.
III. Confirm with
#
.
8. The system records the settings, creates all the users and signals it with as many signals as the number uf
users in the new range.
9. If the operation is successful, the system signals
SuccProc
, if the operation fails because not all the range
cells are free the signal
Err
follows and the system awaits a new range.
Now you can continue with the other options or execute the Esc procedure or let the system execute it
automatically.
The system answers
OK
or
ErrProc
7 #
Cancel a single user
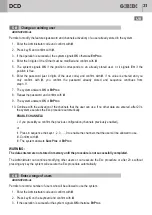
Permits to cancel a single user from the system.
1. Enter the Administrator code and confirm with
#
.
2. Press key
7
on the keyboard and confirm with
#
.
3. If the operation is successful, the system signals
OK
otherwise
ErrProc
.
ADVANCED Mode
4. Enter XXX, where XXX is the ID user to be erased and confirm with
#
. If you enter 000 followed by the
operation is not executed, the system signals
Err
and the procedure starts again from step 4.
5. If the operation is successful, the system signals
SuccProc
, otherwise
ErrProc
.
The Administrator can continue cancelling other users or can execute the Esc procedure or can wait that the
system executes it automatically.
#
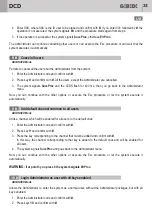
Permits to cancel all the users but the Administrator from the system.
1. Enter the Administrator code and confirm with
#
.
2. Press key
8
and confirm with
#
. All the users, except the Administrator, are cancelled.
3. The system signals
SuccProc
and the LEDS flash for 400 ms, then you go back to the Administrator
menu.
Now you can continue with the other options or execute the Esc procedure or let the system execute it
automatically.
Adds a channel, which will be enabled for all users, to the default ones.
1. Enter the Administrator code and confirm with
#
.
2. Press key
9
and confirm with
#
.
3. Press the key corresponding to the channel that must be added and confirm with
#
.
In this way, the channel corresponding to that key is added to the default ones and will be enabled for
all users.
4. The system signals
SuccProc
and goes back to the Administrator menu.
Now you can continue with the other options or execute the Esc procedure or let the system execute it
automatically.
WARNING:
if at point 3 you press 0 the system signals ErrProc.
Allows the Administrator to enter the system as a normal user, without the Administrator privileges, but with all
keys enabled.
1. Enter the Administrator code and confirm with
#
.
2. Press keys
10
and confirm with
#
.
8 #
Cancel all users
9 #
Add default channel common to all users
10 #
Login Administrator as user with all keys enabled
ADVANCED Mode
ADVANCED Mode
ADVANCED Mode
Summary of Contents for GiBiDi DCD 100
Page 5: ...INSTALLAZIONE 5 I DCD...
Page 23: ...INSTALLATION 23 UK DCD...
Page 38: ...38 NOTE NOTES DCD...
Page 39: ...39 NOTE NOTES DCD...

