Step 1 - Creating, Naming and Arranging Devices
Before beginning, you should have powered up a CK1.1 or CK1.2, connected it to the serial port of your PC, closed
any other open Windows applications that use the serial port, opened CKEditor via the B & K Task bar, started a
new file, used Save As to save the file with a new name. Now you are ready to create new Devices for each of the
remote controls you intend to replace.
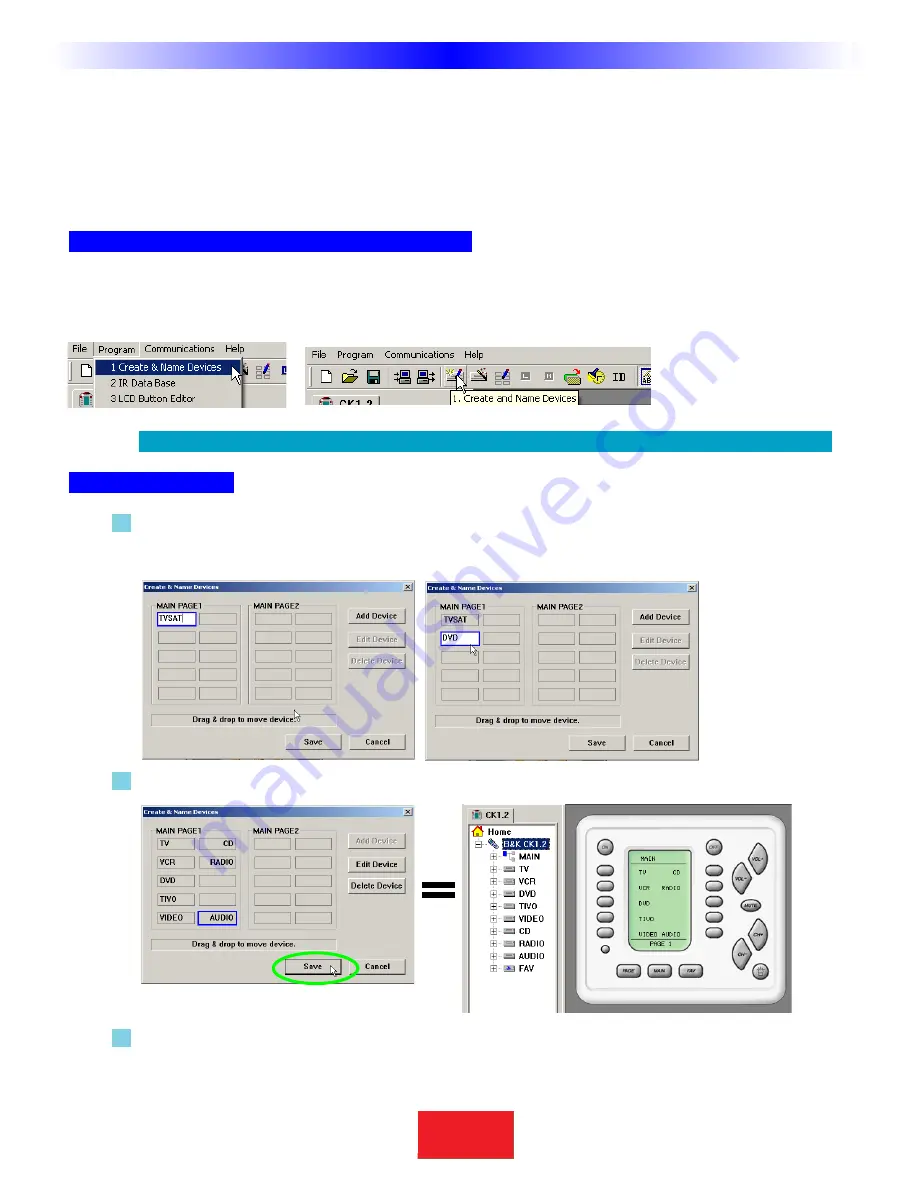
Open the Create and Name Devices Window
You can open the Create and Name Devices window by clicking on the first item of the Program Menu or by clicking
on the Toolbar icon as shown here.
TIP - Hover the mouse over the Toolbar buttons and a pop-up label identifies it!
Creating Devices
1
Click on the position you would like to create a new device in.Type the new name and hit either the
ENTER or the TAB key on your keyboard, then type another name in. If you wish to leave a position blank,
simply TAB past it.
2
You must hit the SAVE button to create all the new devices in the order you selected.
3
Tree View reveals the new devices you’ve created and the simulator shows the new MAIN MENU LCD
button names.
13
Type in Section Title
S
B
I M P LY
E T T E R !
B K
&
T
H
E
B
&
K
A
U
T
O
M
A
T
E
D
H
O
U
S
E
Programming Tutorial


