Installation and wiring
Automation Panel 5000 User's manual V2.11
149
5.5.2 Installing the 5ACCFL00.0000-000 rotary flange
The following requirements must be met:
•
All connected cables must be disconnected.
•
The Automation Panel must no longer be installed on the VESA or swing arm system.
1. Disconnect the power supply cable to the Automation Panel (disconnect the power cable!). Disconnect from
all sources and poles!
2. Carry out electrostatic discharge at the ground connection.
3. Place the Automation Panel on a clean, flat surface.
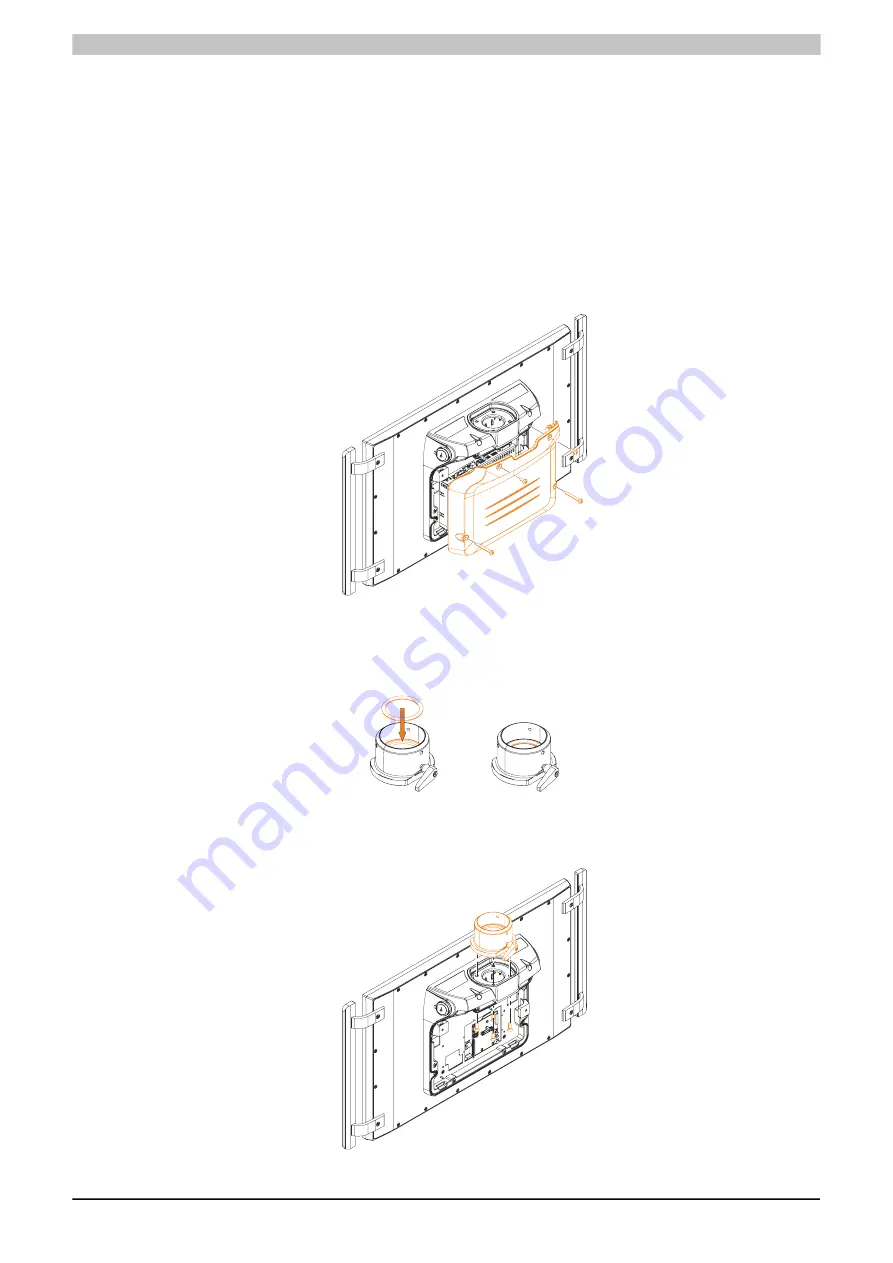
4. Remove the Torx screws (T25) indicated in the following figure. Insert a flat-blade screwdriver into the slot
from the side and remove the cover. Avoid causing irreparable damage to the gasket.
5. The link module must be removed before the rotary flange can be installed. To do so, perform the steps
provided in section
"Removing the link module" on page 147
in reverse order.
6. Check whether the sealing ring is inserted in the rotary flange. If the sealing ring is not installed in the rotary
flange, it must be inserted into the sealing recess.
7. Place the rotary flange in the intended opening on the mounting unit with the locking lever pointing towards
the mounting unit. Fasten it to the mounting unit using the 4 provided Torx screws (T30) with a tightening
torque of 7.2 Nm.


