background image

www.banggood.com

http://www.banggood.com/Large-Screen-Remote-Clock-Electronic-DIY-Kit-Aluminum-Cover-p-976385.html

flashing ON (on) or OF (off), will switch by the plus or minus key. If you choose OF (off), then press the "main button"
directly into the Error Correction submenu. If you choose 0N (on), then press the "main button" to enter the 5-way alarm
setting, to channel 1 alarm for example. Display C1, the other two position flashing ON (on) or OF (off), on and off the
setting as above, if the press OF (off), then press the "main button" directly into the second channel alarm ON (open) or OF
(off) choice; if yes 0N (on), then press the "main button" to enter the hours and minutes, the settings are consistent with the
method and adjust the time setting is completed and then press the "main button" entry 2-way alarm setting, the first 5-way
alarm settings and then press "main button" entry error correction submenu.

3) Error Correction submenu: the first position shows N, after the other two position flashing ON (open amended) or OF
(closed amendments), switch by the plus or minus key, if you choose OF (closed Amendment), then press the "main button"
then go back to normal working interface; If you select ON (open correction), then press the "main button" entry correction
parameter setting interface, the behind two position displays 01 flashes, means one day (the range of days can switch
between 1-999 days by plus or minus keys), (it can be between -50 seconds to 50 seconds after the number of days selected
number of seconds and then press the "main button" Save settings screen to enter the number of seconds after the two
displays 00 flicker, representing 0 seconds by plus or minus keys to choose, there is a negative sign indicates X minus Y
second day, no negative sign indicates X days plus Y seconds), press the "main button" returned to normal travel time
interface.

B. Key shortcut functions:
1) Under normal working time interface press the "off" to turn off or turn on the digital display.
2) Under normal working time interface press "switch" to switch between hour-minute interface and minute-second
interface.
3) Under normal working time interface press "Speed" to select the entire 5-way alarm on or off (display C, ON or OF),
then press "main button" entry chime on or off selection (display H, ON or OF), after selection press "main button" returned
to normal working time interface.
4) In the minutes and seconds interface to go when the screen displayed by the "time" to show SEC, then the second digits
flash, a few seconds after minute and second flash together, then press "time" again to zero seconds, finally , returns to the
minutes and seconds interface, you can check whether the second is correction precision or not.

Summary of Contents for ECL-132

Page 1: ...1F04E C1 R5 composition C4 C5 Y1 constitute a clock circuit 2 The infrared receiver circuit U4 is responsible for receiving the signal transmitted from the remote control after shaping amplified by an...

Page 2: ...parameter setting interface the behind two position displays 01 flashes means one day the range of days can switch between 1 999 days by plus or minus keys it can be between 50 seconds to 50 seconds a...

Page 3: ...148 C7 6P G N D 2 V C C 3 O U T 1 U 4 VS1738 5V 1A1 1A2 1A3 1A4 1F 1 1F 2 1F 3 1F 4 1F 5 1G 1 1G 2 1G 3 1G 4 1B1 1B2 1B3 1B4 1B5 1E1 1E2 1E5 1E3 1E4 1C1 1C2 1C3 1C4 1C5 1D 1 1D 2 1D 3 1D 4 RG RB RE RC...

Page 4: ...R1A1 R4G4 130 Crystal 32 768K Y2 1 330R blue yellow 220R red RA RDP 8 12M Y1 1 Pin 1 8P J2B J3B 2 SCM STC11F04E U1 1 LED 5mm 1A1 4G4 DP 132 IC DS1302 U2 1 Pillars M3 9 6 6 6 74HC138N U3 1 M3 15 6 6 IC...

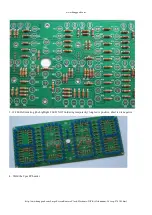
Page 5: ...banggood com Large Screen Remote Clock Electronic DIY Kit Aluminum Cover p 976385 html 3 124 LEDs Soldering the highlight 8 LED NOT Soldering temporarily long led is positive short led is negative 4...

Page 6: ...www banggood com http www banggood com Large Screen Remote Clock Electronic DIY Kit Aluminum Cover p 976385 html 5 Weld the 8 LEDs...

Page 7: ...www banggood com http www banggood com Large Screen Remote Clock Electronic DIY Kit Aluminum Cover p 976385 html 6 Main board install 1 8 Resistance with same values...

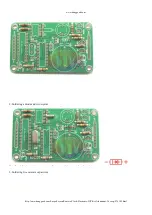
Page 8: ...www banggood com http www banggood com Large Screen Remote Clock Electronic DIY Kit Aluminum Cover p 976385 html 2 Soldering a diode and two crystal 3 Soldering five ceramic capacitors...

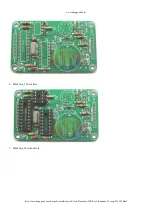
Page 9: ...www banggood com http www banggood com Large Screen Remote Clock Electronic DIY Kit Aluminum Cover p 976385 html 4 Soldering 3 IC sockets 5 Soldering five transistors...

Page 10: ...banggood com http www banggood com Large Screen Remote Clock Electronic DIY Kit Aluminum Cover p 976385 html 6 Soldering two electrolytic capacitors a buzzer and a battery holder 7 Soldering two 8P FE...

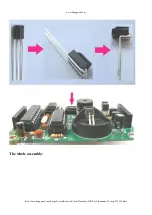
Page 11: ...www banggood com http www banggood com Large Screen Remote Clock Electronic DIY Kit Aluminum Cover p 976385 html 8 Install three manifold 9 Infrared receiver pin...

Page 12: ...www banggood com http www banggood com Large Screen Remote Clock Electronic DIY Kit Aluminum Cover p 976385 html The whole assembly...

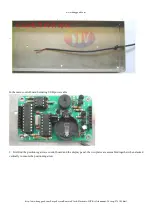
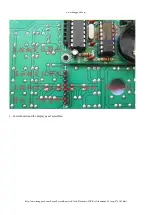
Page 13: ...Electronic DIY Kit Aluminum Cover p 976385 html In the main control board Soldering USB power cable 2 First find the positioning arrows control board and the display panel the two plates are assembled...

Page 14: ...www banggood com http www banggood com Large Screen Remote Clock Electronic DIY Kit Aluminum Cover p 976385 html 3 Control board and the display panel assembled...

Page 15: ...ttp www banggood com Large Screen Remote Clock Electronic DIY Kit Aluminum Cover p 976385 html 4 Then you can power it and observe if it can display 00 00 and then remove the main board and install th...

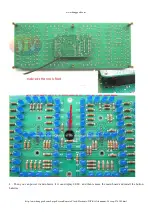
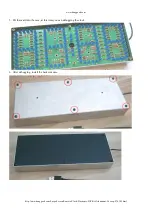
Page 16: ...com http www banggood com Large Screen Remote Clock Electronic DIY Kit Aluminum Cover p 976385 html 5 Put them all into the case at this time you can debugging the clock 6 After debugging install the...

Reviews: