4
96524 v.3.0
1.
Disconnect the negative (ground)
cable from the battery (if there is more
than one battery, disconnect both
negative cables). Secure the cable so
it cannot accidentally come in contact
with the post.
2.
Raise the vehicle and support it
securely with properly weight-rated
safety stands, ramps or a commercial
hoist. Take care to balance the vehicle
to prevent it from slipping or falling.
When using ramps, be sure the wheels
are centered squarely on the topsides.
Place the transmission in park
(automatic), set the parking brake and
securely block the wheels that are on
the ground.
CAUTION: DO NOT WORK UNDER
ANY VEHICLE SUPPORTED ONLY
BY A JACK. SEVERE INJURY MAY
RESULT.
3.
For 2008 Ford 6.8L Models
, from
under the vehicle remove the factory
exhaust starting at the front of the
muffler. Remove the factory muffler
and tailpipe assembly by removing the
factory band clamp on the muffler to
intermediate pipe connection.
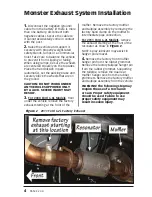
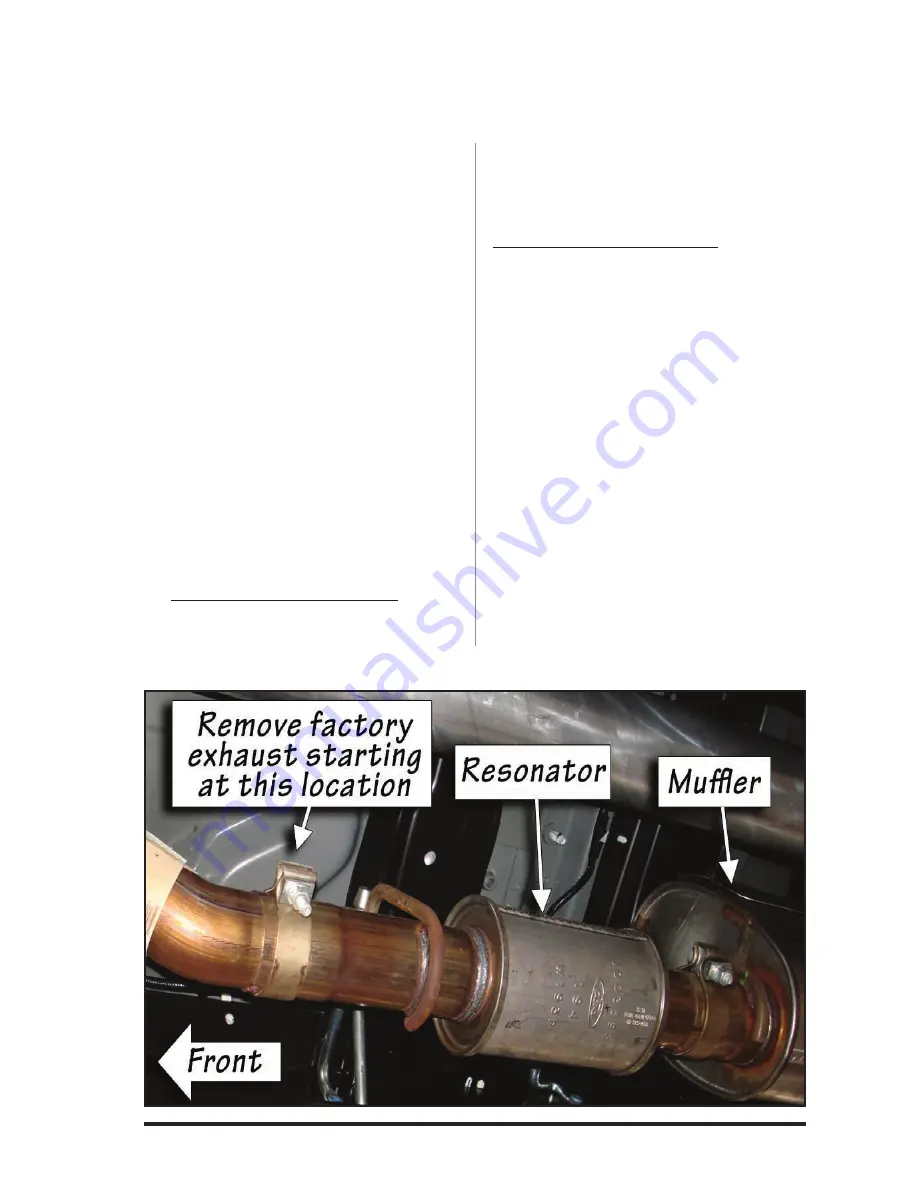
For 2011 Ford 6.2L Models
, remove
the exhaust starting at the front of the
resonator as show in
Figure 2
.
NOTE: Spray lubricant may assist in
hanger pin removal.
4.
Remove the factory front muffler
hanger pin from the rubber grommet.
Remove the factory tailpipe hanger pin
from the rubber grommet. Supporting
the tailpipe, remove the dual rear
muffler hanger pins from the rubber
grommets. Remove the factory muffler
and tailpipe assembly from the vehicle.
WARNING! The following step may
require the use of a torch and/
or saw. Proper safety equipment
should be used. Failure to use
proper safety equipment may
result in severe injury.
Monster Exhaust System Installation
Figure 2
2011 Ford 6.2L Factory Exhaust
Summary of Contents for Monster
Page 6: ...6 96524 v 3 0 Figure 4...

