8.
Turn the SPEED CONTROL knob far enough to allow the rollers to sufficiently pull the poster board into
the laminator. Keep in mind that varying films, media, and temperatures will require different speeds.
9. Feed the poster board between the rollers.
10. After the laminator is properly threaded and the poster board has exited the rear of the laminator,
make any necessary adjustments.
11. Attach film clip to exit of the rear of the lamination in center. This will help the film exit laminator
properly. Please see Figure 3 below.
Mandrel Tension Adjustment:
Mandrel tension must be set correctly to ensure good lamination quality. Adjust the tension by turning the
brake nut at the end of each mandrel.
To increase the tension, turn the brake nut clockwise. To decrease the tension, turn the brake nut counter-
clockwise. Adjust only 1/8 of a turn between tests. Use the minimum amount of tension necessary to achieve
good results. (See Section X Troubleshooting for possible tension adjustment problems).
V. Thermal Laminating...
1. Be sure all laminator parts (i.e. safety shield, feed table, etc.) are in their proper positions and the laminat-
ing film is loaded correctly (See page 3 for film loading instructions).
2. Set the temperatures according to the film manufacturer’s recommendations for the film you have chosen.
A low-melt film is recommended for inkjet prints. Keep in mind that the temperature at which you will laminate
will vary with different medias and laminating speeds. See the chart below for approximate temperature
ranges. The laminator will take approximately 10-15 minutes to reach operating temperature. The tempera-
tures will be indicated on the LCD displays.
3 mil DIGIKote™
190°-210°F
5 mil DIGIKote™
220°-230°F
10 mil DIGIKote™
225°-235°F
3. Turn the MOTOR switch ON and perform a test lamination to ensure proper settings for successful lamina-
tion. Watch film as it exits the rollers so it doesn’t wrap around the rollers. It might be helpful to hold the film
at first when starting a lamination run. If any adjustments are necessary make them now and run another
test. Repeat this step until you obtain desired results.
4. Allow the Entry 4500 to run a small amount of film before feeding the print into the laminator to avoid a
dwell line across your print. Feed the print slowly and evenly, smoothing it as the rollers pull it through.
5. You may laminate subsequent prints now, leaving ample space between each print for trimming.
6. Once your last print has completely exited the laminator, turn the MOTOR switch OFF.
5
Summary of Contents for BA-EN45
Page 1: ...OPERATING INSTRUCTIONS ENTRY 4500 Model No BA EN45 Banner American Products Inc Temecula CA...
Page 2: ...CAUTION TO AVOID ANY DAMAGE PLEASE DO NOT USE RAZORS OR SHARP OBJECTS NEAR THE ROLLERS...
Page 4: ...Entry 4500 BA EN45 Mandrel...
Page 9: ...Rewind Option for Pressure Sensitive Laminating...
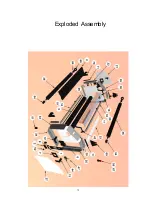
Page 17: ...Exploded Assembly 13...


