2. Click on any tab at the top of page to log into the configuration software.
3. Enter system as the user name and admin as the password.
After making your changes and saving the file, close the browser to log out of the configuration system.
Changing the IP Address
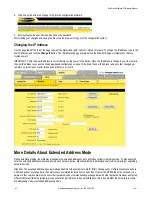
Use the page tabs at the top of the page to select the hierarchical path: System > Setup > Network. To change the IP address, type in the
new IP address and click the Change IP button. The IP address change activates when the Ethernet Bridge or GatewayPro reboots
(cycles power).
IMPORTANT: Verify the new IP address is correct before cycling power to the device. Once the IP address is changed, you must enter in
the new IP address to access the Web page-based configuration screens. Write down the new IP address (and any other changed pa-
rameters on this screen) or print this page and file for your record.
More Details About Extended Address Mode
During automatic binding, the Gateway broadcasts the extended address code to all Nodes currently in binding mode. To manually bind,
enter the extended address code manually into each network device. Manually binding is particularly useful when replacing or upgrading
network devices.
Important: The extended addressing code is independent from the system network ID (NID). Consequently, multiple networks can share
a NID and will not exchange data; the networks are completely isolated from one another. Users of the DX80 product do not need to be
aware of other nearby networks to ensure their network does not unintentionally exchange data with other networks. However, assigning
different NIDs to different networks improves collocation performance in dense installations; this is true whether the network is in stand-
ard addressing mode or extended addressing mode.
SureCross Wireless I/O Network Manual
42
www.bannerengineering.com - tel: 763-544-3164
rev. I

