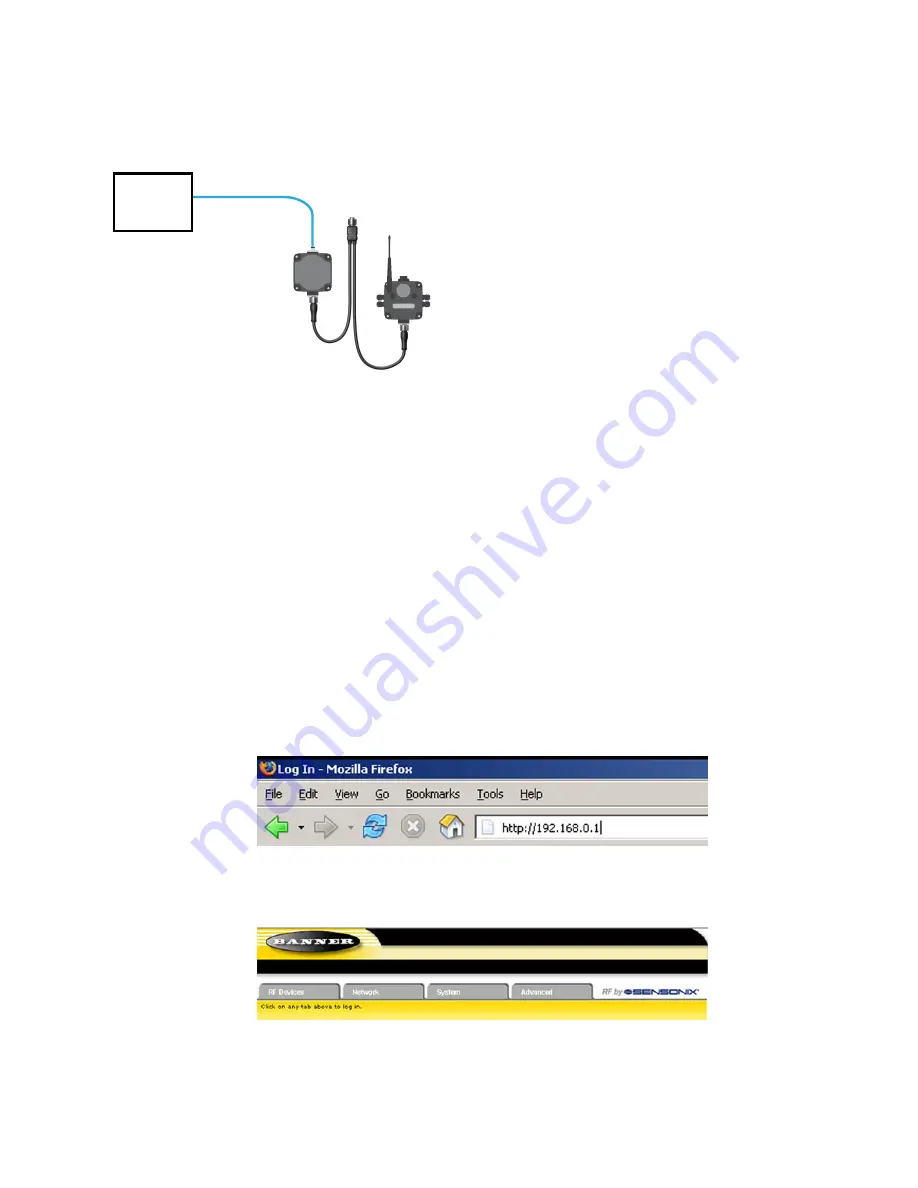
Example Layout #3—This example system layout may also be configured using the web pages. Instead of using a
GatewayPro to connect to the host system, a Gateway and Ethernet Bridge is used to achieve the same function. In this
configuration, the Gateway is Modbus Slave 1.
Host
1
2
3
4
5
1. Ethernet crossover cable using the Modbus/TCP or
EtherNet/IP communication protocol
2. Power connection
3. DX83 Ethernet Bridge
4. Splitter cable CSRB-M1250M125.47M125.73 using
Modbus RTU
5. Gateway
Typically, the Modbus RTU connection at a GatewayPro is not used because the GatewayPro contains a master and slave
device. The Modbus RTU factory default settings for a standard Gateway are: 19200 baud; 8 data bits; No stop bits; 1 parity
bit; Modbus Slave ID 1.
5.2.1 Accessing the Web-based Configuration Screens
The configuration Web pages are served from the DX83 Ethernet Bridge or GatewayPro and are accessed using any
Internet browser.
Before accessing the Web-based configuration screens, configure the browser for a direct connection to the Internet. If you
are experiencing problems connecting, verify the browser is not set to use a proxy server. Use a crossover Ethernet cable
when connecting directly from a host computer to the DX83 Ethernet Bridge or GatewayPro; use a standard Ethernet cable
when connecting through a switch or Ethernet hub.
The factory default IP address for the DX83 Ethernet Bridge or GatewayPro is: 192.168.0.1 To change the default IP
address, set up the host PC with an IP address different from the Ethernet Bridge or GatewayPro IP addresses. (Refer to
Banner document p/n 133116 for detailed instructions on setting up the host computer’s network IP address.) For example,
change the PC host IP address to: 192.168.0.2. To access the configuration screens, follow these steps.
1. Open a Web browser and log into the Ethernet Bridge or GatewayPro by typing the IP address in the browser
location window: http://192.168.0.1.
The Web home page for the Ethernet Bridge or GatewayPro displays.
2. Click on any tab at the top of page to log into the configuration software.
3. Enter
system
as the user name and
admin
as the password.
After making your changes and saving the file, close the browser to log out of the configuration system.
Sure Cross
®
Performance DX80 Wireless I/O Networks
38
www.bannerengineering.com - Tel: + 1 888 373 6767


