background image

Baofeng   UV-­‐5R   Programming   

Basics   of   ge4ng   your   low-­‐cost   

handheld   radio   func<onal   

Summary of Contents for UV-5R Series

Page 1: ...Baofeng UV 5R Programming Basics of ge4ng your low cost handheld radio func onal ...

Page 2: ...ater Input Frequency YOUR Transmit Repeater OFFSET Direc on Plus or Minus Repeater OFFSET Amount Test ques on CTCSS sub audible Tone required Place all the above in a memory for future access Non Chinese radios usually figure this out for you based on offset direc on and amount ...

Page 3: ...Overall Radio Parameters and Keypad Basics Up and Down Select Dnelec VFO Memory select Display Select Upper vs Lower Exit Set MENU Key ...

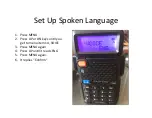
Page 4: ...Set Up Spoken Language 1 Press MENU 2 Press UP or DN keys un l you get to menu item 14 VOICE 3 Press MENU again 4 Press UP un l it reads ENG 5 Press MENU again 6 It replies Confirm ...

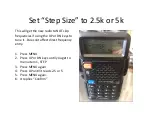
Page 5: ...o NOT skip frequencies if using the UP or DN keys to tune it Does not affect direct frequency entry 1 Press MENU 2 Press UP or DN keys un l you get to menu item 1 STEP 3 Press MENU again 4 Press UP un l it reads 2 5 or 5 5 Press MENU again 6 It replies Confirm ...

Page 6: ...efore programming a channel 1 Press MENU 2 Press UP or DN keys un l you get to menu item 33 BAND 3 Alterna ve enter 3 3 on keypad 4 Press MENU again 5 Press UP un l it reads UHF if channel is in 70cm band or VHF if in 2 meter band 6 Press MENU again 7 It replies Confirm ...

Page 7: ...l Set power level 1 Press MENU 2 Press UP or DN keys un l you get to menu item 2 TXP 3 Alterna ve enter 2 on keypad 4 Press MENU again 5 Press UP to toggle between HIGH and LOW 6 Press MENU again 7 It replies Confirm ...

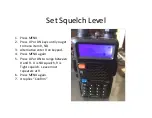
Page 8: ...s UP or DN keys un l you get to menu item 0 SQL 3 Alterna ve enter 0 on keypad 4 Press MENU again 5 Press UP or DN to range between 0 and 9 0 is NO squelch 9 is Tight squelch Leave most repeaters at 9 6 Press MENU again 7 It replies Confirm ...

Page 9: ...un l voice says Frequency Mode 2 Press A B un l the cursor is on the TOP display row 3 Triangular cursor MUST be here to program the radio 4 Enter the frequency with the keypad M M M K K K no enter and no decimal point If you screw up just re enter it ...

Page 10: ...APA 14 repeater with OUTPUT frequency of 446 580 I just entered 4 4 6 5 8 0 on the keypad The lower row is irrelevant here For the benefit of the new students the OUTPUT frequency is the frequency the repeater TRANSMITS on and your radio RECEIVES on ...

Page 11: ...cy Offset 1 Press MENU 2 Press UP or DN keys un l you get to menu item 25 SFT D 3 Alterna ve enter 2 5 on keypad 4 Press MENU again 5 Press UP un l it reads either or OFF OFF for Simplex channels 6 Press MENU again 7 It replies Confirm ...

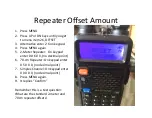
Page 12: ...4 Press MENU again 5 2 Meter Repeater On keypad enter 0 0 6 0 0 no decimal point 6 70 cm Repeater On keypad enter 0 5 0 0 0 no decimal point 7 Simplex Channel On keypad enter 0 0 0 0 0 no decimal point 8 Press MENU again 9 It replies Confirm Remember this is a test ques on What are the standard 2 meter and 70cm repeater offsets ...

Page 13: ...pad 4 Press MENU again 5 Press UP un l the correct CTCSS tone for your repeater is displayed For simplex channels you usually leave it to OFF 6 Press MENU again 7 It replies Confirm Note Missing or incorrect CTCSS selec on is the leading cause with new hams frustra on with not accessing repeaters that are heard with strong signals ...

Page 14: ...peater right now assuming your radio is within range that s if the repeater is coming in crystal clear on receive If no repeater access step outside and try it again Walls aqenuate signals If successful do we want to do all this for each repeater I think not Please con nue ...

Page 15: ...utput and input frequencies require their own programming steps Other rigs deduce the input frequency by automa cally subtrac ng or adding the offset frequency to the output receive frequency Baofengs DO NOT LIKE overwri ng memory channels that have already been programmed ...

Page 16: ...nu item 28 DEL CH 3 Alterna ve enter 2 8 on keypad 4 Press MENU again 5 Press UP or DN un l it gets to the channel you want to delete 6 Note Used channels are displayed as CH XXX Vacant channels are displayed as simply XXX NO CH 7 If the channel is vacant just press the EXIT key and note the channel number that you want to use 8 Press MENU again 9 It replies Confirm ...

Page 17: ...enu item 27 MEM CH 3 Alterna ve enter 2 7 on keypad 4 Press MENU again 5 Press UP or DN un l it displays the desired channel If you see CH preceding the channel number then the channel must be deleted first last step 6 Press MENU again 7 It replies Receive Memory 8 Press the EXIT buqon ...

Page 18: ...ntered 4 4 1 5 8 0 on the keypad The lower row is irrelevant here For the benefit of the new students the INPUT frequency is the frequency the repeater RECEIVES on and your radio RECEIVES on You must CALCULATE your INPUT frequency by manually adding or subtrac ng either 0 6 MHz for 2 meters or 5 0 MHz for 70cm ...

Page 19: ...terna ve enter 2 7 on keypad 4 Press MENU again 5 If you did this in proper sequence the channel number should already be correct 6 Press MENU again 7 It replies Transmit Memory 8 Press the EXIT key 9 Press VFO MR Upper row should display CH YourChannel 10 Test the repeater again If you did it right the channel should func on ...

Page 20: ... if not changed like squelch CTCSS tone and power level Recalling a memory may change the parameters Many users use computer souware to set up and manage radios Much easier but you might expect to experience Windows DLL HELL device driver madness and other quirks and foibles of Chinese Windows unfriendly USB to Serial port interface chips ...

Reviews: