17
PIANI AD INCASSO
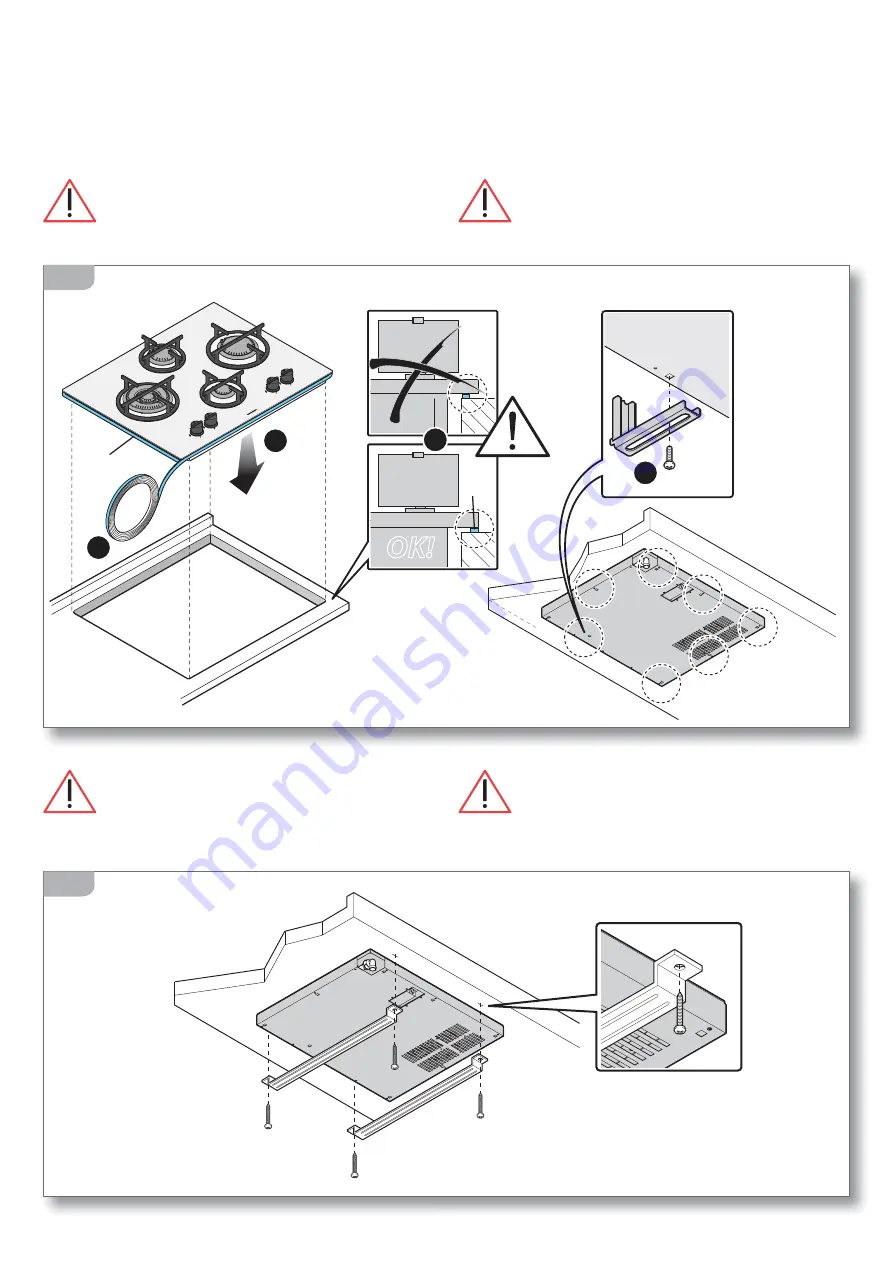
Mettere sotto il piano cottura una striscia di guarni-
zione in spugna
(fig. 10A - part. 1)
.
Successivamente sistemare l’apparecchiatura sopra
il foro di incasso
(fig. 10A - part. 2)
bloccandola con
le viti e le staffe date in dotazione
(fig. 10A - part. 3)
.
Nelle realizzazioni fuoriserie il sistema di
fissaggio è personalizzato.
Per i modelli in vetro ceramica, installare le
staffe in dotazione (fig. 10B) per prevenire la caduta
del piano in caso di rottura del vetro.
EMBEDDED SURFACES
Place a protective sponge sealant under the hob (figure
10A - part 1).
Subsequently, arrange the appliance above the embed-
ded hole
(figure 10A - part 2)
secure it using the screws
and brackets provided
(figure 10A - part 3)
.
With custom made models, assembly is
personalised.
For Glass-Ceramic models, install the supplied
bracket strips (fig. 10B) in order to avoid the hob falling
down if the glass breaks.
2
1
G
3
G
OK!
1
10A
17
10B
Summary of Contents for 1PMD64
Page 30: ...Note...
Page 31: ......


