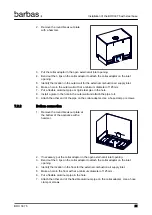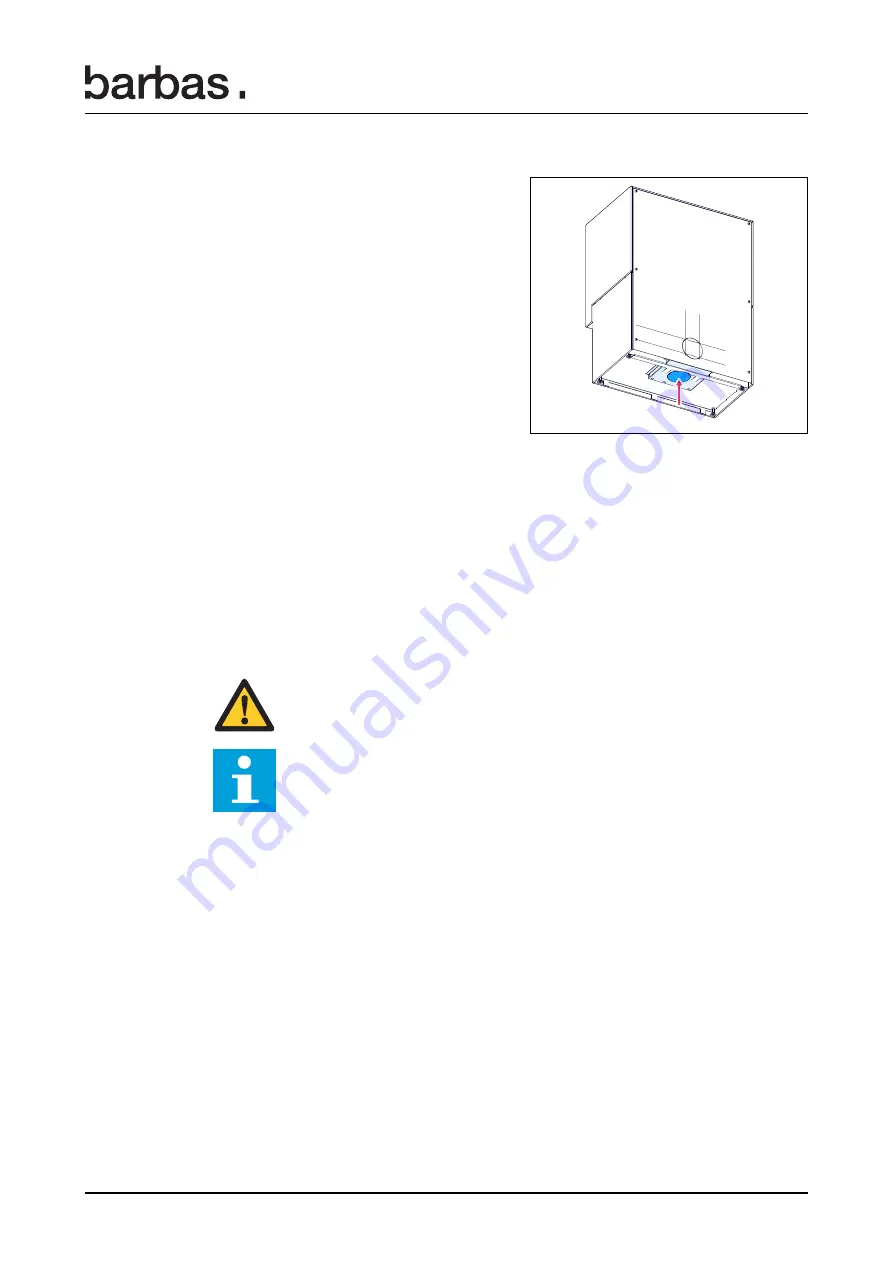
Bottom connection
1. Remove the round break out plate at
the bottom of the appliance with a
hammer.
2. If necessary, put the collar adaptor in the open external air inlet opening.
3. Bend out the 3 lips on the collar adaptor to attach the collar adaptor on the inlet
opening.
4. Identify the location in the floor for the external combustion air supply inlet.
5. Make a hole in the floor with at a minimum diameter of 125 mm.
6. Put a flexible aluminum pipe in the hole.
7. Attach the other end of the flexible aluminum pipe on the collar adapter. Use a hose
clamp or screws.
8.1.3
Connect the flue gas pipe
Caution: During operation of the appliance the outer side of the flue system
becomes hot. Refer to section
for minimum distances to flammable
material.
Note: If the appliance is installed on an unlined, masonry flue with a large
diameter, consider using a flue lining system to improve the performance of
the appliance.
1. Connect the flue to the flue gas connection on the appliance. If necessary use a steel
flue adaptor.
2. If the flue is connected to an existing (masonry) chimney, make sure that the gap
between the flue and the existing chimney is sealed with ceramic wool or any other
applicable component (ask your flue system supplier for advice)
3. Make sure that all mechanical connections of the flue system are correctly used.
4. Make sure that all of the flue system is gas-tight,
8.1.4
Final check on the appliance
1. Make sure the door closes and opens easy.
2. Make sure the control lever moves easy to left and right without undue noise.
3. Make sure the ceramic plate and the baffles are in the correct position.
Contact your dealer if the final check shows a defect.
Installation of the BOX30 75 with stone base
BOX 30 75
25
Summary of Contents for BOX30 75
Page 45: ...Warranty Terms BOX 30 75 45...
Page 46: ...Warranty Terms 46 BOX 30 75...
Page 47: ...Warranty Terms BOX 30 75 47...


