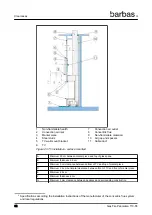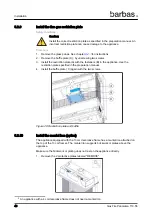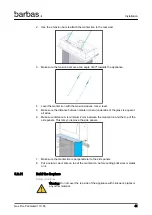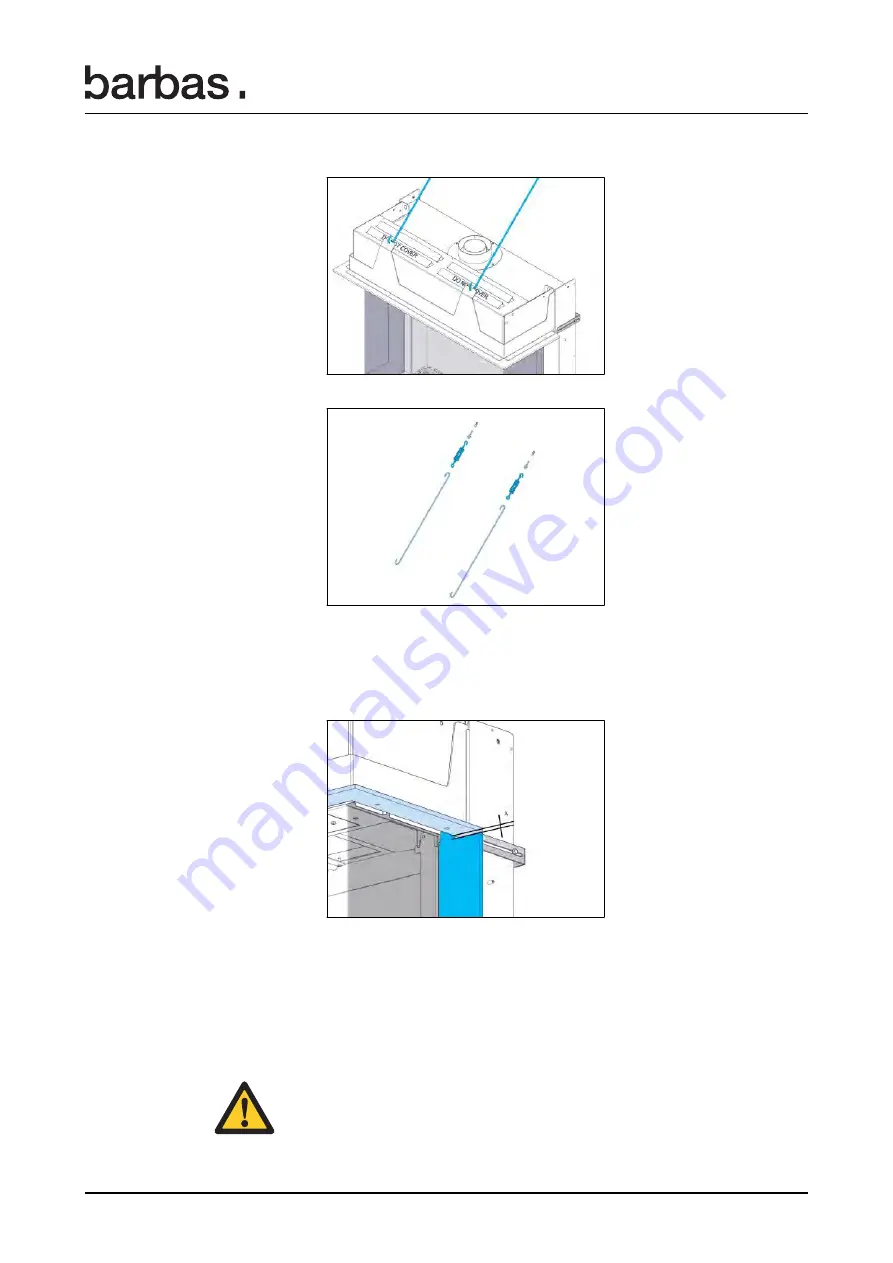
2. Use the 2 tension bars to attach the mantel iron to the rear wall.
3. Make sure the tension bars are at an angle of 60º towards the appliance.
4. Level the mantel iron with the tension sleeves. Use a level.
5. Make sure the distance between mantel iron and underside of the glass is equal at
all sides.
6. Make sure distance A is minimum 2 mm between the mantel iron and the top of the
side panels. This lets you remove the side panels.
7. Make sure the mantel iron is perpendicular to the side panels.
8. Put a ceramic wool strip on top of the mantel iron, before putting brickwork or plates
on it.
5.2.11
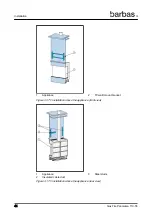
Build the fireplace
Safety conditions
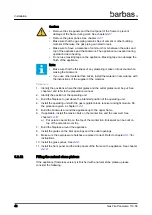
Warning: Do not cover the top side of the appliance with brickwork, plates or
any other material.
Installation
Gas Fire Panorama 110-55
41
Summary of Contents for Panorama 110-55 PF2
Page 1: ...Installation and maintenance manual Gas Fire Panorama 110 55 PF2 Serial number Production date...
Page 50: ...2 Remove the side panels and front panel Maintenance 50 Gas Fire Panorama 110 55...
Page 71: ...9 3 Gas Fire Panorama 110 55 PF2 with 4 cm frame Dimensions Gas Fire Panorama 110 55 71...
Page 73: ...9 5 Gas Fire Panorama 110 55 PF2 with 6 cm frame Dimensions Gas Fire Panorama 110 55 73...
Page 75: ...9 7 Gas Fire Panorama 110 55 PF2 with 10 cm frame Dimensions Gas Fire Panorama 110 55 75...
Page 78: ...9 10 Operating unit Dimensions 78 Gas Fire Panorama 110 55...
Page 81: ...11 EU Declaration of Conformity EU Declaration of Conformity Gas Fire Panorama 110 55 81...
Page 82: ...EU Declaration of Conformity 82 Gas Fire Panorama 110 55...
Page 83: ...EU Declaration of Conformity Gas Fire Panorama 110 55 83...


