www.barbecook.com
10
8 GETTING THE APPLIANCE READY
FOR USE
8.1 Before each use
Each time you use the appliance, make sure that:
•
The appliance is in an appropriate location. See “3.3 Select
an appropriate location”.
•
The gas hose does not drag on the ground and cannot
come into contact with a hot surface or with dripping fat.
•
The bowl is clean. We recommend cleaning the bowl after
each use. See “11.2 Cleaning the bowl”.
•
The burners and venturis are not blocked by insect nests or
spider webs. See “11.3 Cleaning the burners and venturis”.
•
The burners are assembled correctly. The venturis have to
be placed over the openings of the gas valves.
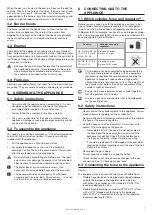
lf you want to be absolutely sure that your gas connection
is okay, you can check your appliance on gas leaks
before each use. See “7 Checking for gas leaks”.
8.2 Before first use (in a long time)
lf you use the appliance for the first time or for the first time
after a long period of non-use, you have to execute some extra
checks:
•
Make sure that you have read, understood and checked all
the instructions in this manual (only before first use).
•
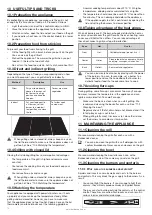
Check the appliance for gas leaks. See “7 Checking for gas
leaks”.
Also check for gas leaks if your appliance was assembled
by your dealer.
•
Clean the burners and venturis (only before first use in a
long time) . See “11.3 Cleaning the burners and venturis”.
•
Burn in the appliance before you put any food on it (only
before first use). See “8.3 Burning in the appliance”.
8.3 Burning in the appliance
By burning in the appliance before the first use, you remove
remaining manufacturing greases from the appliance. Proceed
as follows:
1.
Light the main burners and set their control knobs to HIGH.
See “9.2 Lighting the main burners”.
2.
Close the lid and let the appliance burn for 15 minutes. Do
not put any food on the grill yet.
3.
After 15 minutes, open the lid and let the appliance burn for
another 5 minutes (control knobs still set to HIGH).
4.
After 5 minutes, the appliance is ready for use. You can now
put food on the grill.
9 LIGHTING THE BURNERS
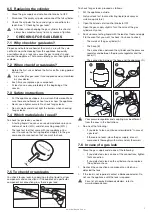
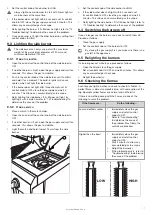
To light the burners with the electrical igniter, you have
to install an AA battery in the igniter. That battery is not
supplied with the appliance. You can find the battery case
of the igniter at the inside of the front panel of the right
side table.
9.1 Safety instructions
•
Before you light the appliance, execute all checks listed in
“8 Getting the appliance ready for use”.
•
Make sure the lid is always open when you light a burner .
•
Never bend directly over a burner when lighting it.
9.2 Lighting the main burners
9.2.1 u
sing
the
igniter
1.
Open the lid and set the control knobs of the main burners
to OFF.
2.
If no other burner is lit yet, open the gas supply and wait ten
seconds. This allows the gas to stabilize.
3.
Push in the control knob of one burner, set it to HIGH and
hold it for a moment. The build-in igniter will cause sparks,
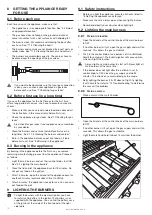
which will light the burner.
Always light one main burner to start with. Never light all
main burners at the same time.
4.
If the burner does not light after three attempts, set its
control knob to OFF, close the gas supply and wait 5
minutes. This allows any accumulated gas to escape.
5.
Retry lighting the burner. If it still does not light, try lighting
it with a match or refer to “14 Troubleshooting” to determine
the cause of the problem.
9.2.2 u
sing
A
mAtCh
1.
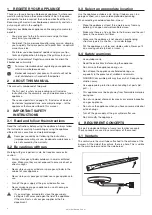
Place a match in the match holder.
2.
Open the lid and set the control knobs of the main burners
to OFF.
3.
lf no other burner is lit yet, open the gas supply and wait ten
seconds. This allows the gas to stabilize.
4.
Light the match and hold it about 13 mm from the burner.
Summary of Contents for SIESTA 412 BLACK EDITION
Page 4: ...www barbecook com 4...
Page 16: ...www barbecook com 16...
Page 29: ...www barbecook com 29...
Page 30: ...www barbecook com 30...
Page 44: ...www barbecook com 44...
Page 58: ...www barbecook com 58...
Page 71: ...www barbecook com 71...
Page 72: ...www barbecook com 72...
Page 86: ...www barbecook com 86...
Page 100: ...www barbecook com 100...
Page 114: ...www barbecook com 114...
Page 198: ...www barbecook com 198 Venturi Venturi...
Page 269: ...www barbecook com 269 12 2 13 13 1 13 2 0 92 0 85 14 n1 10 6 LOW OFF...
Page 270: ...www barbecook com 270 n1...
Page 295: ...www barbecook com 295 Illustrations...
Page 296: ...www barbecook com 296 x 10 x 4 x 24 x 8 x 2 x 6 x 2 x 1...
Page 299: ...www barbecook com 299 29 30 31 32 1x 1x 1x 1x 33 34 35 36 3x 1x 1x 2x 37 38 1x 1x...
Page 300: ...www barbecook com 300 1 2 9 8 3 6 7 2...
Page 301: ...www barbecook com 301 3 4 5 5...
Page 302: ...www barbecook com 302 5 6 10 6 x C 2 x C...
Page 303: ...www barbecook com 303 7 8 32 33 11 12 2 x C 2 x D 1 x H...
Page 304: ...www barbecook com 304 9 10 13 14 38 19 2 x C 6 x D 2 x G 8 x C...
Page 305: ...www barbecook com 305 11 12 4 36...
Page 306: ...www barbecook com 306 13 14 3 15 16 26 26 4 x B...
Page 307: ...www barbecook com 307 15 16 31...
Page 308: ...www barbecook com 308 17 18 21 21 20 4 x A 1...
Page 309: ...www barbecook com 309 19 20 2 x E 18 24 23...
Page 310: ...www barbecook com 310 21 22 17 1 x C 3 x A 3 x F...
Page 311: ...www barbecook com 311 23 24 3 x A 3 x F...
Page 313: ...www barbecook com 313 27 28 22 28 28 27 30 29...
Page 314: ...www barbecook com 314 29...

