Page
23
Assembly instructions (continued)
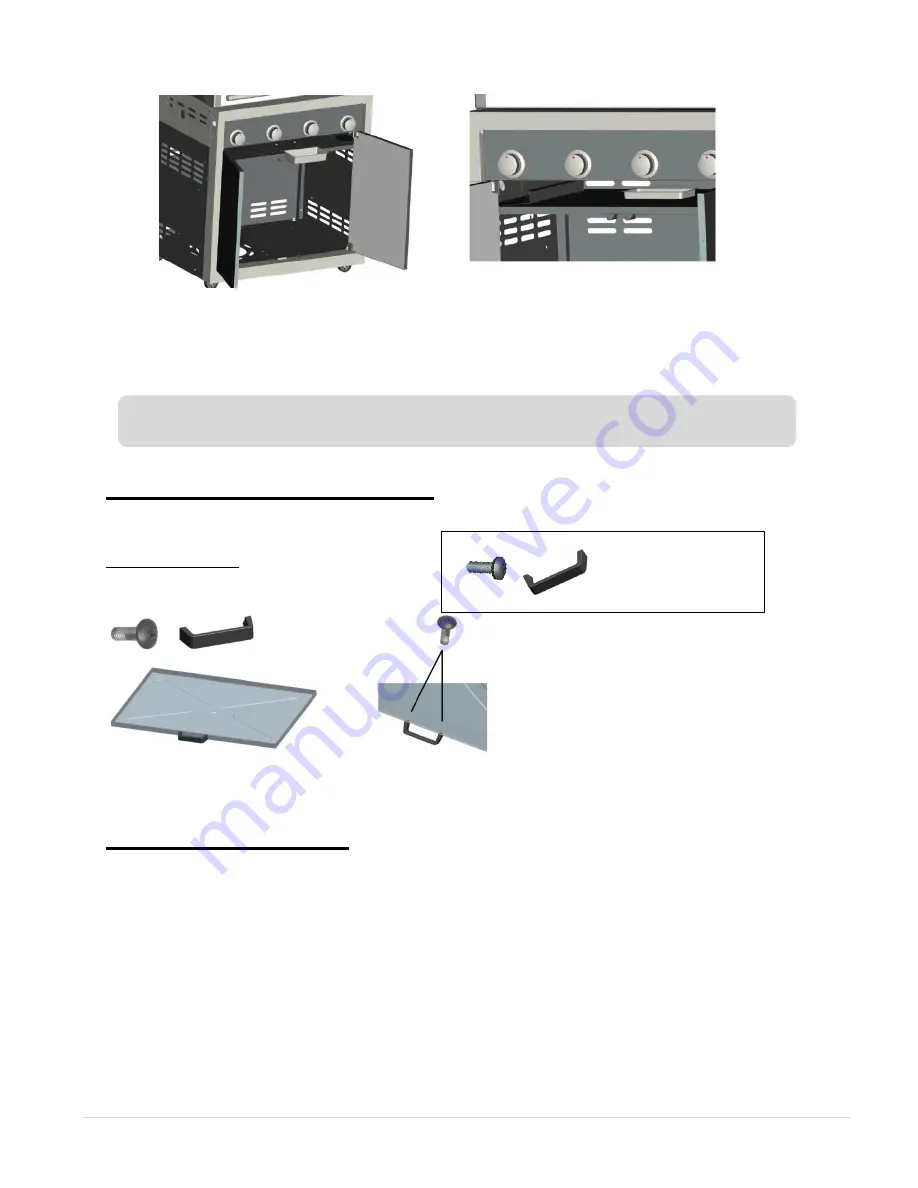
STEP 14 CART MODELS ONLY:
Attach the grease channelling tray
handle.
WHAT YOU NEED
2 x M4*10mm screws
1 x Grease Channelling Tray Handle
STEP 15 ALL MODELS:
Locate the grease channelling tray into position
Slide the grease channelling tray into the support brackets on the separator panel, so that it is
under the bbq, all the way back. If you have a cart, you need to open the doors to remove the
grease channelling tray. Only when the bbq is cold, remove the grease channelling tray when
required for cleaning and to access the grease cup.
Summary of Contents for G2CBL
Page 42: ...Page 42 Cooking times...
Page 47: ...Page 47 Technical continued...
Page 48: ...Page 48 Technical continued...
Page 49: ...Page 49 Technical continued...
Page 50: ...Page 50 Technical continued...
Page 51: ...Page 51 Technical continued...
Page 52: ...Page 52 Technical continued...
Page 53: ...Page 53 Technical continued Spare parts 2 burner...
Page 55: ...Page 55 Spare parts 4 burner including deluxe version...


