background image

14

T8396pr-0920

ASSEMBLY

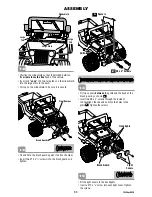
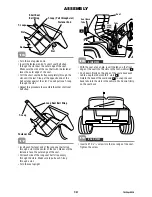
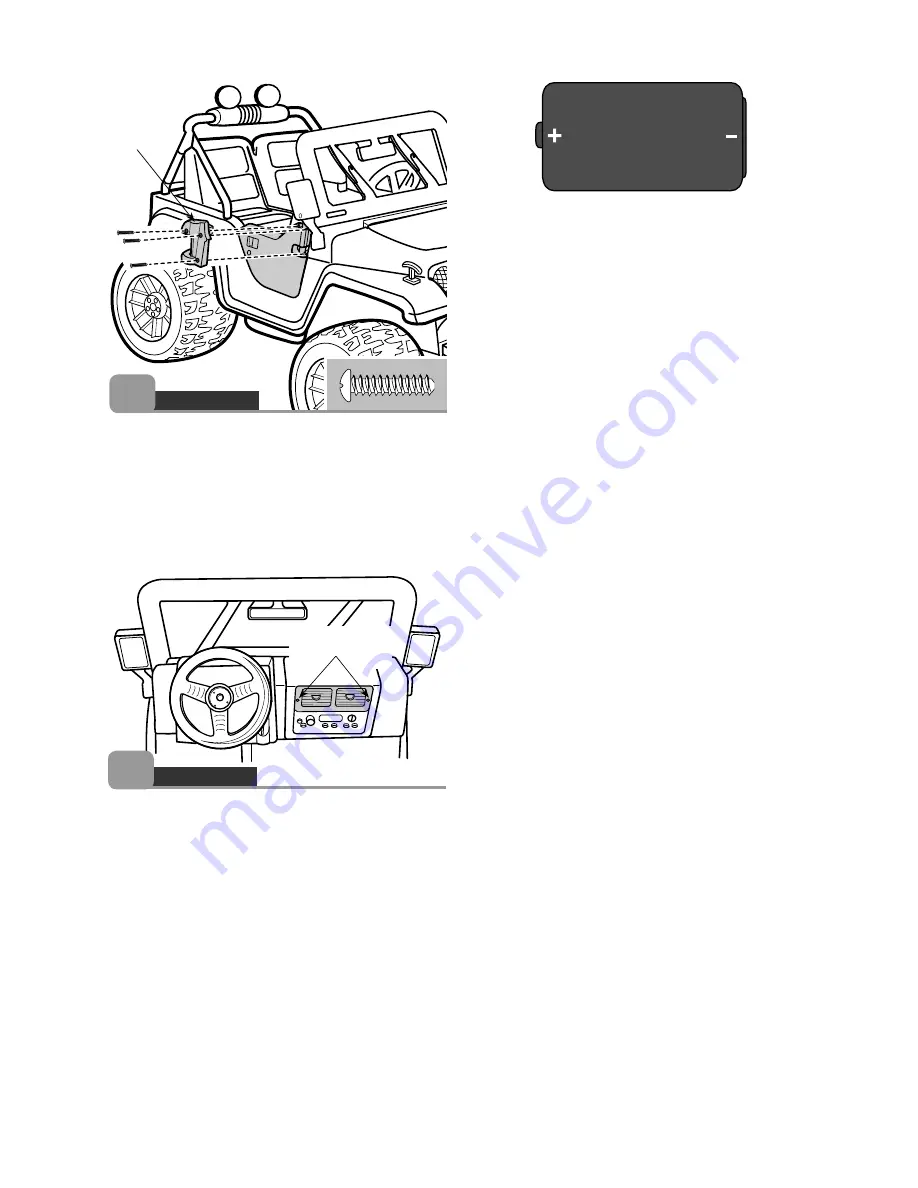
Door 

Hinge

• Fit a hinge over the top end of the door.

Hint:

 Each hinge is designed to fit one way. If the hinge 

does not fit, try the other hinge.

• Insert three #10 x 

3

/

4

" screws into the hinge and 

tighten.

• Repeat Assembly steps 23 and 24 to assemble the 

other door and hinge.

   BOTTOM VIEW

24

Battery Safety Information

In exceptional circumstances, batteries may leak fluids 
that can cause a chemical burn injury or ruin your 
product. To avoid battery leakage:
• Do not mix old and new batteries or batteries of different 

types: alkaline, standard (carbon-zinc) or rechargeable 
(nickel-cadmium).

• Insert batteries as indicated inside the battery 

compartment.

• Remove batteries during long periods of non-use. 

Always remove exhausted batteries from the product. 
Dispose of batteries safely. Do not dispose of the 
product in a fire. The batteries inside may explode or 
leak.

• Never short-circuit the battery terminals.
• Use only batteries of the same or equivalent type, as 

recommended.

• Do not charge non-rechargeable batteries.
• Remove rechargeable batteries from the product before 

charging.

• If removable, rechargeable batteries are used, they are 

only to be charged under adult supervision. 

1.5V x 4

"C" (LR14)

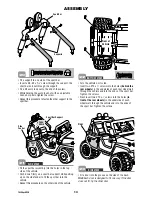
• Locate the FM Radio on the dash. Loosen both screws 

in the battery compartment door. Remove the battery 
compartment door.

•  Insert four, new "C" (LR14) 

alkaline

 batteries.

Hint:

 We recommend using 

alkaline

 batteries for longer 

battery life.

• Replace the battery compartment door and tighten the 

screws.

• When sounds become faint or stop, it’s time for an 

adult to change the batteries! Please refer to page 
19 for general information and tips for use of the FM 
Radio.

Loosen These 

Screws

     DASH VIEW

25

FCC STATEMENT (United States Only)

This equipment has been tested and found to comply with 
the limits for a Class B digital device, pursuant to Part 15 
of the FCC Rules. These limits are designed to provide 
reasonable protection against harmful interference in a 
residential installation. This equipment generates, uses 
and can radiate radio frequency energy and, if not installed 
and used in accordance with the instructions, may cause 
harmful interference to radio communications. However, 
there is no guarantee that interference will not occur in 
a particular installation. If this equipment does cause 
harmful interference to radio or television reception, which 
can be determined by turning the equipment off and on, 
the user is encouraged to try to correct the interference by 
one or more of the following measures:
• Reorient or relocate the receiving antenna.
• Increase the separation between the equipment and 

receiver.

• Consult the dealer or an experienced radio/TV technician 

for help.

Note:

 Changes or modifications not expressly approved 

by the manufacturer responsible for compliance could 
void the user’s authority to operate the equipment.
• This device complies with Part 15 of the FCC Rules.
• Operation is subject to the following two conditions: 

(1) this device may not cause harmful interference and 
(2) this device must accept any interference received, 
including interference that may cause undesired 
operation.

Summary of Contents for JAMMIN' JEEP T8396

Page 1: ...ed Use only with the Power Wheels 12 Volt Lead Acid Rechargeable Battery and Power Wheels 12 Volt Charger with Type 12V Connector both included Requires four C LR14 alkaline batteries for FM radio ope...

Page 2: ...result in serious injury Never allow children to charge the battery Battery charging must be done by adults only A child could be injured by the electricity involved in charging the battery Read the s...

Page 3: ...e thermal fuse is a self resetting safety device which automatically trips and shuts down operation of the vehicle if the vehicle is overloaded or the driving conditions too severe Once a fuse has tri...

Page 4: ...mplete to ensure that no parts are discarded Metal parts have been coated with a lubricant to protect them during shipment Wipe all metal parts with a paper towel to remove any excess lubricant ASSEMB...

Page 5: ...a fasteners Note Tighten and loosen all screws with a Phillips screwdriver Do not over tighten the screws 12 Volt Charger 12 Volt Battery Hood Latch 2 Light Cover 2 Spacer 2 Key Assembly Steering Colu...

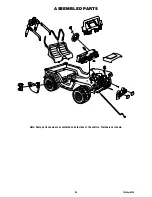
Page 6: ...6 T8396pr 0920 ASSEMBLED PARTS Note Some parts shown are assembled on both sides of the vehicle Fasteners not shown...

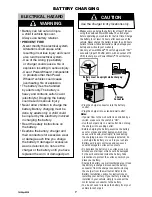
Page 7: ...ehicle Never charge the battery longer than 30 hours Failure to follow these instructions may damage your battery and will void your warranty Use only a Power Wheels 12 volt charger with 12V connector...

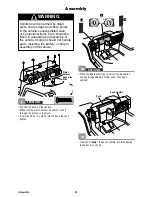
Page 8: ...g the battery or help in assembly of the vehicle WARNING Position the dash on the vehicle Make sure the motor harness connector wire is through the groove in the dash Insert five 10 x screws into the...

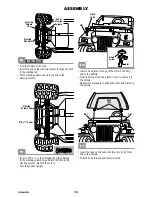
Page 9: ...ight Steering Column Hole Position the steering wheel so that the large opening and the tab on the steering wheel stem are both UP Fit the steering wheel onto the steering column Steering Wheel Steeri...

Page 10: ...ew through the large opening in the steering column cap and into the hole in the steering column Tighten the screw Turn the vehicle upright Hood Latch Slot Hood Latch Slot Insert a hood latch into one...

Page 11: ...Front Bumper Fit and hold the brush guard against the front bumper Insert two 10 x 3 4 screws into the brush guard and tighten 13 12 Fit two spacers between the grille and the back of the brush guard...

Page 12: ...seat belt strap completely through the slot until the last T loop at the opposite end of the belt catches against the slot You will pull one T loop through the slot Repeat this procedure to assemble t...

Page 13: ...on a sport bar support while pulling up on the side fender to fit the sport bar into the vehicle Repeat this procedure on the other side of the vehicle Turn the vehicle on its side Insert two 10 x 3 4...

Page 14: ...ry compartment door and tighten the screws When sounds become faint or stop it s time for an adult to change the batteries Please refer to page 19 for general information and tips for use of the FM Ra...

Page 15: ...ith a clean dry cloth to remove any dust or oils Place the labels exactly as shown in the illustrations and avoid repositioning the labels After applying a label rub it firmly with a clean dry cloth s...

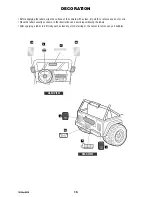
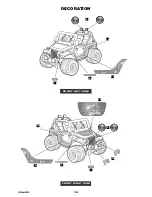
Page 16: ...16 T8396pr 0920 DECORATION FRONT LEFT SIDE FRONT RIGHT SIDE 2 11 12 9 7 18 4 10 7 9 8 13...

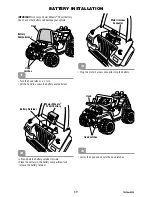
Page 17: ...to access the battery compartment Lift and pull the battery retainer forward Place the battery in the battery compartment and release the battery retainer Power Wheels 12 Volt Battery Motor Harness C...

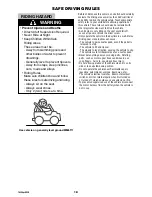
Page 18: ...can snag ngers hair etc causing serious injury Do not allow operation of the vehicle when it is on its side or in an upside down position Do not operate the vehicle near ammable vapors gasoline paint...

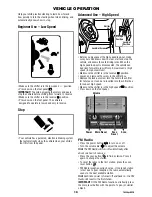
Page 19: ...ICLE OPERATION Beginner Use Low Speed Advanced Use High Speed Stop Make sure the shifter is in the low speed position Press down on the foot pedal 2 IMPORTANT To avoid damaging the motors and gears st...

Page 20: ...THE PART OF POWER WHEELS WHETHER UNDER THIS WARRANTY OR IMPLIED BY LAW FOR ANY INDIRECT OR CONSEQUENTIAL DAMAGES FOR BREACH OF WARRANTY SOME STATES DO NOT ALLOW THE EXCLUSION OR LIMITATION SO THIS LIM...

Page 21: ...se continually trips contact your local Power Wheels authorized service center Loose wires or loose connectors Check all wires and connectors Make sure the battery connector is tightly plugged into th...

Page 22: ...in low speed but does not run in high speed Please Note The vehicle is designed to operate in low speed only in reverse High speed lock out not disconnected The vehicle was pre set to run only in low...

Page 23: ...sis and repair Child is switching between FORWARD and REVERSE without stopping Teach your child to stop the vehicle before switching direction Loud clacking or grinding noise from a motor gearbox Brok...

Page 24: ...are owned by Mattel Inc Fisher Price Inc a subsidiary of Mattel Inc East Aurora New York 14052 U S A 2010 Mattel Inc All Rights Reserved and designate U S trademarks of Mattel Inc unless otherwise in...

Reviews: