11. Convergence
11.2 Preparing for convergence adjustment
Necessary tools
•
7mm
fl
at screwdriver.
•
3mm Allen wrench.
How to set up the projector for convergence adjustment?
1. Remove the top cover from of the projector.
2. Remove the left side cover from of the projector.
3. Remove the top cover plate of the Light Processor compartment.
4. Remove the left cover plate of the Light Processor compartment.
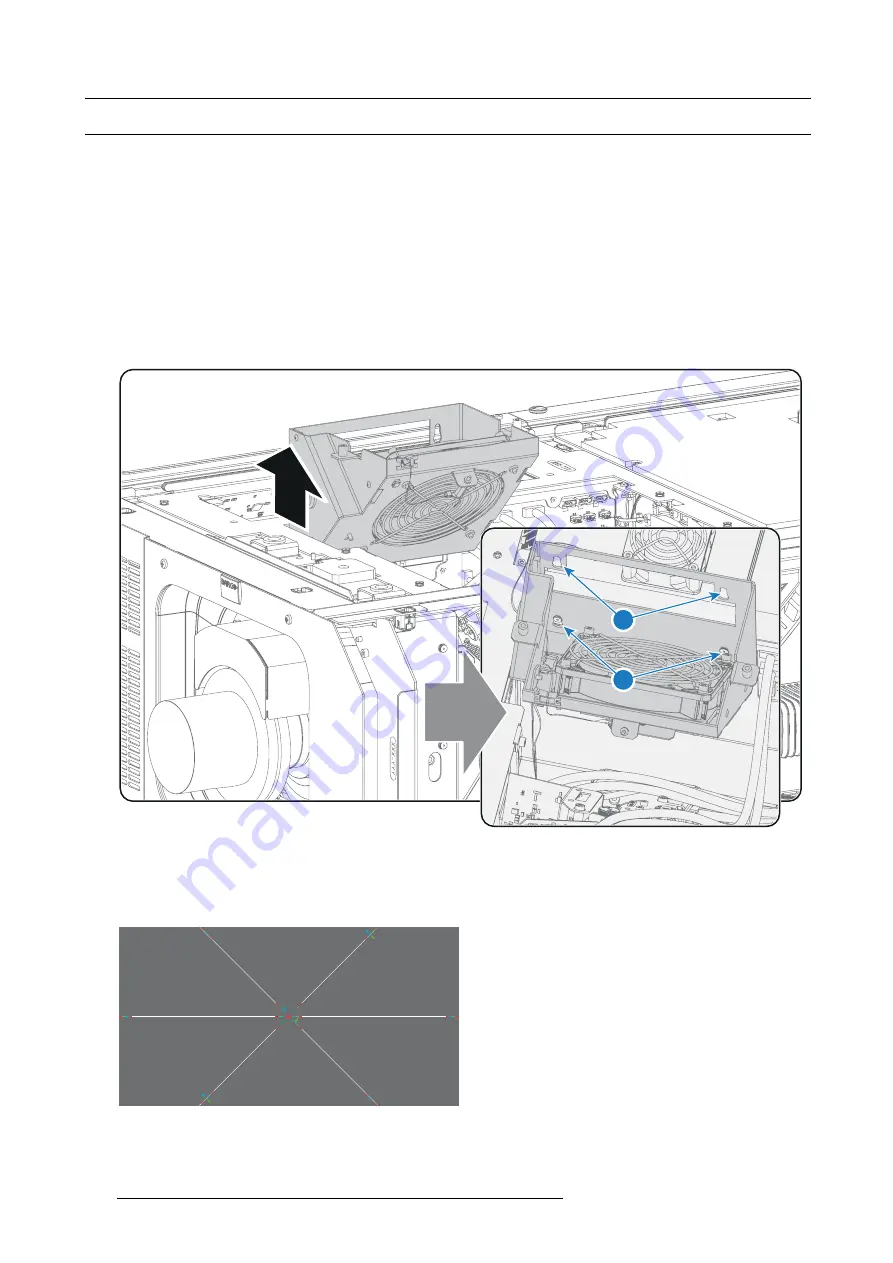
5. Place the fan on top of the Light Processor in the upper position as illustrated. Do this by engaging the two lower slots (reference
2 image 11-3) into the upper mounting pins as illustrated. The two upper slots (reference 3 image 11-3) remain free.
3
2
Image 11-3
6. Switch on the projector, ignite the lamp and open the dowser.
7. Select the convergence test pattern, which is illustrated below (image 11-4). Use the communicator to activate the convergence
test pattern.
Note:
The convergence test pattern can NOT be activated via the
PATTERN
button on the Local Keypad.
4
1
2
5
3
6
Image 11-4
108
R5906847 DP2K SLP SERIES 02/06/2017
Summary of Contents for DP2K SLP Series
Page 1: ...DP2K SLP Series User and Installation manual R5906847 00 02 06 2017 ...
Page 4: ......
Page 15: ...1 Safety PR RESTRICTED AREA RESTRICTED AREA Image 1 2 R5906847 DP2K SLP SERIES 02 06 2017 11 ...
Page 18: ...1 Safety 14 R5906847 DP2K SLP SERIES 02 06 2017 ...
Page 44: ...5 Lenses Lens selection 40 R5906847 DP2K SLP SERIES 02 06 2017 ...
Page 86: ...7 ICMP 82 R5906847 DP2K SLP SERIES 02 06 2017 ...
Page 96: ...9 Starting up 92 R5906847 DP2K SLP SERIES 02 06 2017 ...
Page 108: ...10 Scheimpflug 104 R5906847 DP2K SLP SERIES 02 06 2017 ...
Page 116: ...11 Convergence 112 R5906847 DP2K SLP SERIES 02 06 2017 ...
Page 124: ...13 Preventative maintenance actions 120 R5906847 DP2K SLP SERIES 02 06 2017 ...
Page 162: ...B Pin configurations 158 R5906847 DP2K SLP SERIES 02 06 2017 ...
Page 172: ...C Environmental information 168 R5906847 DP2K SLP SERIES 02 06 2017 ...


