6. GUI orientation
•
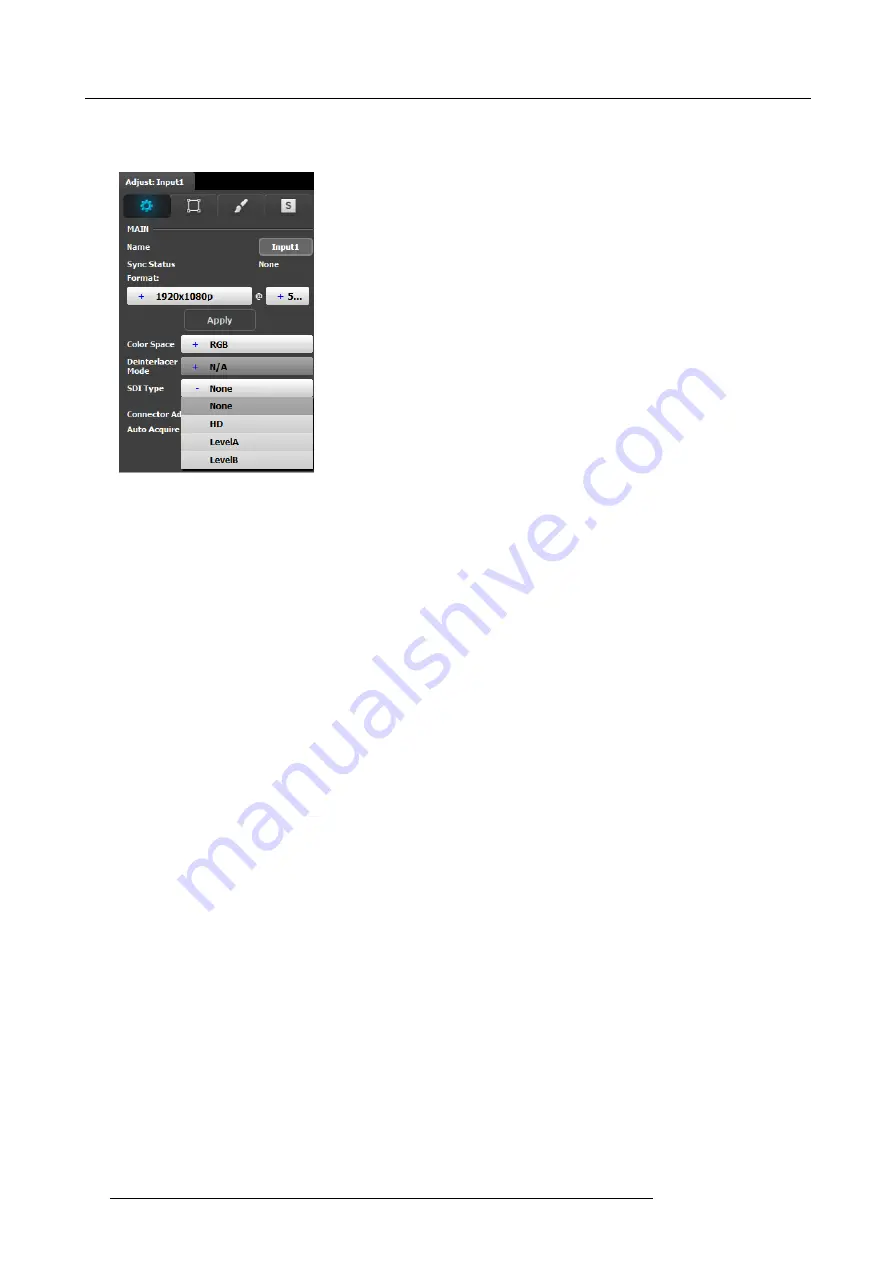
SDI
Input type
The SDI input con
fi
guration menu is similar to the DVI/HMDI/DP menu but without the EDID and HDCP sections. In addition
the SDI menu includes an addition selection regarding the SDI type. The choices are : HD, Level A or Level B
Image 6-19
Auto Acquire Feature discussion:
When the Auto Acquire is On, the system performs a full sync acquisition on the input signal whenever:
•
You select an input
•
The input type changes
•
The sync rate of the input signal changes
During acquisition, the system detects and acquires the input type and resolution When In Auto Acquire is off, the system uses the
last known con
fi
guration, when possible. If the input signal is incompatible with the saved con
fi
guration, a good input lock may not
be possible. In this case, the format name
fi
eld in the Status Menu displays the Invalid Signal message.
Please note the following important points regarding In Auto Acquire:
•
It is recommended that you turn Off Auto Acquire in applications where you have already con
fi
gured and saved the system’s
input setup.
•
If Auto Acquire is On and a valid input is selected that does not have a saved input associated with it, the system attempts to
detect and acquire the source. This process may take a few moments.
•
If Auto Acquire is Off, the system uses the last-known con
fi
guration for each input, to the extent possible, comparing the input’s
timing to the con
fi
gurations in the system’s library. These con
fi
gurations can be custom
fi
les or system default con
fi
gurations.
•
Most users can leave In Auto Acquire on. Advanced users who know the input video timing parameters may choose to turn In
Auto Acquire off and select the parameters manually.
Input adjustment panel > Format & Timing
This is a status and informational menus. No adjustments can be done here.
88
R5905948 E2 12/12/2014
Summary of Contents for Event Master E2
Page 1: ...E2 User s guide R5905948 00 12 12 2014...
Page 8: ...Table of contents 4 R5905948 E2 12 12 2014...
Page 16: ...2 Safety 12 R5905948 E2 12 12 2014...
Page 32: ...3 General 28 R5905948 E2 12 12 2014...
Page 82: ...6 GUI orientation Image 6 8 78 R5905948 E2 12 12 2014...
Page 94: ...6 GUI orientation Image 6 20 90 R5905948 E2 12 12 2014...
Page 115: ...6 GUI orientation Image 6 37 Thumbnail view Image 6 38 R5905948 E2 12 12 2014 111...
Page 186: ...7 System Setup 182 R5905948 E2 12 12 2014...
Page 192: ...8 Updating firmware 188 R5905948 E2 12 12 2014...
Page 196: ...9 General operation example Image 9 3 192 R5905948 E2 12 12 2014...
Page 213: ...9 General operation example Image 9 25 R5905948 E2 12 12 2014 209...
Page 216: ...9 General operation example 212 R5905948 E2 12 12 2014...
Page 220: ...10 Maintenance 10 2 Process Overview Flow chart Image 10 2 216 R5905948 E2 12 12 2014...
Page 281: ...10 Maintenance Disregard the heatsink from the spare kit R5905948 E2 12 12 2014 277...
Page 282: ...10 Maintenance 278 R5905948 E2 12 12 2014...
Page 288: ...11 Environmental information 284 R5905948 E2 12 12 2014...
Page 298: ...B Remote Control Protocol 294 R5905948 E2 12 12 2014...
Page 299: ...C Troubleshooting C TROUBLESHOOTING R5905948 E2 12 12 2014 295...
Page 300: ...C Troubleshooting 296 R5905948 E2 12 12 2014...


