6. GUI orientation
6.12 Con
fi
guration Menu > Adjustment > Unit Con
fi
guration
General
In the unit con
fi
guration adjustments panel, the user can de
fi
ne and adjust unit (device) speci
fi
c parameters.
How to access to the unit con
fi
guration adjustments panel
1. Select the device (unit) you want to con
fi
gure. Refer to the section “How to select device” in the system in the chapter "Con
gu-
ration Menu > System diagram area", page 79.
The device is selected. The device is highlighted in blue in the
System diagram area
and the name of device is indicated in the
Adjustment
tab in the
Adjustment area
.
2. Click on the
Adjustment
tab in the
Adjustment area
.
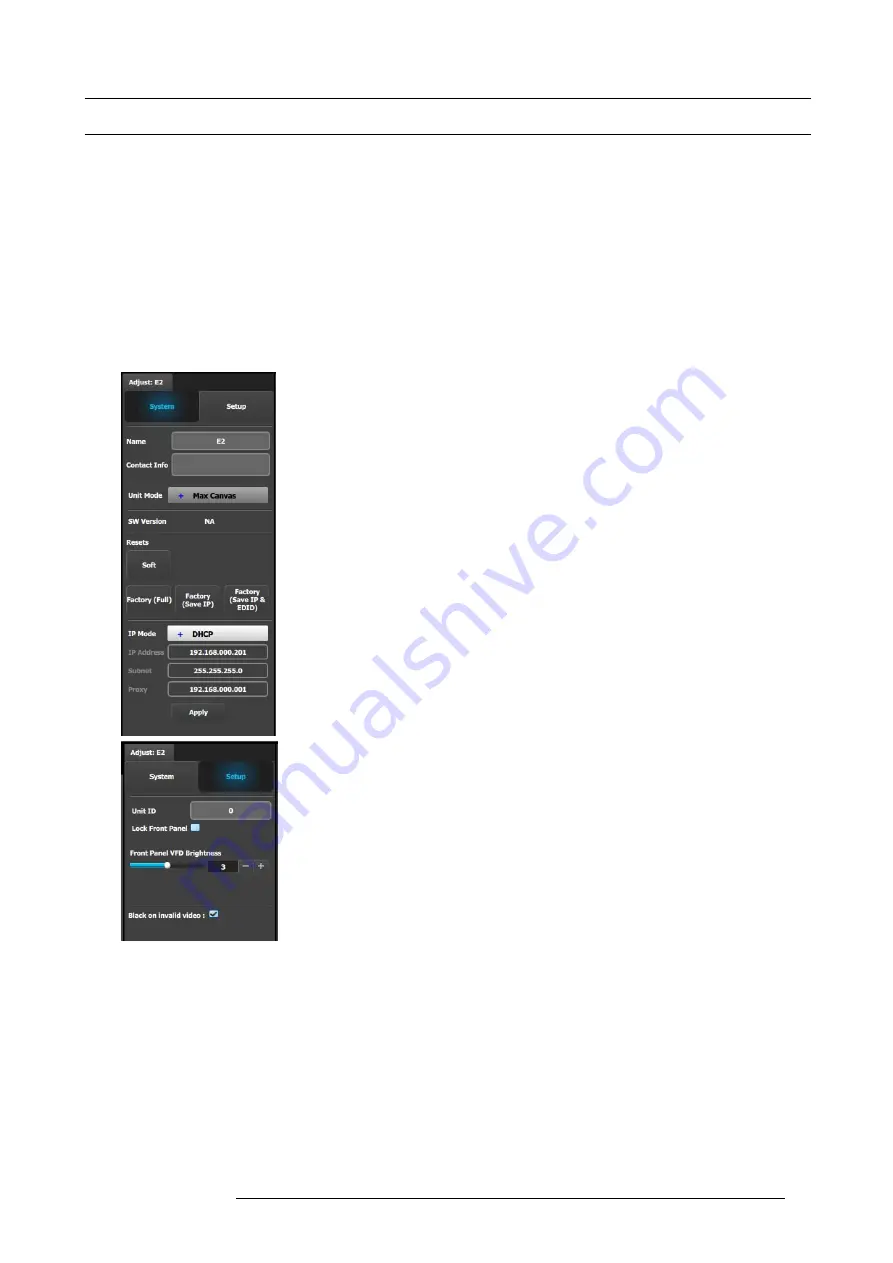
The adjustment panel dedicated to the unit is displayed.
Description
System tab:
•
Name
: The name of the unit can be edited here
•
Contact info : User information for contact person responsible for the unit
•
Unit Mode : Always 20M Pixels
•
SW version area: Unit’s SW version and the latest available SW. If the versions
are different the ‘Upgrade SW’ button will be lit to allow users to upgrade /
downgrade the SW on the VP.
•
Resets (If the user selects one of the reset options, a con
fi
rmation pop up will
appear) :
-
Soft Reset : Resets the unit without erasing any stored settings
-
Factory (Full) : Full factory reset erases all stored settings
-
Factory (Save IP) : Full factory reset with the exception of keeping the
Ethernet setup
-
Factory (Save IP & EDID) : Factory reset, but keep IP and Input EDID
settings
•
Ethernet communication setup area
Setup tab:
•
Unit ID: Unique unit identi
fi
cation number
•
Front Panel: locks or unlocks the front panel.
•
Front Panel VFD Brightness : Updates the brightness of the front panel VFD
•
Genlock
-
Freerun
-
Lock to Ext BNC
•
Genlock Status:
-
N/A : When Genlock is set to Freerun
-
Not Locked : When Genlock is set to Lock to Ext BNC but lock is not achieved
-
Locked : When Genlock is set to Lock to Ext BNC but lock is achieved
•
Black on Invalid video : If checked, when the input timing on the video does not
match what was previously acquired on the input connector the video will be
set to black
R5905948 E2 12/12/2014
83
Summary of Contents for Event Master E2
Page 1: ...E2 User s guide R5905948 00 12 12 2014...
Page 8: ...Table of contents 4 R5905948 E2 12 12 2014...
Page 16: ...2 Safety 12 R5905948 E2 12 12 2014...
Page 32: ...3 General 28 R5905948 E2 12 12 2014...
Page 82: ...6 GUI orientation Image 6 8 78 R5905948 E2 12 12 2014...
Page 94: ...6 GUI orientation Image 6 20 90 R5905948 E2 12 12 2014...
Page 115: ...6 GUI orientation Image 6 37 Thumbnail view Image 6 38 R5905948 E2 12 12 2014 111...
Page 186: ...7 System Setup 182 R5905948 E2 12 12 2014...
Page 192: ...8 Updating firmware 188 R5905948 E2 12 12 2014...
Page 196: ...9 General operation example Image 9 3 192 R5905948 E2 12 12 2014...
Page 213: ...9 General operation example Image 9 25 R5905948 E2 12 12 2014 209...
Page 216: ...9 General operation example 212 R5905948 E2 12 12 2014...
Page 220: ...10 Maintenance 10 2 Process Overview Flow chart Image 10 2 216 R5905948 E2 12 12 2014...
Page 281: ...10 Maintenance Disregard the heatsink from the spare kit R5905948 E2 12 12 2014 277...
Page 282: ...10 Maintenance 278 R5905948 E2 12 12 2014...
Page 288: ...11 Environmental information 284 R5905948 E2 12 12 2014...
Page 298: ...B Remote Control Protocol 294 R5905948 E2 12 12 2014...
Page 299: ...C Troubleshooting C TROUBLESHOOTING R5905948 E2 12 12 2014 295...
Page 300: ...C Troubleshooting 296 R5905948 E2 12 12 2014...


