6. Getting started
6.6.2
Controlling the projector
Projector address
Address installed in the projector to be individually controlled.
Common address
Projector will always execute the command coming from a RCU programmed with that common address.
Why a projector address ?
As more than one projector can be installed in a room, each projector should be separately addressable with an RCU or computer.
Therefore each projector has its own address.
Set up an individual Projector Address.
The set up of a projector address can be done via the software. See chapter ’Projector Control’, ’Projector address’.
Projector controlling.
Every projector requires an individual address between 0 and 255 which can be set in the Service mode.
When the address is set, the projector can be controlled now:
•
RCU for addresses between 0 and 9.
•
computer, e.g. IBM PC (or compatible), Apple MAC, etc. for addresses between 0 and 255.
Common Address
Every projector has a common address ’0’ or ’1’. The choice between ’0’ and ’1’ can be selected in
Projector Control
→
Projector
address
→
Common address
.
6.7
Source selection
Source selection when no picture in picture is active
Use the digit keys on the remote control or local keypad to active the desired source.
Source selection when picture in picture is active
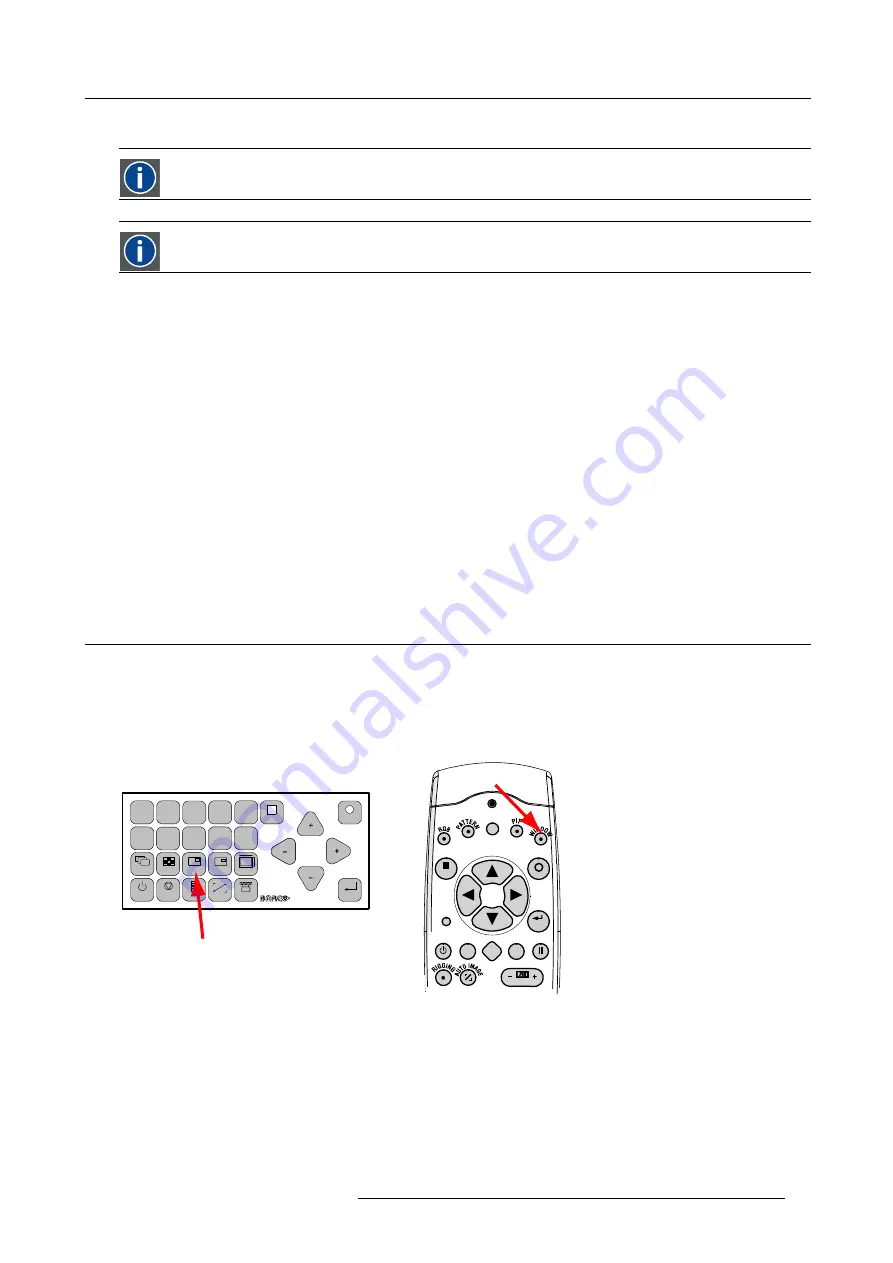
Use the
Window
button on the remote control or the local keypad to select the main window or the picture in picture (PiP) window.
MENU
EXIT
ENTER
PAUSE
TEXT
PHASE
LENS
L
1
2
3
4
5
6
7
8
9
0
MENU
EXIT
ENTER
RGB
STBY
PAUSE
TEXT
PATTERN
WINDOW
PIP
LENS
RIGGING
AUTO
Image 6-17
Window selection button
The outline of the selected window gets a colored rectangle to indicate the selection. For the main window, the color is blue. For the
picture in picture window, the color is orange.
Once the desired window is activated (main window or picture in picture window) all keys on the remote control or local keypad can
now control that selected window.
To select the source for the picture in picture window, press Window button until PiP window is activated and then select the desired
source with the digit keys.
To select the source for the main window, press Window button until the main window is activated and then select the desired source
with the digit keys.
R5976921 FLM R20+ PERFORMER 15/03/2010
53
Summary of Contents for FLM R20+ Performer
Page 1: ...FLM R20 Performer Users manual R9004430 R5976921 11 15 03 2010 ...
Page 34: ...3 Physical installation 30 R5976921 FLM R20 PERFORMER 15 03 2010 ...
Page 46: ...5 Connections 42 R5976921 FLM R20 PERFORMER 15 03 2010 ...
Page 62: ...7 Start up of the Adjustment Mode 58 R5976921 FLM R20 PERFORMER 15 03 2010 ...
Page 72: ...8 Input menu 68 R5976921 FLM R20 PERFORMER 15 03 2010 ...
Page 98: ...9 Image menu 94 R5976921 FLM R20 PERFORMER 15 03 2010 ...
Page 114: ...10 Layout menu Image 10 65 Image 10 66 Image 10 67 110 R5976921 FLM R20 PERFORMER 15 03 2010 ...
Page 120: ...11 Lamp menu 116 R5976921 FLM R20 PERFORMER 15 03 2010 ...
Page 148: ...12 Alignment menu 144 R5976921 FLM R20 PERFORMER 15 03 2010 ...
Page 168: ...13 Projector control 164 R5976921 FLM R20 PERFORMER 15 03 2010 ...
Page 184: ...14 Service menu 180 R5976921 FLM R20 PERFORMER 15 03 2010 ...
Page 204: ...17 Removal of the projector covers 200 R5976921 FLM R20 PERFORMER 15 03 2010 ...
Page 208: ...A Dimensions 204 R5976921 FLM R20 PERFORMER 15 03 2010 ...
Page 216: ...C DMX chart 212 R5976921 FLM R20 PERFORMER 15 03 2010 ...
Page 224: ...D Troubleshooting 220 R5976921 FLM R20 PERFORMER 15 03 2010 ...
Page 232: ...F Order info 228 R5976921 FLM R20 PERFORMER 15 03 2010 ...
Page 240: ...Index 236 R5976921 FLM R20 PERFORMER 15 03 2010 ...


