Manual
2100-422N
Page
19 of 42
BURNER SETUP AND ADJUSTMENT
PROCEDURES
All oil burner installations should be performed by a
qualified installer in accordance with regulations of the
National Fire Protection Standard for Oil-Burning
Equipment, NFPA31 -- latest edition, and in complete
compliance with all local codes and authorities having
jurisdiction. A qualified installer is an individual or
agency who is responsible for the installation and
adjustments of the heating equipment and who is
properly licensed and experienced to install oil-burning
equipment in accordance with all codes and ordinances.
The proper installation and adjustment of any oil burner
requires technical knowledge and the use of combustion
test instruments. The following procedure must be
followed to correctly adjust the burner to match the
specific characteristics of the installation.
Check all oil lines and connections for leaks.
Connect pressure gauge by removing bleed fitting and
screwing in pressure gauge. See Figure 9.
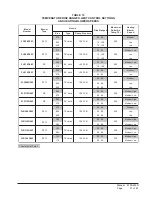
TABLE 4
FURNACE DATA
l
e
d
o
M
r
e
b
m
u
N
r
e
n
r
u
B
e
p
y
T
e
c
a
n
r
u
F
e
p
y
T
e
l
z
z
o
N
g
n
i
t
a
e
H
t
u
p
n
I
H
U
T
B
g
n
i
t
a
e
H
t
u
p
t
u
O
H
U
T
B
e
z
i
S
e
p
y
T
e
r
u
s
s
e
r
P
p
m
u
P
F
6
3
D
5
8
0
C
F
G
F
A
w
o
l
f
r
e
t
n
u
o
C
5
7
.
0
*
w
o
ll
o
H
°
0
7
G
I
S
P
0
0
1
0
0
0
,
5
0
1
0
0
0
,
7
8
5
6
.
0
0
0
0
,
1
9
0
0
0
,
6
7
5
5
.
0
0
0
0
,
7
7
0
0
0
,
4
6
F
6
3
D
5
8
0
H
F
G
F
A
y
o
B
-
i
H
5
7
.
0
*
w
o
ll
o
H
°
0
7
G
I
S
P
0
0
1
0
0
0
,
5
0
1
0
0
0
,
7
8
5
6
.
0
0
0
0
,
1
9
0
0
0
,
6
7
5
5
.
0
0
0
0
,
7
7
0
0
0
,
4
6
F
8
4
D
0
1
1
H
F
X
N
y
o
B
-
i
H
5
8
.
0
*
d
il
o
S
°
0
6
G
I
S
P
0
5
1
0
0
0
,
0
4
1
0
0
0
,
6
1
1
5
7
.
0
0
0
0
,
9
1
1
0
0
0
,
9
9
F
0
6
D
0
1
1
H
F
X
N
y
o
B
-
i
H
5
8
.
0
*
d
il
o
S
°
0
6
G
I
S
P
0
5
1
0
0
0
,
0
4
1
0
0
0
,
6
1
1
5
7
.
0
0
0
0
,
9
1
1
0
0
0
,
9
9
F
6
3
D
5
8
0
F
L
F
G
F
A
y
o
B
-
o
L
5
7
.
0
*
w
o
ll
o
H
°
0
7
G
I
S
P
0
0
1
0
0
0
,
5
0
1
0
0
0
,
7
8
5
6
.
0
0
0
0
,
1
9
0
0
0
,
6
7
5
5
.
0
0
0
0
,
7
7
0
0
0
,
4
6
F
8
4
D
0
1
1
F
L
F
X
N
y
o
B
-
o
L
5
8
.
0
*
d
il
o
S
°
0
6
G
I
S
P
0
5
1
0
0
0
,
0
4
1
0
0
0
,
6
1
1
5
7
.
0
0
0
0
,
9
1
1
0
0
0
,
9
9
F
0
6
D
0
1
1
F
L
F
X
N
y
o
B
-
o
L
5
8
.
0
*
d
il
o
S
°
0
6
G
I
S
P
0
5
1
0
0
0
,
0
4
1
0
0
0
,
6
1
1
5
7
.
0
0
0
0
,
9
1
1
0
0
0
,
9
9
F
6
3
D
5
8
0
R
L
F
G
F
A
y
o
B
-
o
L
5
7
.
0
*
w
o
ll
o
H
°
0
7
G
I
S
P
0
0
1
0
0
0
,
5
0
1
0
0
0
,
7
8
5
6
.
0
0
0
0
,
1
9
0
0
0
,
6
7
5
5
.
0
0
0
0
,
7
7
0
0
0
,
4
6
F
8
4
D
0
1
1
R
L
F
G
F
A
y
o
B
-
o
L
0
0
.
1
*
w
o
ll
o
H
°
0
7
G
I
S
P
0
0
1
0
0
0
,
0
4
1
0
0
0
,
6
1
1
5
8
.
0
0
0
0
,
9
1
1
0
0
0
,
9
9
F
0
6
D
0
1
1
R
L
F
G
F
A
y
o
B
-
o
L
0
0
.
1
*
w
o
ll
o
H
°
0
7
G
I
S
P
0
0
1
0
0
0
,
0
4
1
0
0
0
,
6
1
1
5
8
.
0
0
0
0
,
9
1
1
0
0
0
,
9
9
F
0
6
D
0
4
1
R
L
F
G
F
A
y
o
B
-
o
L
5
2
.
1
*
w
o
ll
o
H
°
0
7
G
I
S
P
0
0
1
0
0
0
,
5
7
1
0
0
0
,
5
4
1
0
1
.
1
0
0
0
,
4
5
1
0
0
0
,
7
2
1
IMPORTANT
Always use combustion test instruments when
making burner adjustments and draft gauge
when setting the barometric damper. It is
virtually impossible to make accurate and
reliable adjustments using the “eyeball” method.
*
Factory Installed Nozzle. Also shown are optional approved nozzle size/type.


