


Bareknuckle Welterweight - Airless Paint Sprayer
OPERATING INSTRUCTIONS & SAFETY MANUAL
Bareknuckle Welterweight - Airless Paint Sprayer
OPERATING INSTRUCTIONS & SAFETY MANUAL
|
8 |
9
Clean Sprayer immediately to prevent permanent damage.
Clean Sprayer immediately to prevent permanent damage.
9
9
9
9
9
9
9
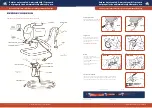
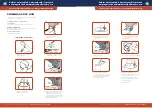
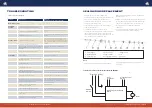
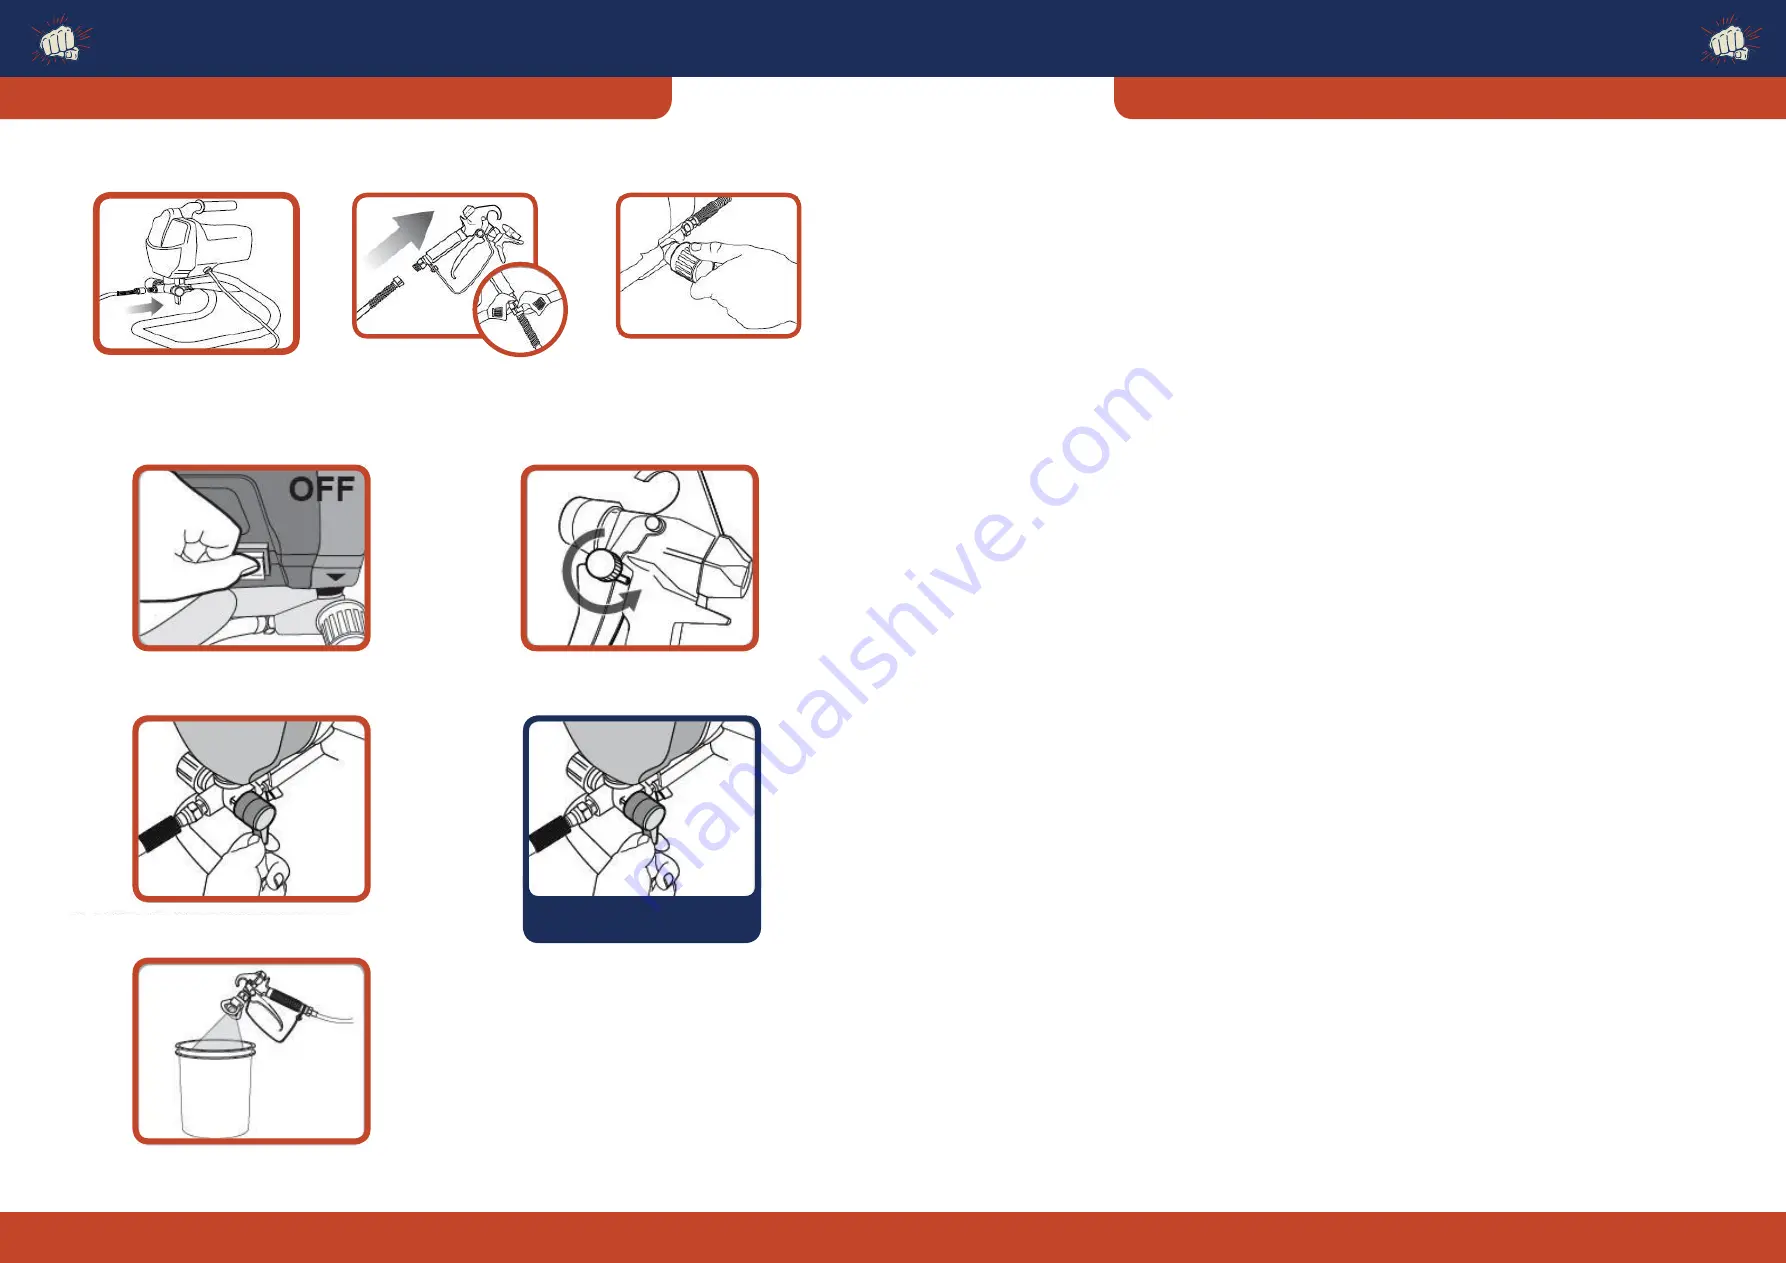
TO RELIEVE SPRAYER PRESSURE
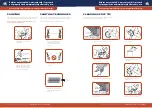
SETUP
NOTE: Remove or cover objects that you want to protect from overspray (paint mist).
1. Attach Paint Hose to Paint Hose
Outlet and tighten with wrench.
1. Turn Power Switch off and unplug unit
from outlet
2. Switch Prime/Spray switch to Prime mode.
Note: Always set to Prime mode
between uses.
3. Point gun into paint pail and activate
Sprayer Trigger to relieve pressure.
4. Turn Trigger Knob to Locking poistion.
2. Attach Paint Hose to Paint Gun
and tighten with two wrenches.
3. Turn Pressure Control Knob to
Low Pressure Spray setting.
Bareknuckle Welterweight - Airless Paint Sprayer
OPERATING INSTRUCTIONS & SAFETY MANUAL
8 |
9
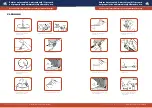
BEFORE STARTING
1)
CHECK
all fittings and connections in the pump system,
hose, and gun to ensure that they are tight.
CHECK
to ensure that there is a spray tip in the gun,
and that the tip is the correct size for the coating you
are to spray. (There are various tips available, for each
type of coating or configuration.)
2)
MAKE SURE
the power source is securely grounded and
match the motor rating of your sprayer.
3) New spray: Oil is used by the factory for testing and
protection. It is necessary to flush unit before spraying.
Clean the pump with warm soapy water. Make sure
the hydraulic oil in the pump is clean and sufficient in
volume then begin the following procedure
1. Remove spray tip from gun
2. Put the input hose and pressure relief tube into the
bucket with some water,
3. Turn on the motor and push the pressure valve
upright. In a few seconds, water will begin to flow
up through the tube and flow out from outlet valve,
tighten the outlet valve deasil, then tighten the
pressure valve deasil.
4. When the pressure reaches up to around 207bar,
check if there is any leakage on the outlet hose, if it’s
leaking, Please check. Don’t stop or deflect leaks with
your hand, body, glove or rag.
5. If it doesn’t leak, open the spray gun and test spray.
Clean the oil in pump. Change the soapy water and
use clean water when the spray is clean.
6. Turn off power, Continue to spray until there is no
more water.
7. Unlock trigger lock. Put the pressure valve upright, till
no soapy water in pump.
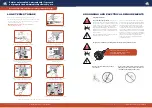
Whenever instructed to relieve pressure, Stop spraying,
Check or service equipment or install or clean spray tip.
1. Engage trigger safety lock on gun. Turn Off power
and turn sprayer pressure control to lowest pressure
setting.
2. Hold gun against side of flushing pail. Trigger gun
into pail to relieve pressure.
3. Turn off pump and release fluid pressure by turning
the pressure relief prime valve located on the side of
the pump down.
OPERATING INSTRUCTIONS
PRESSURE RELEASE PROCEDURE
9
Returns not accepted & warranty void if sprayer is
not properly cleaned immediately after every use.
Returns not accepted & warranty void if sprayer is
not properly cleaned immediately after every use.


