4
• Connect the air delivery hose of the air
connection valve (fig.1.11, fig.4) to the air-in
connector (fig.1.12, fig.4).
.
•
OPERATION
• Read this document thoroughly and assemble
the unit accordingly.
• Check that the unit is fully assembled and
installed in the appropriate location.
• When the unit is switched on, the
LED
is
activated.
•
NOTE
: To cool a beer keg to 3
o
C may take up
to 20 hours depending on initial beer temp
and ambient temp.
• The unit has a temperature setting range of
between 3
o
C and 12
o
C.
•
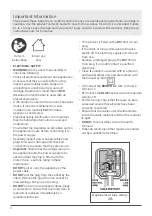
The interface (fig.5) will show the current
beer temperature and number of days the
beer keg has been fitted.
• To set a required beer temperature use the ‘+’
or ‘-’ key (fig.6) to set the value.
• To display the current set value, press the ‘-’
button for one second. The display will return
to the current beer temperature after three
seconds.
•
NOTE
: The unit has a memory function that
uses the last selected temperature.
• To adjust the number of days use the keg
has had press and hold either the “+” or “-”
symbol .
•
•
BEER
DISPENSING
UNIT
(fig.2)
•
Assemble and fit the beer dispensing unit
(fig.2) as follows:
• Screw the handle to tap unit.
• Thread the clear hose of the beer-out
connector through the removable cover of the
tap unit (fig.3).
• Pull the handle forward to the open position
(fig.3) and slide the clear hose of the beer-out
connector firmly onto the inlet spigot in the tap
unit. When the handle is released it will shut
off the flow of beer.
•
Locate the assembled dispensing unit (fig.2)
into the body of the unit. Fix in place using the
supplied screws and place the rubber covers
over the exposed fixings.
•
Temperature
Days Fitted
Fig.2
Fig.3
Fig.4
Fig.5
Fig.6


