


ASSEMBLY INSTRUCTIONS
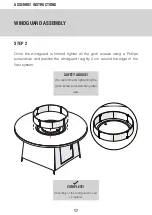
WINDGUARD ASSEMBLY
16
17
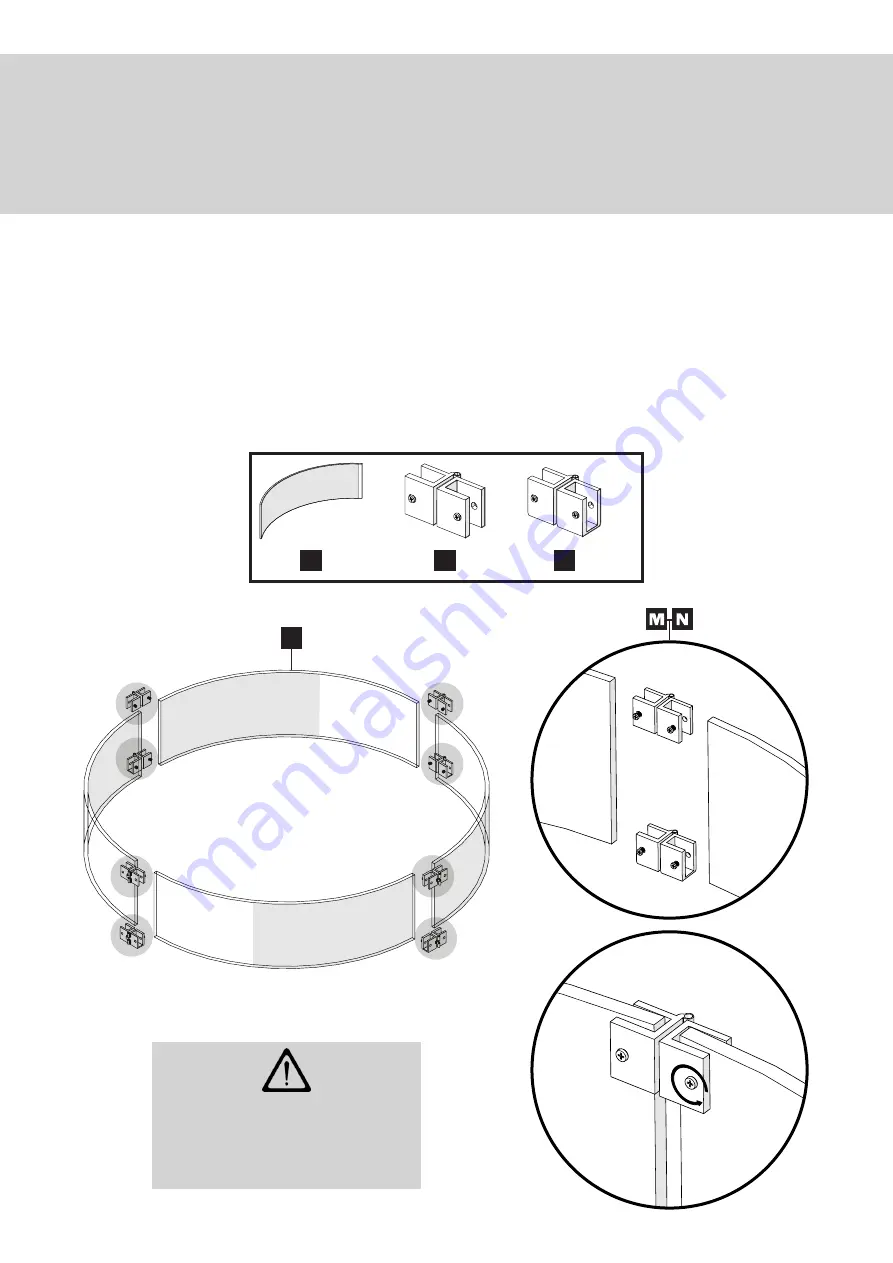
STEP 1
Loosen all the grub-screws in the connectors with a Phillips screwdriver (not
supplied). Loosely position each windguard panel, one at a time, using the top and
bottom connectors until a round windguard is formed.
Do not tighten any screws
until the windguard is formed.
L
M
L
x4
x4
N
x4
CAUTION!
Handle the glass with care when
assembling.
Summary of Contents for BSH-FPT-150G-1005G
Page 23: ...ASSEMBLY INSTRUCTIONS 23 ...
Page 24: ......


