page 75
595 ML CRL (S)
800-00177
1 REMOVE THE
OLD ELEMENT
AS GENTLY
AS POSSIBLE
Loosen wing nut and remove old element. Baby
that dirty element until you get it clear out of the
housing. Accidentally bumping it while still inside
means dropped dirt and dust that may contaminate
the clean side of your filter housing, before the new
filter element has a chance to do its job.
2 ALWAYS CLEAN
THE INSIDE OF
THE HOUSING
CAREFULLY
Dirt left in the air cleaner housing spells death
for your engine. Use a clean, damp cloth to
wipe every surface clean. Check it visually to
make sure it's clean before putting in a new
element.
3 ALWAYS CLEAN
THE GASKET
SEALING
SURFACES OF
THE HOUSING
An improper gasket seal is one of the most
common causes of engine contamination. Make
sure that all hardened dirt ridges are completely
removed, both on the bottom and top of the
cleaner.
4 CHECK FOR
UNEVEN DIRT
PATTERNS ON
YOUR ELEMENT
Your old element is a valuable clue to dust
leakage or gasket sealing problems. A pattern
on the element clean side is a sign that the old
element was not firmly sealed or that a dust
leak exists. Make certain the cause of that leak
is identified and rectified before replacing the
element.
5 PRESS YOUR
FRESH GASKET
TO SEE IF IT
SPRINGS BACK
Make sure your new element is made with a
highly compressible gasket that springs
right back when your finger pressure is released. A
quality gasket is one of the most important parts of
the element.
6 MAKE SURE THE
GASKET IS
SEATING EVENLY
If you don't feel the gasket is seating evenly for
a perfect seal, you don't have protection.
Recheck to see if the sealing surface in the
housing is clean, or if the element is the correct
model number. It may be too short for the
housing.
7 REINSTALL DUST
CUP
Be sure the dust cup seals 360 degrees around
the air cleaner body and the directional arrows
are pointing up.
8 CHECK
CONNECTIONS
& DUCTS FOR
AIR TIGHT FIT
Check that all clamps and flange joints are
tight, as well as cleaner mounting bolts. Seal
any leaks immediately - they mean dirt is
directly entering your engine. All duct joints,
from air cleaner to engine, must be tight.
9 RESET THE
RESTRICTION
INDICATOR
If air cleaner is equipped with a restriction
indicator, reset it to the green zone.
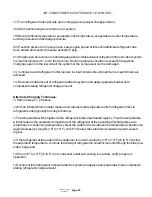
AIR CLEANER MAINTENANCE CONTINUED...
IMPORTANT STEPS TO FOLLOW EVERY TIME AN AIR
CLEANER ELEMENT IS REPLACED:
Summary of Contents for 595ML
Page 3: ...page3 595 ML CRL S 800 00177 Introduction Marker...
Page 16: ...page16 595 ML CRL S 800 00177 Maintenance A PREVENTIVE MAINTENANCE Maintenance...
Page 27: ...page27 595 ML CRL S 800 00177 Maintenance B HYDRAULIC SYSTEM...
Page 33: ...page33 595 ML CRL S 800 00177 HYDRAULIC PRESSURE ADJUSTMENT CONTINUED 558 01699...
Page 44: ...page44 595 ML CRL S 800 00177 Maintenance C ELECTRICAL SYSTEM MAINTENANCE...
Page 67: ...page67 595 ML CRL S 800 00177 Maintenance D POWER UNIT MAINTENANCE...
Page 77: ...page77 595 ML CRL S 800 00177 Structural E STRUCTURAL MAINTENANCE...
Page 84: ...page84 595 ML CRL S 800 00177 Trouble Shooting Marker Marker Marker...


