page 46
page 46
page 46
page 46
page 46
160B&C TM
800-00140
A20 CONTROL VALVE MAINTENANCE CONTINUED...
A20 CONTROL VALVE MAINTENANCE CONTINUED...
A20 CONTROL VALVE MAINTENANCE CONTINUED...
A20 CONTROL VALVE MAINTENANCE CONTINUED...
A20 CONTROL VALVE MAINTENANCE CONTINUED...
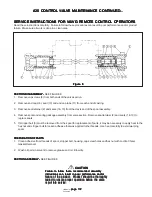
STEP 2 - TIE BOLTS
STEP 2 - TIE BOLTS
STEP 2 - TIE BOLTS
STEP 2 - TIE BOLTS
STEP 2 - TIE BOLTS
Remove the four (4) tie bolts which hold the bank together and separate the sections.
NOTE
NOTE
NOTE
NOTE
NOTE: VA valve fasteners thread into the outlet casting. VG valve fasteners pass through the entire bank and
have a hex nut and washer fastened at both ends.
STEP 3 - SECTION SEALS
STEP 3 - SECTION SEALS
STEP 3 - SECTION SEALS
STEP 3 - SECTION SEALS
STEP 3 - SECTION SEALS
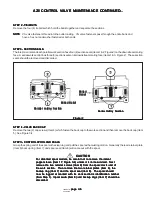
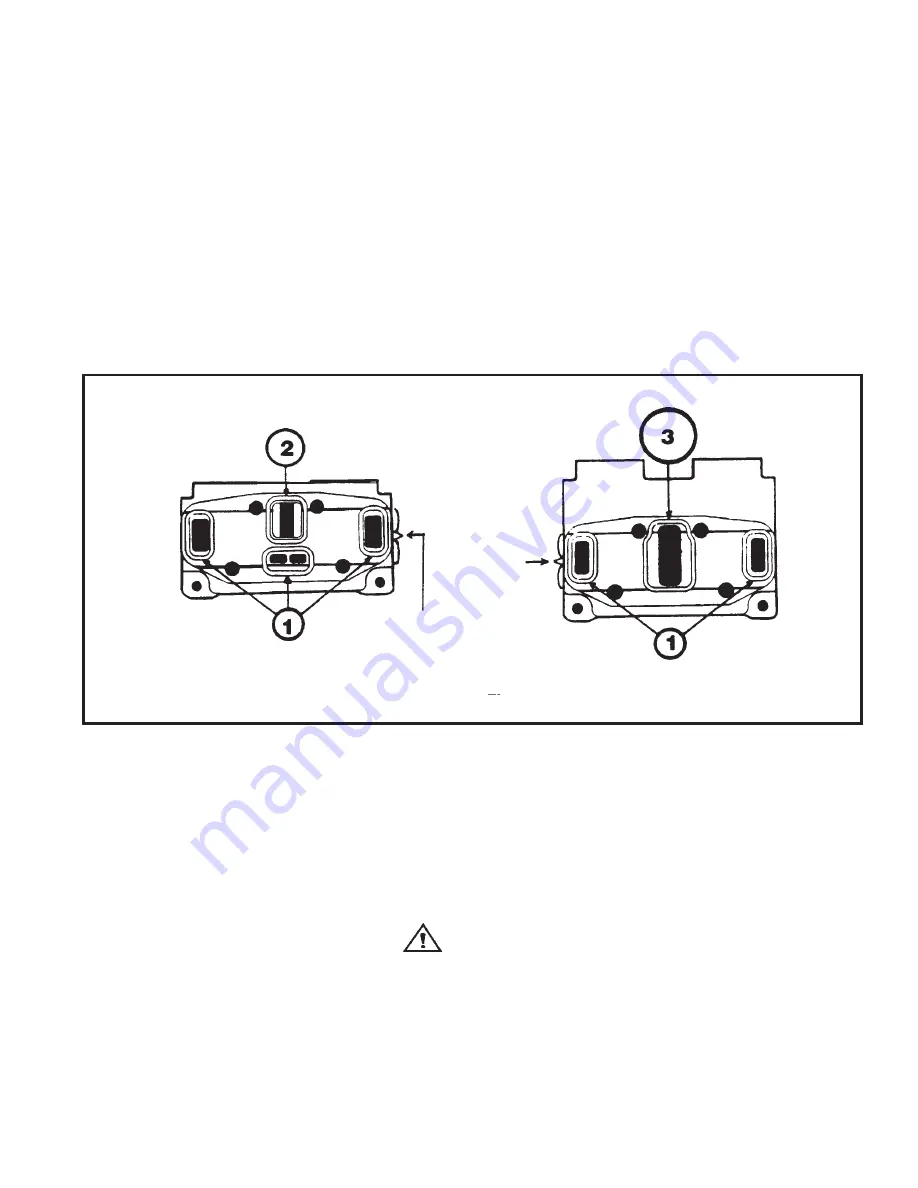
The inlet, mid-inlet and each parallel work section have four (4) section seals (Items 1 & 2, Figure 2) on the downstream mating
face. A series work section has three (3) section seals on its downstream mating face (Items 1 & 3, Figure 2). These section
seals should be removed and discarded.
Figure 2
Figure 2
Figure 2
Figure 2
Figure 2
STEP 4 - VALVE BACK CAP
STEP 4 - VALVE BACK CAP
STEP 4 - VALVE BACK CAP
STEP 4 - VALVE BACK CAP
STEP 4 - VALVE BACK CAP
Remove the two (2) cap screws (Item 4) which fasten the back cap to the work section and then remove the back cap (Item
5). See Figure 3-4.
STEP 5 - CONTROL SPOOL AND SEALS
STEP 5 - CONTROL SPOOL AND SEALS
STEP 5 - CONTROL SPOOL AND SEALS
STEP 5 - CONTROL SPOOL AND SEALS
STEP 5 - CONTROL SPOOL AND SEALS
Grasp the spring end of the spool with a clean rag and pull the spool with a twisting motion. Generally the rear retainer plate
(Item 6) backup ring (Item 7) and spool seal (Item 8) will come out with the spool.
CAUTION
CAUTION
CAUTION
CAUTION
CAUTION
For detented spool models, be careful not to remove the detent
For detented spool models, be careful not to remove the detent
For detented spool models, be careful not to remove the detent
For detented spool models, be careful not to remove the detent
For detented spool models, be careful not to remove the detent
poppet sleeve (Item 17, Figure 3-4) unless it is to be serviced. Next
poppet sleeve (Item 17, Figure 3-4) unless it is to be serviced. Next
poppet sleeve (Item 17, Figure 3-4) unless it is to be serviced. Next
poppet sleeve (Item 17, Figure 3-4) unless it is to be serviced. Next
poppet sleeve (Item 17, Figure 3-4) unless it is to be serviced. Next
remove the two retainer screws (Item 9) from the spool clevis end of
remove the two retainer screws (Item 9) from the spool clevis end of
remove the two retainer screws (Item 9) from the spool clevis end of
remove the two retainer screws (Item 9) from the spool clevis end of
remove the two retainer screws (Item 9) from the spool clevis end of
the work section. Then remove the two retainer plates (Item 6), the
the work section. Then remove the two retainer plates (Item 6), the
the work section. Then remove the two retainer plates (Item 6), the
the work section. Then remove the two retainer plates (Item 6), the
the work section. Then remove the two retainer plates (Item 6), the
backup ring (Item 7) and the spool seal (Item 8). The spool should
backup ring (Item 7) and the spool seal (Item 8). The spool should
backup ring (Item 7) and the spool seal (Item 8). The spool should
backup ring (Item 7) and the spool seal (Item 8). The spool should
backup ring (Item 7) and the spool seal (Item 8). The spool should
now be tagged or marked with its work section’s identification number
now be tagged or marked with its work section’s identification number
now be tagged or marked with its work section’s identification number
now be tagged or marked with its work section’s identification number
now be tagged or marked with its work section’s identification number
(from Step 1). Spool seals (Item 8) and backup rings (Item 7) should be
(from Step 1). Spool seals (Item 8) and backup rings (Item 7) should be
(from Step 1). Spool seals (Item 8) and backup rings (Item 7) should be
(from Step 1). Spool seals (Item 8) and backup rings (Item 7) should be
(from Step 1). Spool seals (Item 8) and backup rings (Item 7) should be
discarded.
discarded.
discarded.
discarded.
discarded.
Parallel Lo-Boy Section
Parallel Lo-Boy Section
Parallel Lo-Boy Section
Parallel Lo-Boy Section
Parallel Lo-Boy Section
Milled Relief
Milled Relief
Milled Relief
Milled Relief
Milled Relief
Milled
Milled
Milled
Milled
Milled
Relief
Relief
Relief
Relief
Relief
Series Hi-Boy Section
Series Hi-Boy Section
Series Hi-Boy Section
Series Hi-Boy Section
Series Hi-Boy Section

