Lindsay Transportation Solutions Sales and Services, Inc
(888) 800-3691 [U.S. toll free] or +1 (707) 374-6800
11
Step 3 – Post 1, Ground Strut and Soil Anchor
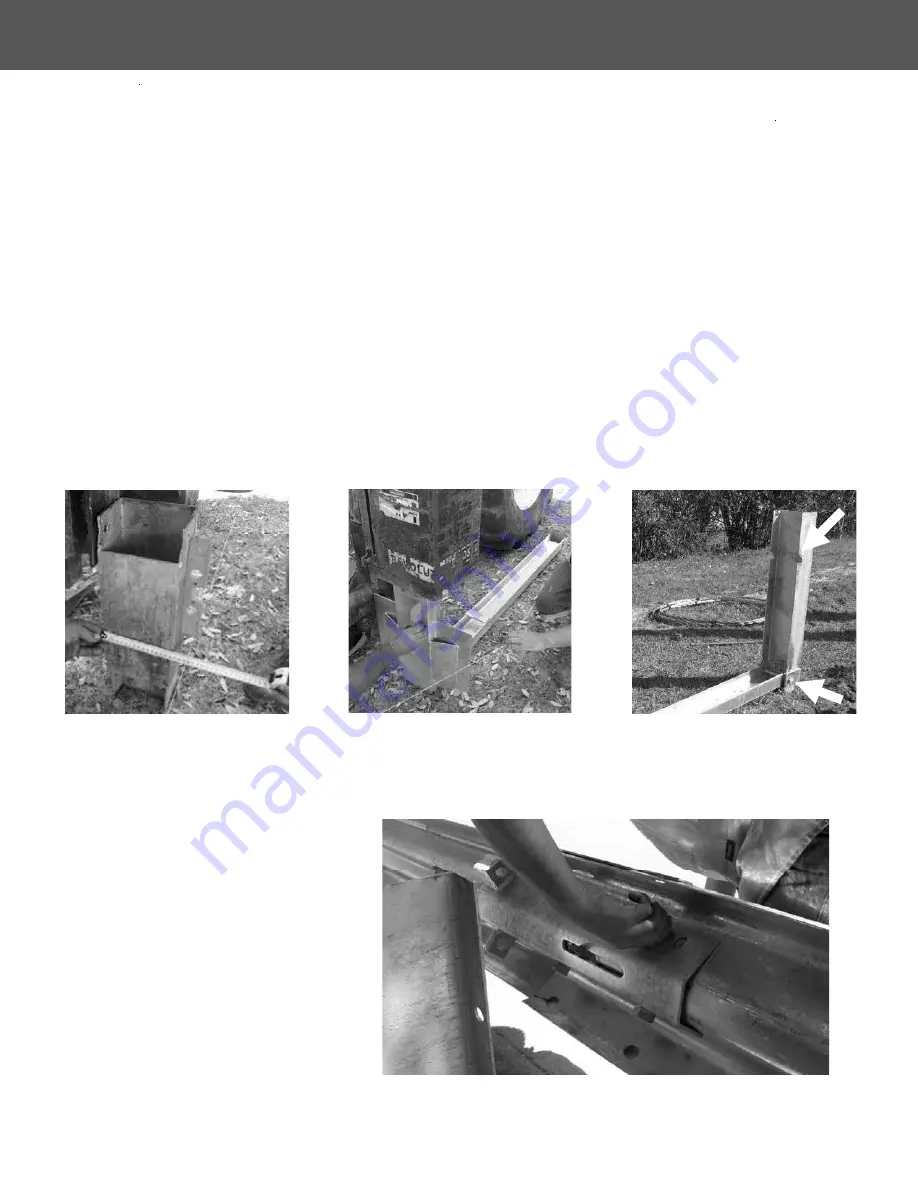
Place the roadside face of post 1 bottom anchor, 200mm (8 in) towards the roadway to
compensate for the lack of blockout (Figure 4).
Post 1 bottom, the Ground Strut and the Soil
Anchor are then placed parallel to the string line at this roadside offset position.
Drive or place the bottom of post 1 in the augured hole so that no more than 75mm (3 in) [100mm
(4 in max)] protrudes above ground level (Figure 5). Use the Ground Strut as a template to place
the Soil Anchor in the correct place. The Soil Anchor can then be driven into place or placed in an
augured hole and backfilled. The Ground Strut should be level
or
lower at the anchor end than at
the post 1 bottom end.
Place post 1 top in the post 1 bottom anchor ensuring that the post bolt notches are at the top
and facing the Soil Anchor (Figure 6). Use M16 x 200mm (5/8 in x 8 in) hex head bolt with nut and
washers.
Do not over tighten bolt.
Figure 4. Measure 8 in. towards roadway.
Figure 5. Drive post 1 into augured hole.
Figure 6. Post 1 top in post bottom.
Step 4 – Hang Rail 3 and Cable Anchor Bracket
Rail 3 is installed like standard
guardrail with post 6 at the center
of the rail and blockouts between
the rail and post. Place the Cable
Anchor Bracket on the back of the
rail at the joint between rail 3 and
rail 4 (post 7).
The two “boxes” on the cable
bracket should be on the impact
head side of the splice joint. At-
tach rails to post with post bolt and
splice rail 3 to rail 4 with 8 standard
splice bolts (Figure 7).
Figure 7. Splice rail 3 to rail 4 with 8 standard splice bolts.
X-Tension - Tangent Installation Instructions
X-TENSION
®
SYSTEM


