background image


RDG603A13 

– Issue 19 

Page 49 of 97 

  All Shire engines run on diesel fuel. 

DO NOT USE BIODIESEL


  Please note that when the vessel is to be left for any period of time, the fuel tank should 

be left full to eliminate the build-up of condensation and formation of water in the fuel 

tank. 

  Engine to be turned off while refuelling 

  The fuel type for all Shire canal boat engines is diesel. 

DO NOT USE BIODIESEL.


6.   Diesel Fuel Additive 

The use of diesel fuel additive is strongly recommended on Shire engines.  The quality of the 

fuel available when cruising is often unknown; also the fuel may have been in storage for long 

periods of time.  The use of additives will ensure that your engine fuel injection system is in 

top condition. This should result in many years of smooth reliable operation without the cost 

and inconvenience of expensive breakdowns due to poor quality fuel.  It has also been found 

that  improvements  in fuel  consumption  and start  ability  are  an added benefit  of  using  this 

product.  Diesel fuel additive is available from your Shire dealer in a handy 500ml container 

(Part Number: RDG80210219) 

7.  Exhaust Back Pressure 

  The back pressure falls within the manufacturers recommended range when using the 

exhaust system recommended for the engine. 

  The maximum allowable back pressure is 0.2 Bar (3 PSI) 

8.   Single Shift Control Lever Side Mount Operation - Optional (RDG9210055) 

To engage forward or reverse gear: 

  Lift the safety latch under the handle before shifting. 


To rev the engine in neutral: 

  Pull the lever out sideways from the main body. 

  Lift the safety latch under the handle then shift. 


Summary of Contents for Shire 15 15 WB

Page 1: ...ORIGINAL INSTRUCTION RDG603A13 Issue 19 CANAL WORK AND RIVER BOAT ENGINE MANUAL For the following engine models Shire 15 15 CB WB RB SHIRE 15 20 CB WB RB ...

Page 2: ...ert symbol appears throughout the manual It means attention be alert as your safety is involved Please read and follow the message that appears after the safety alert symbol NOTICE This indicates a situation which can cause damage to the machine personal property and or the environment or cause the equipment to operate improperly CAUTION This indicates a hazardous situation which if not avoided co...

Page 3: ... serial number in the space provided above Please quote the engine identification number during any enquiry or when ordering spare parts Information about the engine serial number and its location on the engine can be found in SECTION 2 of the manual Shire Engine Manuals and Shire Parts Books ...

Page 4: ... pleasure Please read it carefully in conjunction with the PRM Gearbox Manual and familiarise yourself with the engine and its parts before operation The information and recommendations given in this manual are based on the latest information available at the time of publication E P Barrus reserve the right to change the specification of its products and manuals without prior notice Depending upon...

Page 5: ...ller has completed the Boat Builder Section on the Service Record Card located at the back of this manual regarding hand over and commissioning of boat Failure to complete and return the registration form to E P Barrus will result in the warranty period starting from the date of engine manufacture NOT from the date of purchase PRM Gearboxes are covered by a three 3 year warranty for recreation use...

Page 6: ... the Owner s Manual accident submersion improper installation proper installation specification and techniques are set forth in the Operations and First time running sections in this manual use of an accessory or part not manufactured or sold by us or alteration or removal of parts Expenses related to crane out launch towing storage telephone rental inconvenience slip fees insurance coverage loan ...

Page 7: ...hire 15 15 River Boat 17 4 Shire 15 20 River Boat 18 5 Shire 15 15 Work Boat 19 6 Shire 15 20 Work Boat 20 SECTION 4 Control Panel 21 1 Basic Control Panel 21 2 Standard Control Panel 21 3 Deluxe Control Panel 22 4 Control Panel Overview 22 5 Warning Light Procedure 22 6 Overall Dimensions of the Basic Control Panel 25 7 Overall Dimensions of the Standard Control Panel 25 8 Overall Dimensions of t...

Page 8: ... 36 16 Calorifier 37 17 Control Cables 38 18 Domestic Battery Bank 39 19 Control Panel 40 20 Exhaust System Canal Boat 41 21 Exhaust System Work Boat River Boat 42 22 Hydraulic Drive Transmissions 44 23 Installation Check List 46 SECTION 6 Operation 47 1 Starting the engine for the first time 47 2 Starting Procedure 47 3 Stopping Procedure 48 4 Full Load Running 48 5 Refuelling 48 6 Diesel Fuel Ad...

Page 9: ... Impellor Change Work Boat River Boat 60 15 Engine Heat Exchanger Tube Stack Flushing 60 16 Winterization of Seawater Cooling System Work Boat River Boat 61 SECTION 8 Service Schedule 62 1 Specifications and Capacities 62 2 Service Intervals 63 SECTION 9 Wiring Diagrams 64 1 Engine Wiring Diagram Shire 15 15 20 64 2 Basic Control Panel Wiring Diagram 65 3 Standard Control Panel Wiring Diagram 66 4...

Page 10: ...formity for Recreational Craft Propulsion Engines to the Directive No 2013 53 EU 74 2 Declaration of Incorporation of Partly Completed Machinery 75 SECTION 14 Lubricant Safety Data Sheets 79 1 Ground Force 10W 40 79 2 Liquimatic Super ATF 88 SECTION 15 Shire Service Record Card 97 ...

Page 11: ...ny maintenance or repairs 2 Lifting DANGER CRUSH HAZARD NEVER STAND UNDER A HOISTED ENGINE IF THE HOIST MECHANISM FAILS THE ENGINE WILL FALL ON YOU CAUSING SERIOUS INJURY OR DEATH The Lifting points supplied with the engine are for lifting the engine gearbox only A suitable spreader bar must be employed to prevent over stressing either bracket during any lift 3 Rotating Shafts and Belts WARNING SE...

Page 12: ...AZARD WAIT UNTIL THE EXHAUST COOLS BEFORE YOU TOUCH IT Exhaust gases may have temperatures as high as 650 C and contain elements which are harmful if ingested It is therefore essential that exhaust systems are gas tight and lagged to prevent accidental burning and inhalation of exhaust gases when inside the boat cabin 5 Launching and Lifting Boats Care must be taken when launching or craning new b...

Page 13: ... away from the battery NO SMOKING Batteries contain sulphuric acid if splashed on skin or eyes flush well with water and seek medical advice Keep battery tops and battery compartment ventilated at all times If disconnecting the battery remove the earth lead FIRST and re connect it last If charging the battery ensure that the charger is switched off before connecting and disconnecting Do not tip th...

Page 14: ... Boat Seawater Heat Exchanger cooled dry exhaust manifold with either a dry exhaust system same as a Canal Boat or water injected exhaust system Can also be used for sea going applications RB River Boat Can also be used for sea going applications Seawater Integral exhaust manifold heat exchanger cooled Water injected exhaust system Note There are a number of optional extras that may be fitted to a...

Page 15: ...d from front Figure 3 Shire 15 15 CB Right Side Viewed from rear Note There are a number of optional extras that may be fitted to an engine that are not shown here Description 1 Single Thermostat Housing 2 50 Amp 12 Volt Alternator 3 Dry Exhaust 4 Oil Filter Description 5 Air Filter 6 Gearbox 7 Engine Sump Pump 8 Engine Fuel Filter ...

Page 16: ...re 5 Shire 15 20 CB Right Side Viewed from rear Note There are a number of optional extras that may be fitted to an engine that are not shown here Description 1 Single Thermostat Housing 2 50 Amp 12 Volt Alternator 3 Dry Exhaust 4 Oil Filter Description 5 Air Filter 6 Gearbox 7 Engine Sump Pump 8 Engine Fuel Filter ...

Page 17: ...ure 7 Shire 15 15 RB Right Side Viewed from rear Note There are a number of optional extras that may be fitted to an engine that are not shown here Description 1 Seawater Pump 2 50 Amp 12 Volt Alternator 3 Oil Filter 4 Water Cooled Exhaust Description 5 Air Filter 6 Gearbox 7 Engine Sump Pump 8 Engine Fuel Filter ...

Page 18: ...ure 9 Shire 15 20 RB Right Side Viewed from rear Note There are a number of optional extras that may be fitted to an engine that are not shown here Description 1 Seawater Pump 2 50 Amp 12 Volt Alternator 3 Oil Filter 4 Water Cooled Exhaust Description 5 Air Filter 6 Gearbox 7 Engine Sump Pump 8 Engine Fuel Filter ...

Page 19: ...hire 15 15 WB Right Side Viewed from rear Note There are a number of optional extras that may be fitted to an engine that are not shown here Description 1 Coolant Heat Exchanger 2 50 Amp 12 Volt Alternator 3 Seawater Pump 4 Dry Exhaust 5 Oil Filter Description 6 Air Filter 7 Gearbox 8 Engine Sump Pump 9 Engine Fuel Filter ...

Page 20: ...hire 15 20 WB Right Side Viewed from rear Note There are a number of optional extras that may be fitted to an engine that are not shown here Description 1 Coolant Heat Exchanger 2 50 Amp 12 Volt Alternator 3 Seawater Pump 4 Dry Exhaust 5 Oil Filter Description 6 Air Filter 7 Gearbox 8 Engine Sump Pump 9 Engine Fuel Filter ...

Page 21: ...ture Warning Light 4 Oil Pressure Warning Light 5 50A Alternator Charge Warning Light 6 Glow Plug Light 7 Key Flap and Ignition Switch 12 Engine Stop Description 1 Tachometer Gauge 2 Hour Meter 3 Water Temperature Warning Light 4 Oil Pressure Warning Light 5 50A Alternator Charge Warning Light 6 70A Alternator Charge Warning Light 7 Glow Plug Light 8 Key Flap and Ignition Switch 12 Engine Stop ...

Page 22: ... 15 15 WB RB Shire 15 20 WB RB Basic Control Panel Panel supplied as standard On certain engines a different control panel may be supplied as an option 5 Warning Light Procedure When the ignition is first turned on the control panel warning lights will come on as a bulb check When the engine is started the warning lights will go out Please note that the water temperature warning light and glow plu...

Page 23: ...s first turned on for 5 8 seconds to indicate the heating system is operational When the light goes out the engine can be started Whilst the control panel is in operation all the gauges are backlit This does not indicate a fault and is a normal function for the control panel If any of the warning lights on the control panel come on whilst the engine is running please follow the correct procedure a...

Page 24: ...op the engine immediately Contact your local dealer Failure to stop the engine may result in permanent engine damage 5 50A Alternator Charge Warning Light This indicates that the alternator has stopped charging The engine can still be operated for a short period of time Contact your local dealer 6 70A Alternator Charge Warning Light This indicates that the alternator has stopped charging The engin...

Page 25: ... 6 Overall Dimensions of the Basic Control Panel All Dimensions are in mm Figure 17 Basic Control Panel Dimensions 7 Overall Dimensions of the Standard Control Panel All Dimensions are in mm Figure 18 Standard Control Panel Dimensions ...

Page 26: ...RDG603A13 Issue 19 Page 26 of 97 8 Overall Dimensions of the Deluxe Control Panel All Dimensions are in mm Figure 19 Deluxe Control Panel Dimensions ...

Page 27: ... and forward to the bulkhead Webs or gussets must be welded in place midway to prevent flexing 3 Cooling System Canal Boats with Skin Tanks Ensure pipe work to and from the skin tanks is of sufficient bore A minimum of 28mm 11 6 is recommended Ensure tight bends and elbows are avoided or kept to a minimum 4 Skin Tanks Canal Boats The ideal skin tank internal thickness is between 50 and 75mm the ta...

Page 28: ...raulic bow thruster is used Please refer to Section 5 Installation 22 Hydraulic Drive Transmission for further information 5 Engine Cooling Water Connections For Canal Boats These are on the Left hand Port side of the engine Shire 15 and 20 28mm 1 1 6 OD Use a good quality hose that cannot collapse or kink and is capable of working at temperature in excess of 100 c A S A P Supplies LTD can supply ...

Page 29: ...INJURY TIGHTEN THE HEADER TANK CAP SECURELY AFTER BEING REMOVED STEAM CAN SPURT OUT DURING ENGINE OPERATION IF THE CAP IS LOOSE The pressurised header tank should be mounted higher than the level of the engine no less than 300mm and no more than 1m from the engine to prevent cooling system air locks Two hoses are used on these engines The two spigots on the plastic header tank have different inter...

Page 30: ...ult in excessive engine movement and premature mount failure If this is a problem put steel packing plates under the mounts Ensure that the engine has been installed for at least 24 hours before shaft alignment is checked to allow the mounts time to settle under the engine weight Ensure that the anti vibration mount centre screw is sufficiently raised so as not to touch the engine bed If this occu...

Page 31: ...RDG603A13 Issue 19 Page 31 of 97 Figure 22 Correct Anti Vibration Mount Installation ...

Page 32: ...2 of 97 Figure 23 Correct Anti Vibration Mount Installation Description 1 Normal mounting position 2 Alternative mounting position if engine compartment space is restricted Figure 24 Anti Vibration Mount Installation Points 0 0 ...

Page 33: ...h fully flexible drive couplings should still have the engine and shaft alignment as close as possible A dummy shaft may be required for this purpose Some types of flexible shaft couplings require the input and output to be misaligned check with the coupling manufacturer s installation instructions Minimum clearance of 25mm between rails and engine beds 10 Engine Inclination The engine installatio...

Page 34: ...e cable to the 70A alternator B terminal see wiring diagram This ensures that the 50A alternator charges the start battery and the 70A alternator charges the domestic battery removing the requirement for a split charging system or relay Negative battery terminal must be connected to a common earth point 12 Electrical Options DANGER ELECTRIC SHOCK RISK Standard engine is a single 50A Alternator Opt...

Page 35: ...m engine to main supply and return lines to main fuel tank ensuring they are connected the correct way around The hose to the fuel pump is the inlet The engine hoses are supplied with 5 16 8mm OD metal hose tails and should be securely fitted to the main supply and return pipes with compression fittings The engine hoses should have sufficient slack to absorb engine movement without placing strain ...

Page 36: ...p water and 50 antifreeze Please make sure that the antifreeze used is suitable for the silicone hoses fitted to the engine Open the calorifier taps if fitted to fill the calorifier system and displace air Canal Boats To fill the cooling system for the first time fill the skin tank via the inlet hose connection or filler plug if fitted Fill the engine through white plastic expansion tank After run...

Page 37: ... ensure air is removed and allow a 13mm 1 2 air gap in top of manifold to allow for expansion Note Water Tap CB WB engines only on side of engine must be opened to fill engine and must be closed to the off position to run the engine Figure 26 Figure 26 Water Tap on CB WB Engines 16 Calorifier For Canal Boats The calorifiers are positioned as per Figure 27 Inlet Outlet Figure 27 Position of Calorif...

Page 38: ...ust be incorporated in the calorifier hot water system outlet to lower the hot water temperature for domestic use 17 Control Cables Connect engine speed control cable With the engine off ensure that the engine speed control lever achieves full travel from idle to full speed Adjust if necessary Check the gearbox shift lever selects positively and that the drive direction corresponds with the gearsh...

Page 39: ...il prematurely alternators that fail due to the battery bank being over the maximum recommended size will not be covered by warranty Higher output additional alternators or travel power kits are available if larger battery banks are required discuss your individual power requirements with the boat builder or engine supplier The maximum domestic battery bank is calculated using the following Live a...

Page 40: ...wiring loom plug Turn ignition on do not start engine Press and hold black button on rear of tacho until H appears on the digital display at the bottom of the tacho on the front When pressing and holding the black button on rear of tacho the value displayed will increase decrease until the button is released Then when pressing again it will increase decrease in the other direction Keep doing this ...

Page 41: ...se of suitable exhaust grade between the engine and the silencer or hull outlet The outlet must be above the waterline at all times The exhaust fittings and silencer if fitted must not be smaller than 1 BSP Exhaust silencers flexible exhaust hose connections and lagging blanket are all available as optional extras Part Description Part Number Exhaust Coupling 1 x 1 BSP RDG1916 Exhaust Silencer DSA...

Page 42: ...er level a system such as a Lift Silencer with a siphon break system must be used to prevent sea water from flowing back down the exhaust and into the engine Lift Silencer The correct installation of the lift silencer is vital to safety and to avoid back flooding of the engine Figure 31 shows how to install the lift silencer correctly Note Halyard M I Limited have given Barrus permission to use th...

Page 43: ... 85 degrees centigrade Normally in a well designed system the temperature of the silencer should be between 50 70 degrees centigrade Such operation will result in longer exhaust life Connections to the silencer should be made using suitable exhaust hose which is type approved by Lloyds and DNV Do not use oil or grease to lubricate hoses when installing wetting the inside of the hoses with water wi...

Page 44: ...year the unit should have the small valve removed from the top and this should be thoroughly washed in warm soapy water to remove salt encrustation 2 On a pleasure vessel this should be done twice a year 3 On reassembly the engine should be run and the unit checked for leaks The hose junctions should also be checked for leaks as part of the daily inspection procedure for sea cocks water pipes oil ...

Page 45: ...h separate water circulating pump will need to be fitted for a hydraulic drive transmission Hydraulic oil coolers should be installed after the engine not before Coolers that are installed before the engine will invalidate the engine warranty For Work Boat River Boat Hydraulic oil coolers should be installed in the seawater cooling system after the engine and before the water cooled exhaust inject...

Page 46: ...of coolant in header tank and correct ratio of antifreeze to water All air has been bled from skin tank calorifier and pipework Engine and gearbox oil levels are as specified Throttle and gear cables correctly adjusted and operating smoothly All pipework and cabling supported and not chaffing slack to allow movement of engine Engine control panel installed in a position where it is not out in the ...

Page 47: ...on deluxe panel Note The engine water temperature overheat warning light will only come on for a brief period of time when the ignition is first turned on as a bulb check It will then only illuminate in the case of the engine coolant temperature exceeding the maximum safety level Listen for warning buzzer The cold starter glow plug light will illuminate When the glow plug light extinguishes turn k...

Page 48: ... Running diesel engines near there rated output maximum load regularly will disperse accumulated carbon and condensation enhancing engine life and reducing emissions Running the engine at or near maximum speed whilst in gear may not be possible on inland waterways with speed limits in place This will have to be carried out whilst moored up Ensure that the mooring ropes and posts are strong enough ...

Page 49: ...system is in top condition This should result in many years of smooth reliable operation without the cost and inconvenience of expensive breakdowns due to poor quality fuel It has also been found that improvements in fuel consumption and start ability are an added benefit of using this product Diesel fuel additive is available from your Shire dealer in a handy 500ml container Part Number RDG802102...

Page 50: ... sump Note Remember to refit the blanking plug afterwards Place a drip tray under the engine to catch the small amount of oil that will escape from the oil filter Using the strap type oil filter removal tool supplied slacken the filter from the engine block in an anti clockwise direction Remove the tool and spin off the filter Lightly oil the new filter O ring seal and install the filter onto the ...

Page 51: ...PLASH AND BURN YOU Some engines will have a gearbox sump pump fitted To change the oil in this circumstance follow the same procedures as were outlined for changing the engine oil For engines without a gearbox sump pump follow the procedure below Change the gearbox oil while it is still warm Please refer to the gearbox manual for more information Place a tray beneath the gearbox that will hold at ...

Page 52: ...ug Drain Plug on Gearbox 4 Disposal of Oil and Related Items NOTICE ALWAYS BE ENVIRONMENTALLY RESPONSIBLE Please dispose of used oil and oil filters safely with due regard for the environment and take to your local waste oil disposal point Filler Plug Dipstick Level dipstick Filler Plug Level dipstick Filler Plug Magnetic Drain Plug viewed from underneath ...

Page 53: ...rimary fuel filter water trap Loosen the drain screw located in the bottom of the fuel filter water trap Figure 33 Drain off any water Once the water has been drained retighten the drain screw It is unlikely the complete fuel system will require bleeding Ensure the fuel tank is full prior to bleeding the fuel system Run for 5 minutes Check that the drain union is tight and that there are no leaks ...

Page 54: ...ocedure Turn off the main boat fuel supply tap This is located on or near the fuel tank Place a small drip tray under the filter body Remove the fuel filter in the same way as the engine oil filter in Section 7 Service Procedure Smear a small amount of clean fuel on all of the O ring seals that are supplied with the new filter element Screw the new element back into the filter head Tighten by hand...

Page 55: ...After the fuel filter has been purged of air close the bleed screw Undo ALL the injector pipe connections Crank the engine over with the starter motor When fuel can be seen stop cranking Tighten the injector pipe connections Wipe off any excess fuel Crank the engine The engine should now start If it does not start repeat the above procedure Check for any leaks and clean up any spilt fuel 8 Cooling...

Page 56: ...oolant 50 clean tap water and 50 ethylene glycol based anti freeze through the expansion tank filler cap Do not use water only to top up as this weakens the coolant mix reducing the level of frost protection and anti corrosion protection of the coolant 9 Belt Adjustment WARNING SEVERE HAZARD KEEP HANDS AND OTHER BODY PARTS AWAY FROM MOVING ROTATING PARTS WEAR TIGHT FITTING CLOTHING AND KEEP YOUR H...

Page 57: ...HORT OR TIE BACK REMOVE ALL JEWELLERY BEFORE COMMENCING WORK CHECK BEFORE STARTING THE ENGINE THAT ANY TOOLS OR RAGS USED DURING MAINTENANCE HAVE BEEN REMOVED FROM THE AREA Ensure the ignition key is removed before carrying out any maintenance Turn the battery master switch to the off position before carrying out any maintenance Do not allow oil to contact the belt Oil attacks the construction of ...

Page 58: ... the top adjuster bolts and the lower mounting pivot nut and bolt Push the alternator towards the engine to loosen the belt Remove the belt Hold the belt in position over the top alternator pulley Rotate the engine if required by hand to guide the new belt into the vee Re tension the belt as above 12 Control Panel Maintenance WARNING REMOVE THE IGNITION KEY BEFORE WORKING IN ENGINE COMPARTMENT TUR...

Page 59: ...er lubricants are available Then with the battery master switch turned off operate the key switch a couple of times This will ensure the lubricant works into the mechanism 13 Sacrificial Anode Change For Work Boats The anode is located in the T fitting on top of the engine at the front facing forward Figure 34 Figure 34 Work Boat Anode Location For River Boats The anode is located on the water coo...

Page 60: ... For Work Boats When the engine is cold drain the water from the engine block Remove the hose from the tap and drain Drain water from the heat exchanger The drain plug is in the bottom of the heat exchanger end cap Disconnect the pipes and hoses from the engine heat exchanger Remove the heat exchanger from the engine Mark the position and remove the end caps from the heat exchanger When refitting ...

Page 61: ...ush between the tubes to remove any dirt of scum build up Inspect the tube stack and replace if damaged Clean out the manifold if required Reassemble and refit checking the end cap O rings are in good condition Refill the engine with coolant as described earlier 16 Winterization of Seawater Cooling System Work Boat River Boat To prevent frost damage to the seawater cooling circuit components due t...

Page 62: ...ions and Capacities Specification of Coolants and Lubricants to use Component Lubricant Engine SAE 10W 40 API Class CD Oil Coolant 50 Clean Water 50 Ethylene Glycol Antifreeze PRM 60 80 90 Gearbox ATF Automatic Transmission Fluid Oil PRM 150 Engine Oil Engine Oil Capacity with Filter Engine Capacity Litres Capacity Pints 15 1 73 3 20 2 6 4 5 Gearbox Oil Capacity Excluding Cooler where fitted Gearb...

Page 63: ... Hours As required Check hoses for damage or leaks Replace as necessary Key Switch Lubricate Every 150 hours OR 12 Months As per instructions in Section 7 Service Procedure Sea Water Pump Impellor WB RB Only 150 Hours Every 300 hours OR 24 Months Sooner if required Sacrificial Anodes 150 Hours Every 450 hours OR 12 Months Check and change more frequently if local conditions require it Main Heat Ex...

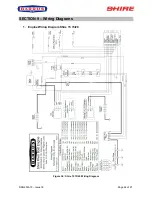
Page 64: ...RDG603A13 Issue 19 Page 64 of 97 SECTION 9 Wiring Diagrams 1 Engine Wiring Diagram Shire 15 15 20 Figure 36 Shire 15 15 20 Wiring Diagram ...

Page 65: ...RDG603A13 Issue 19 Page 65 of 97 2 Basic Control Panel Wiring Diagram Figure 37 Basic Control Panel Wiring Diagram ...

Page 66: ...RDG603A13 Issue 19 Page 66 of 97 3 Standard Control Panel Wiring Diagram Figure 38 Standard Control Panel Wiring Diagram ...

Page 67: ...RDG603A13 Issue 19 Page 67 of 97 4 Deluxe Control Panel Wiring Diagram Additional Option SS1551 Figure 39 Deluxe Control Panel Wiring Diagram ...

Page 68: ...n of Crankshaft Counter Clockwise View from Flywheel End Counter Clockwise View from Flywheel End Lubrication System Combination of Pressure and Splash Combination of Pressure and Splash Cooling System Forced Water Cooled Forced Water Cooled Valve Timing Intake Valve opens 8 Before T D C Intake Valve closes 42 After B D C Exhaust Valve opens 42 Before B D C Exhaust Valve closes 14 After T D C Valv...

Page 69: ... Flow at Idle 0 3 Litre Min 3 Dry Weight of Engine Data Dry Weight of Engine Including Gearbox Model Dry Weight kg Shire 15 15 142kg Shire 15 20 160kg The dry weights stated are for the standard engine in each model range If a different gearbox or additional alternators are ordered the weight will change accordingly ...

Page 70: ...4399 enquiries tontomarine co uk Mobile Marine 01297 631821 mobilemarine btconnect com Darthaven Marina 01803 752242 admin darthaven co uk DORSET Purbeck Marine 01202 686592 purbeckmarine aol com Rob Perry Marine 01297 631314 sales robperrymarine co uk EAST SUSSEX Peter Leonard Marine 01273 515987 info plmarine com ESSEX French Marine Motors Ltd 01206 305233 01255 850303 info frenchmarine com HAMP...

Page 71: ...tephen Goldsbrough Boats 01564 778210 andy sgboats com WILTSHIRE Foxhangers Marine 01380 828795 info foxhangers co uk WORCESTERSHIRE J L Pinder Son 01527 876438 sales jlpinderandsons co uk Starline Narrowboats 01684 874774 narrowboats starline demon co uk YORKSHIRE Rodley Boat Centre 01132 576132 John snowdenz ntlworld com MONMOUTHSHIRE Castle Narrowboats 01873 830001 castlenarrowboats btinternet ...

Page 72: ...2008 GB T12732 2008 GB T12732 2008 Air Filter Element 3011 T3 0004 3011 T3 0004 3011 T3 0004 Oil Filter 119305 35170 119305 35170 119305 35170 Sea Water Pump Impeller N A RDG010A3 RDG010A3 Sea Water Pump N A RDG907A4 RDG907A4 Zinc Anti Corrosive Anode N A 119574 44150 80162 Zinc Sticker N A 124220 09340 124220 09340 Control Panel Basic Control Panel RDG207A16 Standard Control Panel RDG20710110 Del...

Page 73: ...RDG3245 3 Engine Start Control System Fuse 15amp RDG3245 4 Glow Plug Fuse 40amp RDG3246 5 Cold Start Relay RDG5279 6 Starter Relay RDG1396 Figure 40 Fuses Relays Engine Oil Engine Oil is available from your Shire Dealer in convenient 5 litre containers Part Number RDG6110 Diesel Fuel Additive Diesel fuel additive is available from your Shire Dealer in a handy 500ml container Part No RDG80210219 ...

Page 74: ...5 20 CB RB WB 3M78 M78 HPiVS R1105 002 I 02 Essential Requirements Standards Other normative document method Technical file Specify in more detail Mandatory standard Annex 1 B Exhaust Emissions B 1 Engine Identification RCD II 2013 53 EU B 2 Exhaust emission requirements EN ISO 8178 1 1996 B 3 Durability 2013 53 EU B 4 Owners Manual ISO10240 Annex 1 C Noise Emissions See Declaration of Conformity ...

Page 75: ...The engines also comply with measures against the emission of gaseous and particulate pollutants from internal combustion engines to be installed in non road mobile machinery contained in the Directives 97 68 EC amended by 2002 88 EC and 2004 26 EC The engines also comply with Directive 2013 53 EU Recreational Craft Directive Article 6 part 4 in that the engine will continue to meet the exhaust em...

Page 76: ... and reliability of control systems Yes 3 No 3 3 The control systems are designed and constructed to withstand the intended operating stresses and external influences A fault in the hardware or software of the control system errors in the control system logic or reasonably foreseen human error during operation does not lead to hazardous situations The operation of the control systems is to be desi...

Page 77: ...9 Risks of uncontrolled movements 1 4 REQUIRED CHARACTERISTICS OF GUARDS AND PROTECTIVE DEVICES 1 4 1 General requirements No No Guards to be specified and fitted by the boat builder installer 1 4 2 1 Fixed guards No No 1 4 2 2 Interlocking movable guards Not applicable By boat builder installer 1 4 2 3 Adjustable guards restricting access 1 4 3 Special requirements for protective devices 1 5 RISK...

Page 78: ...ce warning stickers are fitted on surfaces that may become hot during operation All other protection or warnings to be made by the boat builder installer 1 7 1 1 Information and information devices Yes 13 Yes 13 13 The control panel is simple to understand and use Other control measures and information on the use of the machinery is to be carried out by the boat builder installer 1 7 1 2 Warning d...

Page 79: ... Details of the supplier of the safety data sheet Supplier Morris Lubricants Castle Foregate Shrewsbury SY1 2EL 08 45 17 00 GMT T 44 0 1743 232200 F 44 0 1743 353584 sds morris lubricants co uk 1 4 Emergency telephone number Emergency telephone 44 0 1743 232200 08 45 17 00 hrs GMT SECTION 2 Hazards identification 2 1 Classification of the substance or mixture Classification Physical hazards Not Cl...

Page 80: ...ption of first aid measures General information Get medical attention if any discomfort continues Inhalation If spray mist has been inhaled proceed as follows Move affected person to fresh air and keep warm and at rest in a position comfortable for breathing Get medical attention if any discomfort continues Ingestion Get medical attention if any discomfort continues Do not induce vomiting Skin con...

Page 81: ...ntering drains sewers or watercourses The product is insoluble in water and will spread on the water surface 6 3 Methods and material for containment and cleaning up Methods for cleaning up Contain spillage with sand or earth Collect spillage for reclamation or disposal in sealed containers via a licensed waste contractor Avoid water contacting spilled material or leaking containers Spillages or u...

Page 82: ... 0 01 mg l Sediment Freshwater 132000 mg kg Sediment Marinewater 13200 mg kg Soil 263000 mg kg Fresh water 0 1 mg l Phenol dodecyl sulfurized carbonates calcium salts overbased DNEL Industry Dermal Short term systemic effects 80 mg kg day Industry Inhalation Short term systemic effects 167 mg m Industry Dermal Long term systemic effects 20 8 mg kg day Industry Inhalation Long term systemic effects...

Page 83: ...t be used if the airborne contamination exceeds the recommended occupational exposure limit Thermal hazards Not anticipated under normal conditions of use The product is combustible if heated excessively and an ignition source is applied Environmental exposure Do not allow product to contaminate land Controls SECTION 9 Physical and Chemical Properties 9 1 Information on basic physical and chemical...

Page 84: ...lames and other sources of ignition 10 5 Incompatible materials Materials to avoid Strong oxidising agents 10 6 Hazardous decomposition products Hazardous decomposition Oxides of carbon Oxides of nitrogen Products SECTION 11 Toxicological information 11 1 Information on toxicological effects Acute toxicity oral Notes oral LD Not expected to be highly toxic based on information of ingredients Based...

Page 85: ...ure may cause skin dryness or cracking Eye contact May cause temporary eye irritation Acute and chronic health Prolonged or repeated contact with used oil may cause serious skin diseases such as Hazards dermatitis and skin cancer SECTION 12 Ecological Information Ecotoxicity Based on available data the classification criteria are not met Not regarded as dangerous for the environment 12 1 Toxicity ...

Page 86: ...tal hazards Environmentally hazardous substance marine pollutant 14 6 Special precautions for user Not applicable 14 7 Transport in bulk according to Annex II of MARPOL73 78 and the IBC Code Transport in bulk according to Not applicable Annex II of MARPOL 73 78 and the IBC Code SECTION 15 Regulatory information 15 1 Safety health and environmental regulations legislation specific for the substance...

Page 87: ...mpt Korea KECI All the ingredients are listed or exempt China IECSC All the ingredients are listed or exempt Philippines PICCS All the ingredients are listed or exempt New Zealand NZIOC All the ingredients are listed or exempt SECTION 16 Other information Revision comments NOTE Lines within the margin indicate significant changes from the previous revision Revision date 11 11 2015 Revision 1 SDS n...

Page 88: ...et Supplier Morris Lubricants Castle Foregate Shrewsbury SY1 2EL 08 45 17 00 GMT T 44 0 1743 232200 F 44 0 1743 353584 sds morris lubricants co uk 1 4 Emergency telephone number Emergency telephone 44 0 1743 232200 08 45 17 00 hrs GMT SECTION 2 Hazards identification 2 1 Classification of the substance or mixture Classification Physical hazards Not Classified Health hazards Not Classified Environm...

Page 89: ...f any discomfort continues Inhalation If spray mist has been inhaled proceed as follows Move affected person to fresh air and keep warm and at rest in a position comfortable for breathing Get medical attention if any discomfort continues Ingestion Get medical attention if any discomfort continues Do not induce vomiting Skin contact Remove contaminated clothing immediately and wash skin with soap a...

Page 90: ...ntering drains sewers or watercourses The product is insoluble in water and will spread on the water surface 6 3 Methods and material for containment and cleaning up Methods for cleaning up Contain spillage with sand or earth Collect spillage for reclamation or disposal in sealed containers via a licensed waste contractor Avoid water contacting spilled material or leaking containers Spillages or u...

Page 91: ...otection Eyewear complying with an approved standard should be worn if a risk assessment indicates eye contact is possible The following protection should be worn Chemical splash goggles or face shield Hand protection The most suitable glove should be chosen in consultation with the glove supplier manufacturer who can provide information about the breakthrough time of the glove material Other skin...

Page 92: ...ising properties The mixture itself has not been tested but none of the ingredient substances meet the criteria for classification as oxidising 9 2 Other information Volatile organic compound The product is a complex mixture the majority of which would not be classed as a VOC However it cannot be discounted that trace or low levels of VOC s may be present SECTION 10 Stability and reactivity 10 1 R...

Page 93: ...red to be carcinogenic under IARC All of the oils in this product have been demonstrated to contain less than 3 extractables by the IP346 test Reproductive toxicity Reproductive toxicity fertility No data available to suggest the product will cause reproductive toxicity Specific target organ toxicity single exposure STOT single exposure Based on available data the classification criteria are not m...

Page 94: ...ential Bioaccumulative potential Bioaccumulation is unlikely to be significant because of the low water solubility of this product Partition coefficient Not determined log Kow 7 The above figure is typical of mineral oil 12 4 Mobility in soil Mobility The product is non volatile The product is insoluble in water and will spread on the water surface Henry s law constant Not determined 12 5 Results ...

Page 95: ...009 No 716 EU legislation Dangerous Preparations Directive 1999 45 EC Dangerous Substances Directive 67 548 EEC Regulation EC No 1907 2006 of the European Parliament and of the Council of 18 December 2006 concerning the Registration Evaluation Authorisation and Restriction of Chemicals REACH as amended Regulation EC No 1272 2008 of the European Parliament and of the Council of 16 December 2008 on ...

Page 96: ...s NOTE Lines within the margin indicate significant changes from the previous revision Issued by Regulatory Affairs Revision date 26 10 2015 Revision 2 SDS number 21439 Hazard statements in full H304 May be fatal if swallowed and enters airways H319 Causes serious eye irritation ...

Page 97: ...ission of Boat and Hand Over to Customer Refer to the Installation Check List Page in this Manual Date Signed Dealer Stamp Actual Hours Signed Dealer Stamp Actual Hours Signed Dealer Stamp Actual Hours Signed Dealer Stamp Actual Hours Signed Dealer Stamp Actual Hours Signed Dealer Stamp Actual Hours Signed Please refer to Owner s Manual for service intervals PDI 1st 2nd 3rd 4th 5th 6th ...

Reviews: