w w w . b a r s k a . c o m
w w w . b a r s k a . c o m
6
7
NVX200
NVX200
If the “Memory Full” warning message appears on the LCD screen, the SD card
is full. Please transfer all the files to your computer and delete the files on the
card. Then the card can be used again.
Turn On The Monocular
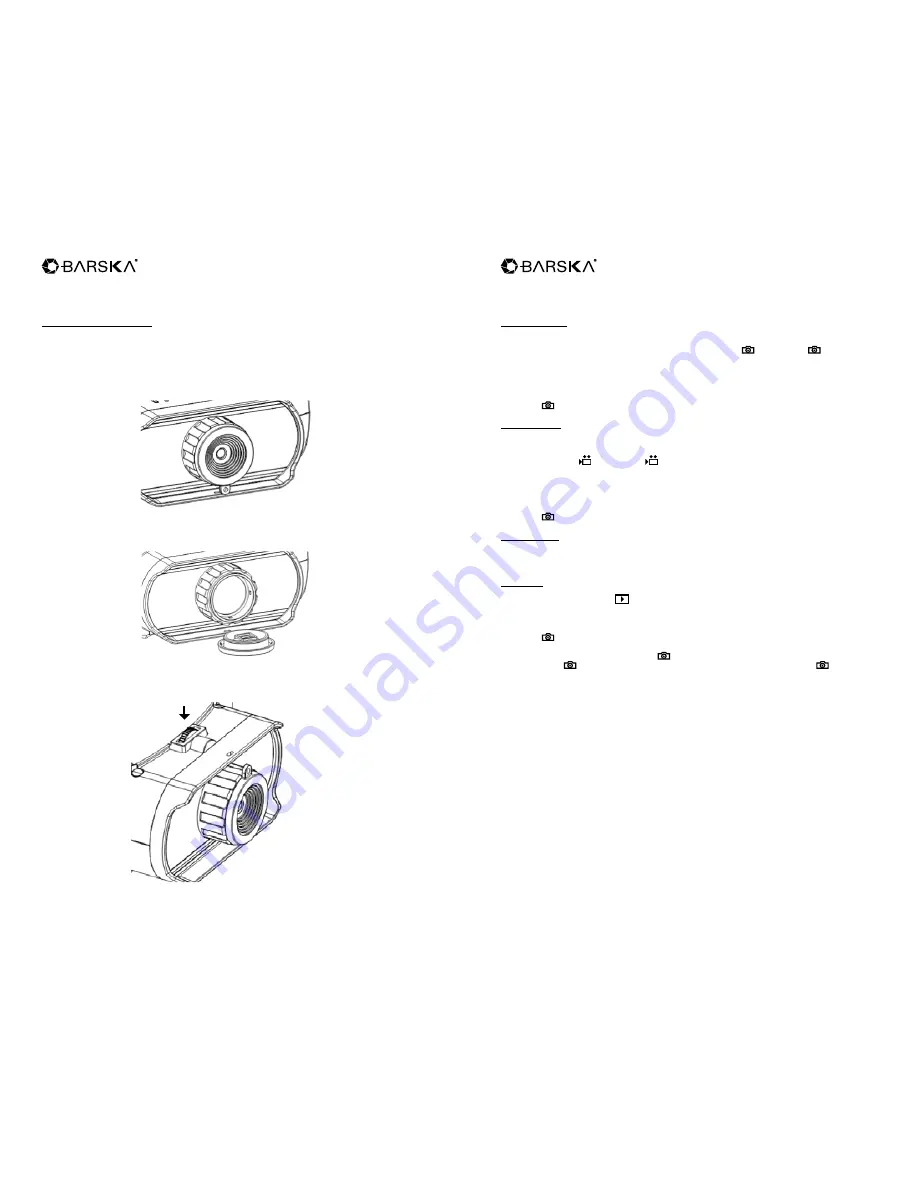
1. For day use, first cover the lens with the lid. For night use, take off the lid.
(Note: Uncovering the lid during the day time will NOT damage the lens, but it
will affect the image quality.)
Lid ON for day use
Lid OFF for night use
2. Long press the Power button to turn on the binocular. Once the power is on,
look into the LCD screen inside for preview.
3. Adjust the focus by turning the focus wheel at the front bottom.
4. For night use, turn on the IR by pressing the IR button. Increase the brightness
by pressing the button repeatedly. It has 7 levels of brightness.
5. Long press the Power button to shut down the binocular.
Take A Picture
1. When the power is on, the binocular is automatically under the picture mode.
2. Check the left bottom corner of the screen for the icon. If the icon is not
showing, press Mode multiple times until the icon shows up.
3. Adjust the focus by turning the focus wheel. (see “Turn on the Binocular”
section for details)
4. If at night, adjust the brightness by pressing IR. (see “Turn on the Binocular”
section for details)
5. Press to take pictures.
Take A Video
1. Turn on the Binocular.
2. Press Mode to enter video-recording mode. Check the left bottom corner of the
screen for the icon. If the icon is not showing, press Mode until the icon
shows up.
3. Adjust the focus by turning the focus wheel. (see “Turn on the Binocular”
section for details)
4. If at night, adjust the brightness by pressing IR. (see “Turn on the Binocular”
section for details)
5. Press to start video recording, and press it again to stop recording.
Digital Zoom
Press Zoom to zoom in at multiple levels up to 2X. Once reaching 2X, keep
pressing to go back to 1X.
Playback
1. Press Mode until icon
shows on the top left corner of the screen.
2. The LCD Screen will show the last file saved. If it was a photo, the photo will
show on the screen, with “JPG” wording on the left bottom corner. If it was a
video, wording “AVI” will show on the left bottom corner.
3. Press to play, delete, delete all, or exit.
4. Press IR to go to the previous file, and press Zoom to go to the next file.
5. To delete photo or video, press move down by pressing IR button,
then press to select. Screen will ask you if you are sure, press on yes
to delete.


