3
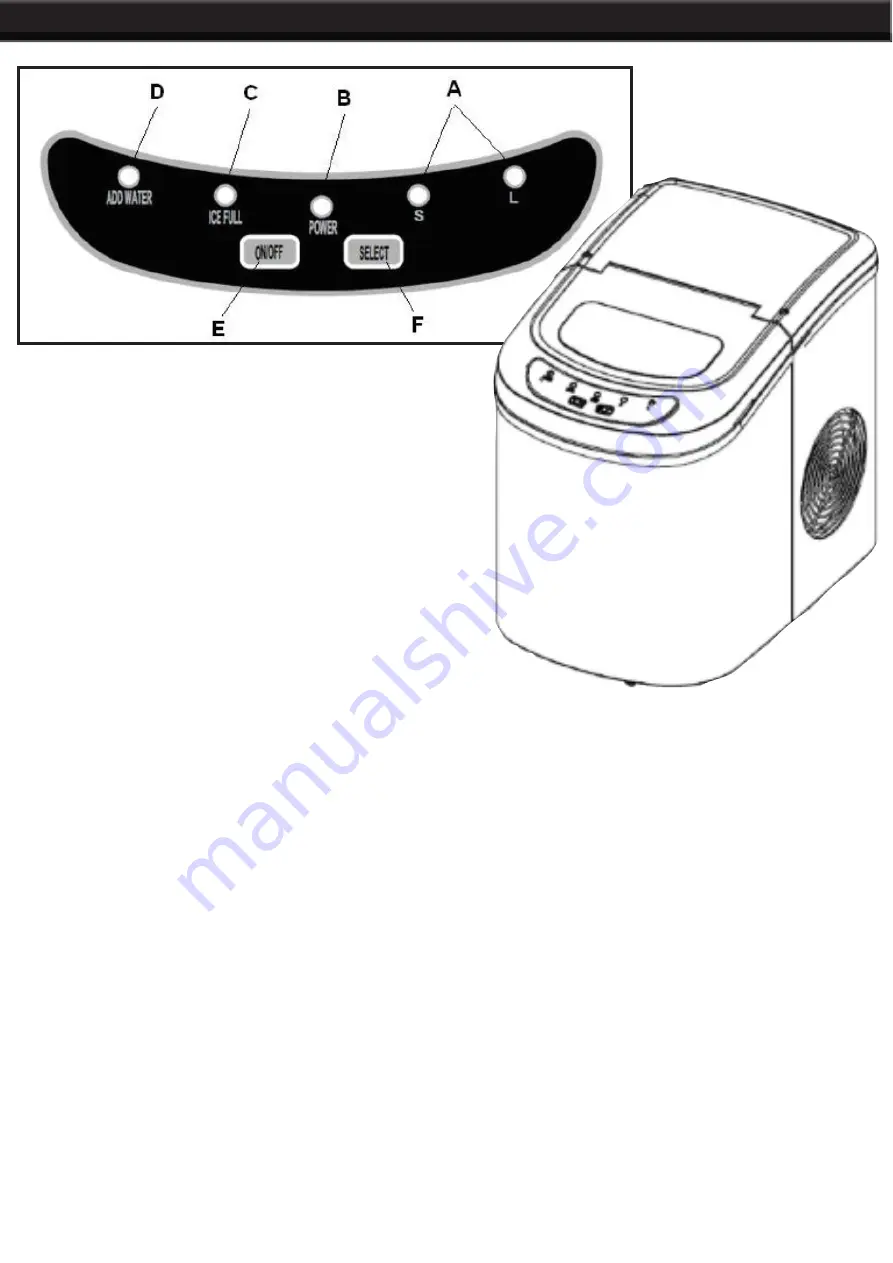
CONTROL PANEL:
A.
ICE SIZE INDICATOR
B.
POWER INDICATOR
C.
ICE FULL INDICATOR
D.
WATER SHORTAGE INDICATOR
E.
POWER BUTTON
F.
ICE SIZE SELECTION
UNPACKING YOUR ICE MAKER
1.
Remove the exterior and interior packaging. Check if ice basket and ice scoop inside. If any parts are
missing, please contact our customer service.
2.
Remove the tapes for fixing ice shovel, ice basket & ice scoop. Clean the tank & ice basket.
3.
Put the ice maker on a level & flat counter top without direct sunlight and other sources of heat (i.e.:
stove, furnace, radiator). Maker sure that there is at least 4 inches gap between the back & LH/RH sides
with the wall.
4.
Allow one hour for the refrigerant fluid to settle before plugging the ice maker in.
5.
The appliance must be positioned so that the plug is accessible.
OPERATION


