Pag. 11
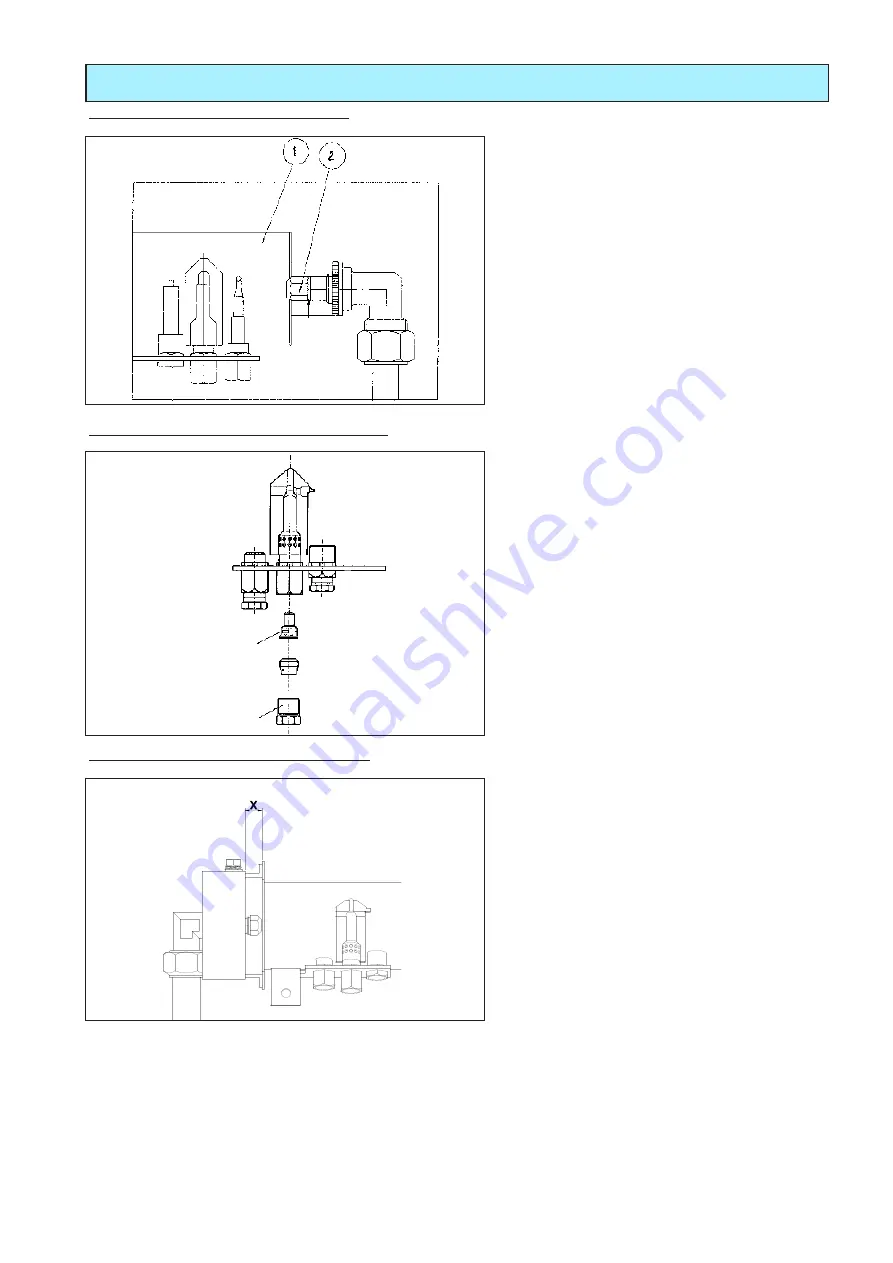
- Unscrew screwed-on cap (Ref. 1), remove the
nozzle (Ref. 2) and replace it with one that is
suitable for the type of selected gas.
- Refit the screwed-on cap (Ref. 1).
- Use a foam product to check that the cap does
not leak.
REPLACING THE PILOT BURNER NOZZLE (Fig. 5)
WARNING! After each conversion to a different gas type make sure you:
- Fix an indelible sticker on the rating plate giving the data relative to the new installation.
- Test for leaks on the gas circuit.
Before delivering the appliance to the user:
- check that it operates correctly,
- instruct the user on how to use it.
Fig. 5
1.5 CONNECTING TO A DIFFERENT TYPE OF GAS
REPLACING MAIN BURNER NOZZLE (Fig. 4)
1
Burner
2 Nozzle
- Before adapting to a new type of gas, shut off
the gas cock upstream.
- Loosen the screws that hold the front control
panel in place and disconnect the electric
cables of the piezoelectric ignition.
- Loosen the main injectors (Ref. 2) and repla
-
ce them with those corresponding to the gas
used. The diameter is stamped in hundredths
of a millimetre on them and can also be che-
cked on the Specifications Table.
Fig. 4
ADJUSTING BRIDGE TO MAIN BURNER (Fig. 6)
- Unscrew the bolt that fixes the bridge .
- Position the bush at distance X = 4mm.
- Tighten the fixing bolt again .
Fig. 6


