background image


- 37 - 


Before the first use it is necessary to perform the following actions. Follow the 
instructions from sections “Device start-up” and “Settings”. 


1.


Clean the baking plates before use. 

2.


Connect the device to the single grounded socket.  

3.  Set the temperature control knob to 300°C and leave the device turned on with 

opened baking plates 

without dough

 for 30 minutes. Due to existing 

manufacturing residuals smoke may be emitted during heating. It does not 
indicate damage of the device and will not occur during the next use. Assure 
good ventilation in the room during the first heating. 

4.  Then apply some sunflower oil on the baking plates or spray them with anti-

sticking spray 3 or 4 times. It allows for closing the large pores and creation of 
coating.  

Leave the device closed and tuned on at 250°C for approx. 20 minutes. 

5.  Repeat process described in paragraph 4. 

6.  Make (without additional fat/oil) 2 - 4 waffles in temperature of 220°C - 230°C 

and throw the first waffles away. 

7.  During the process described in paragraph 6 you will see that each successive 

waffle is better, and after a few baking processes you will get clean and easily 
removed waffles. 


Device start-up 


  Prepare the waffle dough according to owned recipe or our proposal (section 

“Hints 

and advices”

).  

  Close the upper heating plate with use of handle. 

  Connect the device to the single grounded socket.  


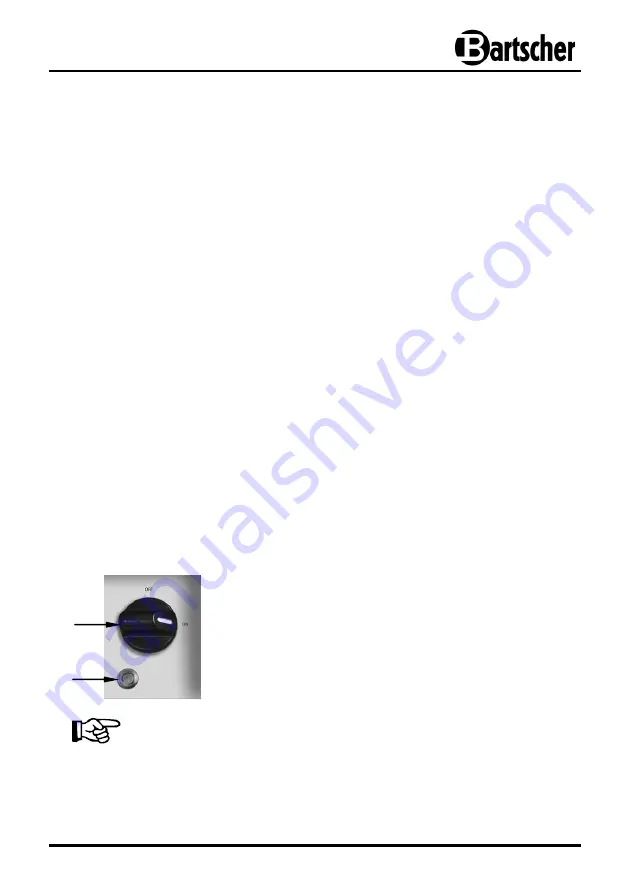
  Turn the device on with use of


ON/OFF 

switch. (

16

(fig. on the left), setting it in position 

“ON”

.  

The operational control light (

15

) will come on, 

signalling that the device is turned on. 

NOTE!


For best results, heat the unit to the appropriate temperature before making 
waffles. 

15 

16 

Summary of Contents for 1BW16080

Page 1: ...1BW16080 370169 Original Gebrauchsanleitung V1 1216...

Page 2: ...0 3 Transport packaging and storage 31 3 1 Delivery check 31 3 2 Packaging 31 3 3 Storage 31 4 Technical data 32 4 1 Overview of parts 32 4 2 Technical specification 34 5 Installation and operation 35...

Page 3: ...essible for anyone carrying out the installation servicing maintenance or cleaning Please keep these instructions and give them to future owners of the device 1 Safety This device is designed in accor...

Page 4: ...dren with physical or mental disabilities insufficient experience and or insufficient knowledge unless such persons are under the care of a person responsible for their safety or have received instruc...

Page 5: ...at are not explicitly approved by the manufacturer may be undertaken DANGER Electric shock hazard To avoid the hazard results please follow the safety instructions below Never allow the power cable to...

Page 6: ...ons the electric shock hazard will occur Do not use any acid agents and make sure no water ingresses the device Never operate the device with moist hands or standing on wet floor Disconnect the device...

Page 7: ...he fire hazard and the damages of the device never place the kitchen utensils towels paper etc on the heating plates Never operate the device near combustible easily flammable materials e g petrol spi...

Page 8: ...ation and maintenance must be performed by the qualified service personnel only The waffle maker is intended only for baking waffles CAUTION Any use going beyond the intended purpose and or any differ...

Page 9: ...by violation of advice concerning operation and cleaning use other than designed alterations made by user use of inadequate spare parts We reserve the right to make technical changes for purposes of...

Page 10: ...The outer and inner packing material should be removed completely from the device before installation NOTE If you liked to dispose the packing consider the regulations applicable in your country Supp...

Page 11: ...cal data 4 1 Overview of parts 1 Thermal insulator handle 2 Upper heating plate 3 Lower heating plate 4 Drop collecting tray 5 Body 6 Feet 7 Control panel 8 Ventilation holes 9 Cleaning scraper 3 2 8...

Page 12: ...33 Control panel 10 Digital display 11 Time setting button 12 Start Stop button 13 Heating indicator green 14 Temperature controller knob 15 Indicator light red 16 ON OFF switch 10 11 16 15 13 12 14...

Page 13: ...type fixed Waffle size 160 x 80 mm height 26 mm Digital display for programming and storing the time timer ON OFF switch with indicator Heating indicator Drop collecting tray Degree of protection IP2...

Page 14: ...eely service the device and ensure appropriate air circulation Never place the device directly against walls low walls furniture or other objects which are made of flammable material Keep a distance o...

Page 15: ...ect the device directly to the wall socket do not use any extension cords or power strips 5 2 Operation Before the first use The device should be thoroughly cleaned before the first use Follow instruc...

Page 16: ...large pores and creation of coating Leave the device closed and tuned on at 250 C for approx 20 minutes 5 Repeat process described in paragraph 4 6 Make without additional fat oil 2 4 waffles in tempe...

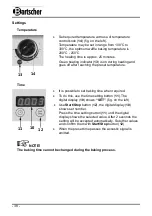
Page 17: ...ime It is possible to set baking time when required To do this use the time setting button 11 The digital display 10 shows SET fig on the left Use Start Stop button 12 the digital display 10 shows set...

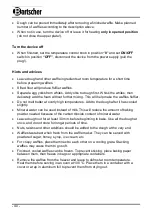
Page 18: ...d uniformly spreading towards the edges The dough excess will escape through the side surfaces of the device during baking Close the device and use the handle to press the upper heating plate down to...

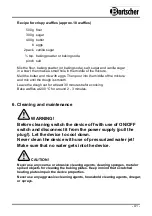
Page 19: ...ratures Add to the dough after it has cooled slightly Mineral water can be used instead of milk This will reduce the amount of baking powder needed because of the carbon dioxide content of mineral wat...

Page 20: ...minutes before cooking Bake waffles at 200 C for around 2 3 minutes 6 Cleaning and maintenance WARNING Before cleaning switch the device off with use of ON OFF switch and disconnect it from the power...

Page 21: ...that the moisture oil or fat do not enter the device o Remove the fat collection tray from the device and wash it in warm water and gentle cleaning agent Dry the fat collection container thoroughly be...

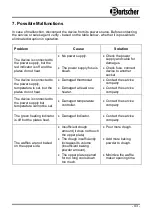
Page 22: ...power supply temperature is set but the plates do not heat Damaged thermostat Damaged at least one heater Contact the service company Contact the service company The device is connected to the power s...

Page 23: ...ional regulations It is advisable to contact a company which is specialized in waste disposal or just contact the local disposal service in your community WARNING To exclude any abuse and the dangers...

Reviews: